1. Welcome to Tacoma World!

    You are currently viewing as a guest! To get full-access, you need to register for a FREE account.

    As a registered member, you’ll be able to:
    • Participate in all Tacoma discussion topics
    • Communicate privately with other Tacoma owners from around the world
    • Post your own photos in our Members Gallery
    • Access all special features of the site

Wackyhacky's 2013 TaCOmarado Build

Discussion in '2nd Gen. Builds (2005-2015)' started by Wackyhacky, Aug 26, 2019.

  1. Aug 26, 2019 at 12:45 PM
    #1
    Wackyhacky

    Wackyhacky [OP] A Well Known Troublemaker

    Joined:
    Jun 4, 2014
    Member:
    #131275
    Messages:
    611
    Gender:
    Male
    First Name:
    Keith
    Berthoud, CO
    Vehicle:
    2013 Tacoma DCSB
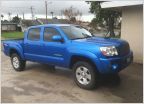
    I figured since I am starting this whole wedge/pop-up camper build in earnest & the truck is currently bone stock, aside from tires and a Leer topper it just might be fun to keep track of it all. My goal is to have a dedicated camping machine for the wife and I to support our off grid adventures, road trips and access to backcountry trail heads. Let the fun begin.

    My blank canvas:
    IMG_8918.jpg
    IMG_8265.jpg

    Update 11/02/20 - Recent life changes have resulted in my build plan/needs for a camper to be revised somewhat. Therefore, I have decided to switch gears on the kind of camper and some of my build out plans that I had been working on over the winter. Look for the updates to my thread to start coming out fast & furious again. I am back in production mode and couldn't be more excited.

    As noted above, while our original plan was a Tacamper based around the Vagabond Outdoor's Drifter, we have recently changed to a different canopy camper made by Alu-Cab. Therefore, the vision for the Tacamper shifted, so I put my shoddy photoshop skills to work on that new vision along with a completely better name for our new fun rig, the TaCOmarado! I am now working on a new IG feed as well under that handle, solely for the purpose of chronicling this whole build & where it takes us:

    MyTruckTemplate RR5-S #2 camper.jpg
     
    Last edited: Jan 7, 2021
    hoarder23, Slashaar, d.shaw and 2 others like this.
  2. Aug 26, 2019 at 1:16 PM
    #2
    Wackyhacky

    Wackyhacky [OP] A Well Known Troublemaker

    Joined:
    Jun 4, 2014
    Member:
    #131275
    Messages:
    611
    Gender:
    Male
    First Name:
    Keith
    Berthoud, CO
    Vehicle:
    2013 Tacoma DCSB
    Vagabond Drifter ordered back in July, so starting to work on the first elements of Tacamper this past wkd in preparation for taking delivery 10 or so odd months from now (hopefully!!). Recently I used a weather stripping kit from Amazon and some waterproof Gorilla sealant tape to seal up my cubbies, drain holes and around the tailgate. Dust intrusion is finally now only coming through the place the Leer rear window doesn't seal properly (in my opinion) but way better than it was before.

    Then this past wkd I spent some garage time installing @TOTAL CHAOS bed stiffeners and said goodbye to the ability to use my bed extender which I am still grappling with the loss of. It's for sale if you want one in the CO Trading Post. I still want to be able to use my truck as a truck, but I definitely see the need for these in the long run. My Leer cap was already starting to push the sides out, be it minimally. Very easy to install though.

    UNADJUSTEDNONRAW_thumb_5b26.jpg

    Then I "installed" a Rigd Supply Ultraswing to which I will eventually add more accessories. I hated always having to remove our bikes on a trip every time we stop to camp and we always take them unless were positive we won't use them. I have to say the thing is pretty sweet and well built. Works totally as advertised and way lighter than replacing the whole bumper w/ swing out set up. I can still remove it without much trouble as well if I need to haul something w/ the tailgate down and can still tow stuff without taking it off.
    UNADJUSTEDNONRAW_thumb_5b25.jpg UNADJUSTEDNONRAW_thumb_5b23.jpg

    Finally I got 5x5 pc of 1/2" birch plywood to start cutting out a base plate.

    UNADJUSTEDNONRAW_thumb_5b21.jpg
     
    Last edited: Jul 7, 2020
    Slashaar and geomo like this.
  3. Aug 27, 2019 at 8:58 AM
    #3
    TOTAL CHAOS

    TOTAL CHAOS WWW.CHAOSFAB.COM Vendor

    Joined:
    Jun 6, 2018
    Member:
    #255639
    Messages:
    685
    Corona, CA
    Rad!

    Thanks for the tag and sharing a pic with us

    Lookin' good :cool:
     
  4. Sep 10, 2019 at 1:10 PM
    #4
    Wackyhacky

    Wackyhacky [OP] A Well Known Troublemaker

    Joined:
    Jun 4, 2014
    Member:
    #131275
    Messages:
    611
    Gender:
    Male
    First Name:
    Keith
    Berthoud, CO
    Vehicle:
    2013 Tacoma DCSB
    Back to work on some more preparation for the Drifter...

    After I finally got my hands on a jig saw (bought when I sold my bed extender I can't use anymore) I was able to cut the base plate to fit in. My paper template actually was pretty close to exact for the angles.

    IMG_3674.jpg
    IMG_3675.jpg

    Once I had it sitting in there perfectly I marked the bed mount bolts w/ a mallet ( thanks @geomo ) and drilled the holes in the plate to bolt through so I could really test fit it. I decided to only end up use the front four bed mount bolts for securing the base plate and then routed out clearance for the two bolt heads going through the bed stiffeners at the back. Well, I don't have a router, so I did it w/ a chisel and hole saw drill bit, but it worked just fine.

    IMG_3694.jpg

    Lastly, I made sure the 4 bed bolts would actually engage their threads (and that my holes were lined up) before securing a stack of washers (credit to @MJonaGS32 for the tip) to the underside of the four mounting holes using some JB Weld to support the tightening of the bed bolts to the base plate without pulling it down. Still need to set it in for another test fit, but it should be good to go.

    IMG_3695.jpg
    IMG_3696.jpg

    While the JB Weld cured I removed my plastic tailgate cover and patterned the shape onto a .090" thick pc of aluminum I had picked up earlier in the day so I could make a flat plate to replace the plastic. It will be easier on the knees & my beer won't spill as easy sitting on the tailgate most importantly!
    The material was only $55 (17" x 56" pc from Alreco Aluminum in Henderson, CO which is like gold mine for Aluminum) and a local fab shop is only charging me $80 to cut it out & clean up the edges, so not a bad savings over the couple ready made solutions out there.
    IMG_3681.jpg IMG_3682.jpg
     
  5. Sep 16, 2019 at 5:42 PM
    #5
    Wackyhacky

    Wackyhacky [OP] A Well Known Troublemaker

    Joined:
    Jun 4, 2014
    Member:
    #131275
    Messages:
    611
    Gender:
    Male
    First Name:
    Keith
    Berthoud, CO
    Vehicle:
    2013 Tacoma DCSB
    Fresh from the fab shop, cut, drilled & ready to mount....

    IMG_3741.jpg

    And the finished product!! Works great and lightweight. Definitely happy w/ this, especially for the price and "ooooo Shiny"
    IMG_3743.jpg

    I may paint it up w/ some matte paint or something w/ some texture eventually, but for now I think I will just leave it natural. If you live in Northern CO or Boulder area and need some fab work done (general project stuff) call Loren Tonsing at Mtn. View Welding in Longmont. They are great to work with and even directed me to the best source for material as well so there wasn't any mark up on that. Cool to see a business do this kind of stuff on the side even though it's not their bread & butter.
     
    Slashaar, d.shaw and SenatorBlutarsky like this.
  6. Nov 14, 2019 at 12:21 PM
    #6
    Big_Country68

    Big_Country68 Active Member

    Joined:
    Aug 17, 2017
    Member:
    #227097
    Messages:
    40
    Gender:
    Male
    Clearwater Florida
    Vehicle:
    2017 DCSB SW TRD PRO
    Thanks for the inspiration. Just received my sheet All today. Looking forward to getting it fab'd up and installed. Great build so far.

    Cheers,

    B_C
     
    Wackyhacky[OP] likes this.
  7. Nov 16, 2019 at 9:31 AM
    #7
    Wackyhacky

    Wackyhacky [OP] A Well Known Troublemaker

    Joined:
    Jun 4, 2014
    Member:
    #131275
    Messages:
    611
    Gender:
    Male
    First Name:
    Keith
    Berthoud, CO
    Vehicle:
    2013 Tacoma DCSB
    Right on & Thanks! Hope to be adding more inspiration here soon as well over the winter.
     
  8. Dec 9, 2019 at 8:39 AM
    #8
    Wackyhacky

    Wackyhacky [OP] A Well Known Troublemaker

    Joined:
    Jun 4, 2014
    Member:
    #131275
    Messages:
    611
    Gender:
    Male
    First Name:
    Keith
    Berthoud, CO
    Vehicle:
    2013 Tacoma DCSB
    Been a slow couple of months on the old Tacamper project due to the holidays and a bunch of unexpected medical expenses, but I am still doing things where I can, stocking up some parts scored on GBs or Black Friday deals that I can hopefully start tackling in Jan/Feb as I prepare to take delivery of the Drifter next year.

    While far from important or doing anything other than making my truck look "cooler", I got myself a replica TRD Pro Grille (always liked the look of them) during BF that I installed. I did a review of the one I bought as well in a separate post.

    https://www.tacomaworld.com/threads/runnin-4-tacos-trd-pro-replica-grille-2012-2015.641724/

    IMG_4016.jpg

    Then yesterday I finally installed some RCI Sliders / @Joshp767 I ordered on a GB months ago, but hadn't been able to pick up or mess w/ b/c of some lifting limitations I was on after surgery. I was going to document this a little better when I installed them but honestly, I figured most people can figure these out considering how prevalent they are. All in all, I was really happy to be able to support a local company and they are great quality in my opinion. Install was pretty straight forward. I just bolted a 2x6 to the platform of my floor jack to hold them and get them into place, which made it pretty easy to do myself without an extra set of hands. They bolt in 6 places (through the frame) on each side, but I am not able to use one of the mounting holes on the driver's side b/c of where my brake lines run down the frame. Therefore I left this one bolt out. It would probably be okay as is, but they also provide you a second hole (that requires drilling) where they wrap under the frame. They say this other hole is purely optional, but I think I will eventually drill & bolt up through it too on both sides, especially since I can't make the one hole work.

    IMG_4034 copy.jpg

    IMG_4035 copy.jpg

    That's all for now!
     
    Last edited: Dec 10, 2019
    Slashaar, MattCowsmasher and geomo like this.
  9. Dec 10, 2019 at 11:01 AM
    #9
    geomo

    geomo Drifter

    Joined:
    Dec 22, 2018
    Member:
    #276625
    Messages:
    50
    Gender:
    Male
    First Name:
    George
    Cheyenne, Wyoming
    Vehicle:
    2012 DCSB 6mt TRDOR Drifter
    RCI full skids and sliders, BP-51s, KB Voodoo bed caps, Rago stiffeners
    Hey, if you’re comfortable, a person can slightly bend those lines to make room for the bolt. 1CA3E4B8-FF31-40EA-95EC-104490CBE291.jpg
     
  10. Dec 10, 2019 at 1:28 PM
    #10
    Wackyhacky

    Wackyhacky [OP] A Well Known Troublemaker

    Joined:
    Jun 4, 2014
    Member:
    #131275
    Messages:
    611
    Gender:
    Male
    First Name:
    Keith
    Berthoud, CO
    Vehicle:
    2013 Tacoma DCSB
    Hey George! Hope all is well. Thank you...so, I get so nervous manipulating brake lines (nightmares from rebuilding/maintaining an old 80's GMC truck back in the day..ha ha), but that's a good point. I suppose I just needed some reinforcement, so thanks!

    Happy Holidays to you & your wife as well.
     
    geomo[QUOTED] likes this.
  11. Dec 16, 2019 at 5:55 PM
    #11
    tielur

    tielur Well-Known Member

    Joined:
    Jun 4, 2019
    Member:
    #295301
    Messages:
    61
    Gender:
    Male
    First Name:
    Tyler
    Arizona
    Vehicle:
    2019 Cement Tacoma DCSB Off-Road
    Any tips on cutting it to fit?
     
  12. Dec 17, 2019 at 8:45 AM
    #12
    Wackyhacky

    Wackyhacky [OP] A Well Known Troublemaker

    Joined:
    Jun 4, 2014
    Member:
    #131275
    Messages:
    611
    Gender:
    Male
    First Name:
    Keith
    Berthoud, CO
    Vehicle:
    2013 Tacoma DCSB
    So, I know the best way would be to get your hands on one of those rubber bed mats & use it for your template. I didn't know anyone w/ one & was not paying $100 for template, so I just got a sheet of paper big enough & made a rough template to get the angles and then made a ton of measurements to see how far it was off. It was pretty close after all, but the measurements kept me from cutting anything two small. Then I started cutting using a circular saw for the straight cuts and a jigsaw for the others. I "saved the line" for most of the cuts and then tested it a couple times to get the angles perfect so it fit in flat.
     
    tielur[QUOTED] likes this.
  13. Dec 17, 2019 at 6:55 PM
    #13
    RonKemal

    RonKemal New Member

    Joined:
    Dec 17, 2019
    Member:
    #313593
    Messages:
    2
    Gender:
    Male
    Vehicle:
    2016 Silver Tacoma SR5 with Leer 122
    Thanks for build thread, great information for me; UltraSwing and total chaos bed stiffeners.
     
    Wackyhacky[OP] likes this.
  14. Jan 7, 2020 at 2:16 PM
    #14
    Wackyhacky

    Wackyhacky [OP] A Well Known Troublemaker

    Joined:
    Jun 4, 2014
    Member:
    #131275
    Messages:
    611
    Gender:
    Male
    First Name:
    Keith
    Berthoud, CO
    Vehicle:
    2013 Tacoma DCSB
    Next up on the list, more small tailgate improvements. When fabricating my flat aluminum tailgate plate I came to the realization the threaded plastic inserts were not going to cut it much longer. A couple more removals/installs and they would probably start to shit the bed. Therefore I picked up a nice little kit @Mobtown Offroad sells that allows you to replace them with 1/4-20 rivnuts. It includes all new hex head cap bolts as well. Process was pretty easy to install.
    IMG_4091 copy.jpg IMG_4093 copy.jpg

    I just pried out all the plastic inserts, then you ream all the holes (which are square) w/ 25/64 drill bit so the rivnuts will slip in. I did touch up the holes after reaming w/ some paint as well to help keep things from rusting where it got down to bare metal.

    IMG_4092 copy.jpg

    I then used my 1/4" impact driver w/ a grade 8 bolt, washers & coupling nut to install all of the rivnuts b/c I didn't have decent rivnut setter. I saw this method used online a couple places, but just be aware, it can still be a little much for the bolt going through 13 or so of them (holes), so you may destroy a bolt or two using this method, but it worked overall. In summary, I think I will buy a good rivnut setter in the future if I have the need again. All in all though, it's a cheap project that gives me more pc of mind knowing I need to remove/install this plate a couple more times for various reasons. First up being to install the tailgate lock I got for Christmas which is next on the list and then moving the back up camera to see past the Ultraswing tire/bike carrier.
     
    Slashaar and geomo like this.
  15. Jan 7, 2020 at 6:07 PM
    #15
    geomo

    geomo Drifter

    Joined:
    Dec 22, 2018
    Member:
    #276625
    Messages:
    50
    Gender:
    Male
    First Name:
    George
    Cheyenne, Wyoming
    Vehicle:
    2012 DCSB 6mt TRDOR Drifter
    RCI full skids and sliders, BP-51s, KB Voodoo bed caps, Rago stiffeners
    superb idea to replace those shitty plastic tabs, plus, I have always wanted a rivnut tool. Thanks for the great excuse to get one!

    Also, Happy New Year!
     
  16. Jan 7, 2020 at 7:31 PM
    #16
    Wackyhacky

    Wackyhacky [OP] A Well Known Troublemaker

    Joined:
    Jun 4, 2014
    Member:
    #131275
    Messages:
    611
    Gender:
    Male
    First Name:
    Keith
    Berthoud, CO
    Vehicle:
    2013 Tacoma DCSB
    Ha ha...anytime! Happy New Year to you as well!
     
  17. Jan 19, 2020 at 1:50 PM
    #17
    tielur

    tielur Well-Known Member

    Joined:
    Jun 4, 2019
    Member:
    #295301
    Messages:
    61
    Gender:
    Male
    First Name:
    Tyler
    Arizona
    Vehicle:
    2019 Cement Tacoma DCSB Off-Road
    Have you mounted anything to the base plate yet?
     
  18. Jan 20, 2020 at 5:21 AM
    #18
    Wackyhacky

    Wackyhacky [OP] A Well Known Troublemaker

    Joined:
    Jun 4, 2014
    Member:
    #131275
    Messages:
    611
    Gender:
    Male
    First Name:
    Keith
    Berthoud, CO
    Vehicle:
    2013 Tacoma DCSB
    No, unfortunately I haven't got to that point yet. I decided to wait to do the rest of my interior build out until we actually get the Drifter this summer.
     
  19. Apr 13, 2020 at 7:32 AM
    #19
    Wackyhacky

    Wackyhacky [OP] A Well Known Troublemaker

    Joined:
    Jun 4, 2014
    Member:
    #131275
    Messages:
    611
    Gender:
    Male
    First Name:
    Keith
    Berthoud, CO
    Vehicle:
    2013 Tacoma DCSB
    With the isolation/quarantine in full effect & another spring dump of snow yesterday I figured it was time to get back in the garage and keep plugging away on the truck. Honestly, I don't have a clue if I even have a hope of getting the Drifter in July now, which was my expectation, but obviously that's not an unknown I am going to worry myself with. First on the agenda is getting the Pop & Lock PL8521 installed that someone gave me for Christmas.
    IMG_4462 copy.jpg
    All in all, this was pretty straight forward to install. There is a good video tutorial here as well: https://www.etrailer.com/Tailgate/Toyota/Tacoma/2013/PAL8521.html?VehicleID=2013912655
    I originally thought one of these would be a good idea as a theft deterrent as Tacoma's seem to be a target for tailgates getting ripped off, but I figured it would add some security (if needed) with the truck becoming a camper soon. The kit comes with everything you need except some extra zip ties (most likely) a rubber grommet (3/8" ID) and even though the cable runs have a pretty robust coating, I still put them in plastic split loom as well where I could.
     
    Slashaar likes this.
  20. Apr 13, 2020 at 7:47 AM
    #20
    Wackyhacky

    Wackyhacky [OP] A Well Known Troublemaker

    Joined:
    Jun 4, 2014
    Member:
    #131275
    Messages:
    611
    Gender:
    Male
    First Name:
    Keith
    Berthoud, CO
    Vehicle:
    2013 Tacoma DCSB
    IMG_4464 copy.jpg
    Mounting the lock unit using the existing bolt holding the left side of the tailgate latch handle was simple. The only real deviation from the instructions was that it tells you to run the short lead (connection from lock to the longer cable run) through the drain holes in the tailgate which is not possible (the hole is way too small to get the pre-terminated wires through it). Therefore I drilled a 1/2" hole in the bottom of the tailgate and installed a 3/8" ID grommet to pass these through:
    IMG_4466 copy.jpg
    IMG_4467 copy.jpg
    After that I connected the shorter lead to the longer lead (after I covered it in split loom) and ran it to the front along the driver's side frame rail and up through the firewall grommet into the cab. From there you have to pop off the thresholds & trim panel between the doors so you can wire tap it into the two wires controlling the rear door lock with the provided taps. Once that was all buttoned up & working, then worked from front to back to zip tie the cable run securely and secure any extra in the tailgate as shown below:
    IMG_4468 copy.jpg
    As I said, it was pretty simple to complete the whole thing, probably only taking about 3 hours total and works as intended.
     
    Slashaar likes this.

Products Discussed in

To Top