

-
Welcome to Tacoma World!
You are currently viewing as a guest! To get full-access, you need to register for a FREE account.
As a registered member, you’ll be able to:- Participate in all Tacoma discussion topics
- Communicate privately with other Tacoma owners from around the world
- Post your own photos in our Members Gallery
- Access all special features of the site
 Where the wireless Apple CarPlay headunits at?
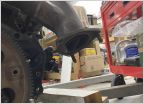 Exhaust Gasket Part Number - 5VZ-FE
 98 1st gen Taco misfiring #3 & #4 cyls
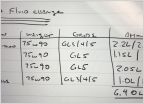 What type of diff oil do I need for my 97 taco?
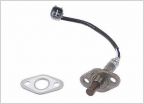 Knock sensors
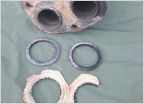 Exhaust Gasket Part Number Needed!
What have you done to your Tacoma today? 1st Gen Edition
Discussion in '1st Gen. Tacomas (1995-2004)' started by SlimDigg, Feb 7, 2011.
Page 72 of 11227
Page 72 of 11227
Products Discussed in


