1. Welcome to Tacoma World!

    You are currently viewing as a guest! To get full-access, you need to register for a FREE account.

    As a registered member, you’ll be able to:
    • Participate in all Tacoma discussion topics
    • Communicate privately with other Tacoma owners from around the world
    • Post your own photos in our Members Gallery
    • Access all special features of the site

Whiteyotaguy's Long,Low, and LOTS of Rubber Build w/BS

Discussion in '2nd Gen. Builds (2005-2015)' started by whiteyotaguy, Jun 26, 2018.

  1. Sep 20, 2018 at 4:57 PM
    #21
    whiteyotaguy

    whiteyotaguy [OP] Well-Known Member

    Joined:
    Jun 24, 2018
    Member:
    #257372
    Messages:
    55
    Gender:
    Male
    Vehicle:
    2007 DCLB Sport
    Update on the fire wall trimming. Got the passenger side 90% done just have to seal it and bed line it. Will do the driver side tomorow as well as find a way to do some fender liners again. I have an idea that i'll show in detail tomorrow. I'm going to try and update this every week with anything I can. Wheeling season is right around the corner!

    The porta power helps as a 3rd hand while welding.
    AoTB8ytteBbzN6slOIl8jK7YJnDjg8zVO7R8Ow78_b05f22930d8447d14ca7fef4012d2f28db658f11.jpg
    Ill try to show more of the process of how I got to that point as im sure some of you are wondering. I was trying to take my time on this side and see how everything needs to be. The driver side will take much less time and give me a chance to do a play by play. I also have the body lift pucks machined i need to figure out my bolt lengths and that'll be ready to install.
    More to come tomorrow night!
     
    Casper66 likes this.
  2. Sep 22, 2018 at 6:01 PM
    #22
    whiteyotaguy

    whiteyotaguy [OP] Well-Known Member

    Joined:
    Jun 24, 2018
    Member:
    #257372
    Messages:
    55
    Gender:
    Male
    Vehicle:
    2007 DCLB Sport
    Sorry for the late update guys, got side tracked with the enduro race I did today. I didnt get as far as I wanted yesterday, got the passenger side finished up sealed and undercoated. There is so much room now its unreal! Tomorrow I'll do some more work on the rig maybe finish something haha.

    Top by the washer bottle. I cut more than it appears I basically pounded the metal up twards the engine compartment and tacked it together worked out great and made a bunch of room. I'll get a comparison pic of the two sides it's crazy, I seamed to forget to take a pic of the finished product too.
    -WCoYELnWnp1iALnOlV6aCGfjVvdr7Elm2LBXiNQ_9c9c0e53a2f8e5a620f67b7d82b5e15acee858bb.jpg

    Sealer spread.
    3Qo94zEWJGF1wGtrkyw8Ob08pBB-H9m7Hzawz8UP_4f3c8a2c7b9c7efb9d09242f11156e2feaeb0add.jpg

    Better pic of the inside all finished it got sealed and undercoated as well.
    Ynhyt9IrP6TZsrHkHGVBWqfphZ-tB5aZjkpRhmvA_0b4a6a802ce9da4e74b63942993c5c591d366529.jpg

    One from inside the engine bay behind the ABS pump. This will get sealed and color matched.
    NVbdyW2hOzFVa6GFUbj5WpxNLom6ji_zi5xIZWUe_e427e6c36b9311fc6405b8e8420c8412ec75fbfd.jpg
     
  3. Oct 20, 2018 at 11:04 PM
    #23
    whiteyotaguy

    whiteyotaguy [OP] Well-Known Member

    Joined:
    Jun 24, 2018
    Member:
    #257372
    Messages:
    55
    Gender:
    Male
    Vehicle:
    2007 DCLB Sport
    Hey Guys and Gals! Been balancing updating the tacoma build and the wedding and the wedding always won, but we're married now so let the build tread move forward with regular content updates!

    Friday I got around to tubbing the driver side firewall. Same as the passenger but took some more detailed pics of the process. I think it turned out nicer than the passenger in some parts just because I used 18ga steel not 16ga so it was easier to mold into what shape I needed.

    Frst step was to remove plastic molding along the door jam and the kick panel and pull the carpet and insulation back.
    EBZCmrbDO-rHwi2MYLqq5dSq57nnxQlizJ50fSTA_2f97f5ce8f2a7114a813506a181b7ca500398403.jpg

    Next was to unbolt the wiring harness from the kick panel and move it out of the way.
    mTmT-MO5cr84OnIzCw7nx9VBSUl9jf89l0-cdZiC_2d879714019e9a11bb8480cd9279744ba48f5026.jpg

    Then I cut out the insulation from the offening area. I put it back later once everything was done though.
    Db23eX8E0LafBHUv4ZIPGlMYT1E9P9It_Xkhpkoh_2eb970243ad16b90bba94af55b792f22da44fc26.jpg

    Then grab you some bungie cords to pull the wiring harness and E brake cabe out of harms way.
    S9gCPR6y0ng3ok6z0wLL7ERkoc3BXwh061WnuwXG_a5401f9515b0bb064ffe0fabbf7836258fea20ea.jpg

    Then I put down a fiberglass welding blanket. This didnt help the insulation from catching fire like I had hoped. I now have zero insulation from the E brake bracket up. I was only scared a little bit when I saw flames under my dash. No wiring or anything important got harmed minus some melted insulation stuck to things and my interior smells like smoke now. I suggest taking a Squirt bottle filled with water and squirting down the insulation just to dampen it or have a buddy watch, I had neither.
    _TrdfhY_5AQ9QTDsuBCtj-clTvgGoL8iW_CsMNjx_df16cec9429824c1c84f15ffe59255f53e25142c.jpg

    Then you jack the pickup up and remove the tire, dont forget the jack stands. I'm a fabricator and do all my work after hours so I have access to all the toys! One of which is the templetes for the slip rolls. I used a 20" radius template and drew a line where to cut. I used the same method for the passenger side. On the driver side the area behind the headlight wasnt in the way enough to mess with other than a BFH beating I may revisit it if it becomes a problem but I dont see it happening.
    gbQ2o_XodPevWdlk8ad1OuCoYOzfW8IseM5cW4OR_ee06ddfb78e26355397e3196b9b8d9c74f98cd69.jpg
    8MK64pF-mA3Cm2QxgN-XSES8d6ebK9y97ebqS707_d074a037af7166359d81c3451babbf70b9d43b49.jpg

    Then start cutting...
    AuMHXnN4bblk3yHnJpu_gBH6jhhTNxpYDdYIQiop_daf941340145014b2fa1d8e05f49c1336f18e646.jpg

    ...until you've stopped crying about cutting up your rig and it looks like this.
    f1jRvrHON98Om_KnmzVjTEFsMrDKqkP3zIFSbGAZ_4fe0d189229b640f08c0517f0be0f783e8b17f41.jpg

    Then start putting metal back. I used the porta power again on this side to press it into shape, it works amazing that way. Then after its all stich welded in seam sealer it and undercoat it and put your interior back together and enjoy the new real estate!
    w3xx4onbygisjLBjAEg7QAVW5aRqGD5L17miYJPV_ffa3df45bb7dea802333a4b4a71c85b28dc4b6a0.jpg
    I think I might have taken more out of the driver side than the passenger but not by much, its hard to tell with the way the inner fenders are stock. Overal it took me ~4hrs to do the driver start to finish. The passenger took way longer but I removed the strut on that side and cycled the tire to measure and check. This side I just winged it and went off of what the passenger side looks like. I have room for 40's maybe even without the 1" body lift if i wanted to cut my fenders instead. I have the 2" diameter pucks machined i just need to make a few 2.5" pucks for the bed I think im going to use aluminum instead of UHMW on those.
    Here are the 2" pucks.
    UAkmT62SJTGwWsXR28EAUrUjkwqvw5qsPKrHg9Ru_66c3f2f2c2620e25bb83c8a3c0a4aa8b32e9c0d9.jpg
    I have some more parts coming this week to install my CB and I also have a trail clean up with my Club so I will definatly take pictures of all that.
     
    CGoss, TacoZim, dirtyrob and 2 others like this.
  4. Oct 31, 2018 at 7:35 PM
    #24
    whiteyotaguy

    whiteyotaguy [OP] Well-Known Member

    Joined:
    Jun 24, 2018
    Member:
    #257372
    Messages:
    55
    Gender:
    Male
    Vehicle:
    2007 DCLB Sport
    Not a real update but I did nab some pics of the space between my 315/75R16 Duratracs and the newly clearanced firewall.

    Passenger:
    XxSspKJK2yonzbJoWuMwCYAlh0HaG19-wApSHAMo_fd52c48ff57bb2a19b0de5abb1d60b1d36d72225.jpg
    a4iOokWcG-CkxHnXqhZ3xIKj59N8vebh_k9VyUD9_71bf199d0b4ad2cf4ff5da41830449560e3a0942.jpg

    Driver:
    mrsCQ5pjsW_bPRBpU6uvPl9bPO-wic72Qgbm9kH8_b78600668f2ef3499c6fa930add0df3af315f8e5.jpg
    _SmpxgI3nazK-EKmZ2YGpaOlJIJu9xgrmPDUo3Q8_b86dc403dcebacf9b70ba4a69eeb4a6099177146.jpg

    As you can see I'm well past the lower fender bolt.
    I got the parts to finish the air tank plumed in and the cb all wired up.
    Ive also decided to go with 5.29's over 4.88's with 40's and the auto my highway driving will be much better with the 5.29's.
    I'll keep the posts coming as I see that the views keep climbing.
     
    CGoss, TacoZim and 10tacotrooper like this.
  5. Nov 2, 2018 at 9:04 PM
    #25
    whiteyotaguy

    whiteyotaguy [OP] Well-Known Member

    Joined:
    Jun 24, 2018
    Member:
    #257372
    Messages:
    55
    Gender:
    Male
    Vehicle:
    2007 DCLB Sport
    Went and designed myself a bumper for the rig. It will be built out of aluminum. Input everything into autocad this afternoon.
    1PrCjSkK0ZehQ8mOaTiWsVxvcpEdrMI7t9lMFDq4_f70b030883096f8a33417332abccd62f382b8c7c.jpg
    GsiEP9LELb6E1JwGY2cWRJeC7AyM-fpgG6UjtumE_89a34cb3ffba8e7b254e103cfc968534de705885.jpg
    Should turn out pretty good. I havent decided on hoops or not but if I do it will have full hoops, grill headlights the whole thing.
     
    CGoss and 6 gearT444E like this.
  6. Nov 20, 2018 at 10:04 PM
    #26
    whiteyotaguy

    whiteyotaguy [OP] Well-Known Member

    Joined:
    Jun 24, 2018
    Member:
    #257372
    Messages:
    55
    Gender:
    Male
    Vehicle:
    2007 DCLB Sport
  7. Dec 7, 2018 at 4:39 PM
    #27
    whiteyotaguy

    whiteyotaguy [OP] Well-Known Member

    Joined:
    Jun 24, 2018
    Member:
    #257372
    Messages:
    55
    Gender:
    Male
    Vehicle:
    2007 DCLB Sport
    Ran into some issues. Bed bolts are seized in the frame, so I ditched the 1" body lift for the time being till I figure out how to get those loose. Also sold the 40's... :D
    Getting far on my bumper build, about ready to weld it out and paint or powdercoat it. 5.29's have been ordered and are on there way ive had a ARB sitting since summer waiting to go in the rear, wish i had the funs for a front ARB but that'll have to come later. Also looking into a sequoia rear axle swap too for various reasons. Got out and played in the snow we have the other night, 35's and open diffs dont go too bad at 5psi. My old Viair is so slow at only 1.33cfm even with my 7 gallon tank. Had the compressor running for 30min and still would not fill the tank. I have been eyeing the Bulldog or Smittybilt compressors for there price and the 5.65cfm. They should fit in the same place as the viair if not ill do some fabbing. I am starting to hate the sagging rear its even getting worse I think so a sahckle flip and some beefier shackles are in order as well as some rear shock hoops.

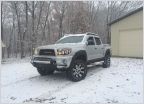
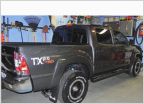
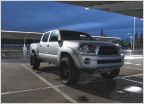
    Here are some pics of it lately as well as some from the christmas parade this last weekend.
    W1ExBxQZ7ToOCV5SzXw7UNgbB2uf5dPBW2KZn5Pz_136028680245c07bc2c36a055ff7d92fec11a667.jpg sTLJAgWFfjn3LgMhgAuJ3G2RzMYnMggzmhGIBvGR_d791ebe7b4af7628b82dd2e025dff3ca9f745e4a.jpg
    GyTKNlXIkh81K-c7MKaROIQGbzk50CRiu5U6QJTs_2017d6ae431af0624ee135e953660769e294b9ab.jpg
    6dngFl1_y0dVOi-EinEQnZvWx_HXHhwgTOmu41tx_78c20f4b8bb1610be39342881a95bb3cf15089f3.jpg
    zSvfB6SGR6YJQWKfVK6N03sr-qvdsjW3NcEOcM75_413f20f0b2e538e75596fb088e19c931a0e9c4b3.jpg
     
    CGoss and Blacktacoma23 like this.
  8. Dec 9, 2018 at 12:22 PM
    #28
    whiteyotaguy

    whiteyotaguy [OP] Well-Known Member

    Joined:
    Jun 24, 2018
    Member:
    #257372
    Messages:
    55
    Gender:
    Male
    Vehicle:
    2007 DCLB Sport
    Gears are in!! and my ARB rear!! Also found the compressor I'm going to go with its a Tuff Stuff basically a copy of the other two brands just cheaper same cfm same everything.

    Nitro really packages everything nicely.
    LPcnehzKf9ImUm6xAyF_CosSmmje1tXcZec5DQd-_f17fa8e89c17b90baffa208be0556e5ab79cfac0.jpg
    Cant go wrong with an ARB
    44_4BnfrtSXiy0O-wj8lr1eu4KEpj8ySLhILQwBw_c0648dd37db01a29a08f0de351cc8a2e1b90b09a.jpg
    Things to do are of course install my gears and locker, also need to get my new mystery tires and do a few other odds and ends. Luckly its been too cold here to snow enough to go play so its buying me time but looking at the forcast I will be running out soon.
     
    CGoss likes this.
  9. Dec 25, 2018 at 8:50 PM
    #29
    whiteyotaguy

    whiteyotaguy [OP] Well-Known Member

    Joined:
    Jun 24, 2018
    Member:
    #257372
    Messages:
    55
    Gender:
    Male
    Vehicle:
    2007 DCLB Sport
    5.29’s and dual ARB’s are in and work amazing! Have about 120 miles on the gears now, nothing over 50mph yet. Up to that speed everything feels great and the auto is happy. Here are a few pics of the install that I grabbed. I had a little accident with the rear dropping the pinion into the carrier after 10 miles. I found a couple of shims that had gotten damaged and shoved inside the solid pinion spacer that I believe to be the culprit. Got it all fixed up though!

    I used nitro gears and went through just differentials and everything was top quality from the packaging to the parts them selves.
    SBOvTz3apSNelhYlr6bz45YtS5uddGBG4HodDm3T_9511e4ef1d50759b1ed5deac8d0bcf66aff253aa.jpgHrKg6lssCATN1ysfJoun3A1c3SptZTsMZGqXeUfo_9e72037812af5913b676107361410c71c6d4fc97.jpg
    Rear was straight forward.
    _nPQIvfvusWdd3EFyoYGCHbqn-gCoT8tyCXxEtnv_8d5c980f831380f28defdf6b3a559141793996d8.jpg
    Front was easier to pull than I thought.
    Tc_VugbbhdSPsj2tuG9zq4mnFEiuIZV80PWeORgQ_3c6d96c8f3f18c0da2728d610a469898396304f3.jpg
    Front done after some fun getting races pressed back in. If you plan to due it at home use a porta-power with a hollow ram to press the new races in straight.
    lLgK4jQu6cIu-FsCTOydWxMWuqVmTPHX9VFH7-db_d187e6b4a42fef964ec3313cfa799f7f82365f1c.jpg
    After 10 miles on the gears rear started to howl obnoxiously loud. I could see what was wrong through the fill plug and this awaited me. Tore it apart cleaned the case and bearings of all metal shavings and reassembled double checking everything.
    bV_3xSbbN8ZwIUbUXbBSXdFWjtJiG-5PpKEC5PqS_d35e92e1f438ea56eff9262c224f803e0dcbbb96.jpg Uu0S5x0LldOaxKgiLOTTdGOy4pBWjZvBQ8EcwIY9_aedbf2a41e847bba13d4c33e8bc0d90bbd72110d.jpg

    9RPROgVyjz4fXHqp4ERGwXZf-e7mvxvPrvtzXPpX_cc7e0c6c98fb270ecd2416d7c22604b10a1d6351.jpg
    Have one light wheeling trip on the gears without the use of the lockers. Now that I am over 100 miles and have some heat cycles in I'll hook up the lockers and start doing some highway driving to get some MPG data and some better wheeling trips.
     
    CGoss and Duvorak like this.
  10. Dec 26, 2018 at 7:07 PM
    #30
    whiteyotaguy

    whiteyotaguy [OP] Well-Known Member

    Joined:
    Jun 24, 2018
    Member:
    #257372
    Messages:
    55
    Gender:
    Male
    Vehicle:
    2007 DCLB Sport
    Made a mount for my locker solenoids. Weird ARB doesn't make them with a built in mount. this will go next to the brake booster. It serves a few purposes a place for the Locker compressor to mount as well as a place for the solenoids to mount to and cover sup the inner fender where I tubbed. The solenoids will just be daisy chained together then ran to the single compressor.
    This is the air compressor that will charge the lockers its a firestone unit that is compact.
    kGIcqPg0nxR7H2KqRD0cJYLqDKzn9ja7GVIYZUYs_21d3e4b477f8883ebb97e0ff0e37541b55aa7aa8.jpg
    cyOayFDGl4mAmUh9YmYPLXXF_XSiwosipTRAZHeh_27778e89213aada5da482f50d66a8b69d39975af.jpg
     
    CGoss, Nimble9 and Duvorak like this.
  11. Feb 3, 2019 at 8:15 PM
    #31
    WormSquirts

    WormSquirts Armageddon

    Joined:
    Dec 18, 2015
    Member:
    #172583
    Messages:
    2,487
    First Name:
    Braeden
    BC
    Looking forward to more!!!! Love that you're in a dclb too. As soon as I can afford gears and lockers I will go to 37s. Have had thoughts of 40s, but worried about breaking the steering rack or tie rods.
     
    CGoss and Nimble9 like this.
  12. Jun 24, 2019 at 9:24 AM
    #32
    SportsmanJake

    SportsmanJake Well-Known Member

    Joined:
    Nov 18, 2015
    Member:
    #169982
    Messages:
    424
    Gender:
    Male
    VA
    Vehicle:
    2006 Tundra
    Hit us with the updates!
     

Products Discussed in

To Top