1. Welcome to Tacoma World!

    You are currently viewing as a guest! To get full-access, you need to register for a FREE account.

    As a registered member, you’ll be able to:
    • Participate in all Tacoma discussion topics
    • Communicate privately with other Tacoma owners from around the world
    • Post your own photos in our Members Gallery
    • Access all special features of the site

wiring expert help needed....

Discussion in 'Lighting' started by NYCO, Mar 4, 2011.

  1. Mar 4, 2011 at 8:58 PM
    #21
    joes06tacoma

    joes06tacoma Well-Known Member

    Joined:
    Jan 1, 2010
    Member:
    #28588
    Messages:
    3,183
    Gender:
    Male
    First Name:
    Joe
    Central Coast, CA
    Vehicle:
    06 4x4 Off Road Access Cab v6 6spd
    LEER Shell with dome lights operated with 3 way switches, aux backup lights with relay and 3 position switch, modified wiring to compass/temp display and clock to include switch that disables dimming function (poor man's DRL solution), Scan Gauge 2
    Perfect! Glad someone has mad graphics skillz!
     
  2. Mar 4, 2011 at 9:52 PM
    #22
    BLACKnBLUE

    BLACKnBLUE Well-Known Member

    Joined:
    Sep 9, 2010
    Member:
    #42972
    Messages:
    204
    Gender:
    Male
    First Name:
    Iain
    Ellensburg, WA (Kittitas County)
    Vehicle:
    07 TRD SR5 with ARB Front Bumper
    ARB front winch bar, 3" lift, blacked out badges, blacked out headlights, Custom Steel Rear Bumper Mod, and Leer 100XQ
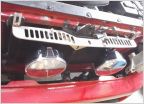
    I want to get some FF75's into where the parking lights are now... just as soon as I can afford to get some. AutoAnything has em for $115 with free shipping...

    Hella75_f74ce91e4be29438541162021710941c52632a22.jpg
     
  3. Mar 5, 2011 at 8:55 AM
    #23
    NYCO

    NYCO [OP] go explore...

    Joined:
    Jul 27, 2010
    Member:
    #40842
    Messages:
    19,121
    Gender:
    Male
    First Name:
    bOb
    Colorado
    Vehicle:
    Blue Betty - '06 TRD OR
    dents & scratches
    i was thinking of doing the same with my lights, but the mounting behind the bumper will be tricky...so i may just use my FF75 fogs as reverse lights instead...
     
  4. Mar 5, 2011 at 9:23 AM
    #24
    NYCO

    NYCO [OP] go explore...

    Joined:
    Jul 27, 2010
    Member:
    #40842
    Messages:
    19,121
    Gender:
    Male
    First Name:
    bOb
    Colorado
    Vehicle:
    Blue Betty - '06 TRD OR
    dents & scratches

    so let me get this straight....

    i need to get a switch that will have 3 terminals on it? i'd be looking for the on-off-on setup...

    the center terminal will be the wire coming from #86 on the relay, another terminal will be connected to a splice coming from the high beam wire, and the third will coming from my existing power, which i assume is the wire i have tapped into a wire i found that turns on when the key is on which allows my lights to be on when the truck is on...

    so the rest of the wires i should be able to leave as is...and you're suggesting an additional fuse coming from the high beam splice to my switch? i think i have an extra inline 10A fuse, think that'll work or should i get a lower Ampere?

    the red box with the curved line is the inline fuse you suggested?

    does the new on-off-on switch have a terminal for a ground? or does the wire going to the relay which is connected to a ground through #85 count?
     
  5. Mar 5, 2011 at 10:01 AM
    #25
    Pugga

    Pugga Pasti-Dip Free 1983 - 2015... It was a good run

    Joined:
    Jun 18, 2010
    Member:
    #39131
    Messages:
    38,665
    Gender:
    Male
    First Name:
    Mike
    Massachusetts
    Vehicle:
    '19 Ford F-250 6.7 SCrew
    F-250 Land Yacht Mod
    This is actually a pretty clever idea and maybe a bit simplier than the method I described. You'd need a new switch and it would be a 3 position on/off/on switch. There is only one fuse in that diagram and it's between the constant power and the relay. The high beam tap is just acting as a switch for the relay and wouldn't actually be powering the lights so you don't need an inline fuse on that wire. The wiring from your relay to the lights can remain as-is. You'd have to look at the terminals on the switch you purchase to see if it has a location for a ground but it may not be required. There should be a description of the switch poles on the back of the box.
     
  6. Mar 5, 2011 at 10:13 AM
    #26
    dhurley

    dhurley Well-Known Member

    Joined:
    May 30, 2009
    Member:
    #17817
    Messages:
    998
    Gender:
    Male
    First Name:
    Doug
    Colorado Springs, CO
    Vehicle:
    04 Double Cab TRD SR5 V6
    TRD, Snugtop Super-Sport, bedliner, receiver hitch, alarm mod, deck plate mod, AFE Pro-Dry S, Saddleman camo seat covers, TW decal, grey wire mod w/switch, DRL, LED cupholder mod, Dynomax Super Turbo, aux back-up lights, Devil Horns by Andres, "blue plug" mod for 2LO, shorty antenna, Pro Comp fog & driving lights, receiver shackle, 15% tint front windows, stainless nerf bars, Ultra Gauge, diff breather mod
    The only need for a ground on the switch would be if it is illuminated. That makes the light in the switch lite up.
     
  7. Mar 5, 2011 at 10:30 AM
    #27
    NYCO

    NYCO [OP] go explore...

    Joined:
    Jul 27, 2010
    Member:
    #40842
    Messages:
    19,121
    Gender:
    Male
    First Name:
    bOb
    Colorado
    Vehicle:
    Blue Betty - '06 TRD OR
    dents & scratches
    awesome...thanks for the help everybody...project begins this afternoon
     
  8. Mar 5, 2011 at 6:21 PM
    #28
    NYCO

    NYCO [OP] go explore...

    Joined:
    Jul 27, 2010
    Member:
    #40842
    Messages:
    19,121
    Gender:
    Male
    First Name:
    bOb
    Colorado
    Vehicle:
    Blue Betty - '06 TRD OR
    dents & scratches
    Success! All it took was a wire from the high beams to my new on-off-on switch...thanks for the tips...next lighting mod will be to hook up some reverse lights in the same manner
     
  9. Mar 6, 2011 at 5:35 PM
    #29
    NYCO

    NYCO [OP] go explore...

    Joined:
    Jul 27, 2010
    Member:
    #40842
    Messages:
    19,121
    Gender:
    Male
    First Name:
    bOb
    Colorado
    Vehicle:
    Blue Betty - '06 TRD OR
    dents & scratches
    all of the previous wiring was already set up where my hellas would go on at the flip of a switch...with the help of the guys in this thread, some extra wire and a new on-off-on switch it is now set up where one position turns the lights on like previously installed, the the other on position has it set to turn the hellas on when my high beams are on....

    not the best pics but here's some pics...

    tapped into the high beam wire found in this cluster fuck...
    IMG_20110306_182737_a136909de394d9efdd0ab7ac479aae5bc9065fdb.jpg

    ran the new wire through the hole i made for the previously ran wire from the relay...
    IMG_20110306_182746_84ccc983f7b7b24c00453347693d97a6dfce5895.jpg

    and got it all going to this simple on-off-on switch
    IMG_20110306_182657_9a5f6cf31c1237e9a937e44d6db5a5840739c599.jpg

    thanks for all the help, it was a simple change in the end...:cheers:
     
  10. Mar 6, 2011 at 5:39 PM
    #30
    NYCO

    NYCO [OP] go explore...

    Joined:
    Jul 27, 2010
    Member:
    #40842
    Messages:
    19,121
    Gender:
    Male
    First Name:
    bOb
    Colorado
    Vehicle:
    Blue Betty - '06 TRD OR
    dents & scratches
    new lighting setup output...

    no light
    IMG_20110305_184614_dbe20e49756c49b7e179e6bb6b0084378ae81721.jpg

    hellas only
    IMG_20110305_184624_4f9cde2126887823215d9615377a882a006c07d0.jpg

    hellas and 6000k HID low beams
    IMG_20110305_184648_43e5ffa41659d8da5a1e6586fc76303cd21b131a.jpg

    hellas, HID lows and PIAAs
    IMG_20110305_184657_379d2c64c8f234d0d408ebae6ab1665d932f276a.jpg

    hellas and highs
    IMG_20110305_184708_f343dc5a12bb29eeb89bb2789bb73dec6d6fd7a8.jpg

    hellas, highs and PIAAs
    IMG_20110305_184715_15707d84a865f93c45624a6f0a0962dfa0e429c5.jpg


    cell phone doesn't do the light output justice and eventually i'll get some real life output photos not what it looks like against a small shed...
     

Products Discussed in

To Top