1. Welcome to Tacoma World!

    You are currently viewing as a guest! To get full-access, you need to register for a FREE account.

    As a registered member, you’ll be able to:
    • Participate in all Tacoma discussion topics
    • Communicate privately with other Tacoma owners from around the world
    • Post your own photos in our Members Gallery
    • Access all special features of the site

Yukikaze's build and BS: Utility Package AF

Discussion in '3rd Gen. Builds (2016-2023)' started by Nitori, May 25, 2017.

  1. May 9, 2018 at 10:13 AM
    #41
    iBoosted

    iBoosted It's go to be the king

    Joined:
    Jan 13, 2017
    Member:
    #207437
    Messages:
    1,361
    Gender:
    Male
    First Name:
    Niko
    Mesa, Arizona
    Vehicle:
    2017 BBP Tacoma TRD Off-Road 4x4
    TRD PRO Front Grille Icons stage 3 lift Icons Billet Upper Control Arms Method Roost's Toyo Tires Caliraised Ditch Lights Caliraised Rear facing amber lights Caliraised Fog Lights Interior: Many Patches Greyman Tactical Rigid Insert Molle Panel
    Like the build, keep it up
     
  2. May 15, 2018 at 9:25 PM
    #42
    Nitori

    Nitori [OP] Well-Known Member

    Joined:
    May 3, 2016
    Member:
    #186058
    Messages:
    4,586
    Maricopa AZ
    Vehicle:
    2021 T4R SR5
    Just picked up the SDHQ behind the grille light mounts. Nothing to mount in them (yet) but I can start measuring out a template for my homebrew bracket.

    Not much else going on except a lot of research into suspension bits... :playball:
     
  3. May 19, 2018 at 7:11 PM
    #43
    Nitori

    Nitori [OP] Well-Known Member

    Joined:
    May 3, 2016
    Member:
    #186058
    Messages:
    4,586
    Maricopa AZ
    Vehicle:
    2021 T4R SR5
    Installed the SDHQ behind the grille mount today:

    [​IMG]

    Did some preliminary eyeballing and measurements for my plan for a rally style light rack, it looks like the front most lower tab should be perfect!

    I am a little disappointed that the install instructions tell you to throw away the air deflectors, it would seem they are reasonably important to airflow over the radiator and I think they can be partially re-fit with a little bit of trimming. Just a gut feeling based on the fact that Toyota even adds foam to the OEM pieces to seal over AC lines and stuff. SDHQ are based here in Phoenix after all though, so they are aware of high temperature operation parameters. Perhaps a good dremel tool project for another day...

    Anyways the lights look like they should mount up really nicely. I picked up my first set of squadrons at overland expo for measurements.

    This is a ballpark of about where they will end up:
    [​IMG]
    I don't know that I'm brave enough to trim out that center piece for each light, but it looks like there should be minimal light loss even untrimmed. Also there is definitely plenty of room for 6 total lights in there with extra breathing room to spare.
     
  4. May 26, 2018 at 10:48 AM
    #44
    Nitori

    Nitori [OP] Well-Known Member

    Joined:
    May 3, 2016
    Member:
    #186058
    Messages:
    4,586
    Maricopa AZ
    Vehicle:
    2021 T4R SR5
    [​IMG]
    [​IMG]

    [​IMG]

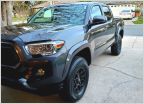
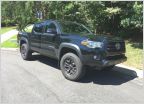
    I need to wash the dust off more often... it's my zen moment where I get to appreciate my truck all over again.

    Got a 3 day weekend full of small projects I'm trying to knock out. Oil change, decal work, diff breather, all sorts of fun stuff.
     
  5. May 28, 2018 at 3:56 PM
    #45
    Nitori

    Nitori [OP] Well-Known Member

    Joined:
    May 3, 2016
    Member:
    #186058
    Messages:
    4,586
    Maricopa AZ
    Vehicle:
    2021 T4R SR5
    Found some older but good pictures lurking on my hard drive...

    [​IMG]
    Finding a scenic little wooded forest road the first weekend I had the truck.

    [​IMG]
    Water crossing (it was a graded concrete one that any car could do pretty much, just makes for a pretty shot)

    [​IMG]
    After a little bit of :mudding:
     
    SilverBulletII likes this.
  6. May 28, 2018 at 4:06 PM
    #46
    Nitori

    Nitori [OP] Well-Known Member

    Joined:
    May 3, 2016
    Member:
    #186058
    Messages:
    4,586
    Maricopa AZ
    Vehicle:
    2021 T4R SR5
    My weekend was... semi-productive. Struck out on a few of the project ideas I had rolling around in my head. There's no good way to reattach the air deflectors next to the radiator, even after hacking them up. I also partially melted one of my spare under-headlight grille pieces while experimenting with forming an acrylic cover piece to it with my heat gun. :eek:

    Other than that though I did change my oil, and I finally put my diff breather in!
    [​IMG]
    No one mentioned about the bed cubbies being made from some kind of FRP, surprised the shit out of me and made a mess!
    What I ended up doing was drilling a hole large enough to slip the nipple of the breather through, but not large enough to fit the hose itself through. Put the breather through the cubby hole and then push the hose firmly into place on it, use a hose clamp on it, and the hose will keep the breather tight in position without the chance to rattle.
    [​IMG]

    [​IMG]

    Then it's just a matter of plain old zip tie routing... I left generous slack so I can easily pull the bed cubby out if need be.

    Oh, and making my decal job more hardy for wheeling meant I had to trim back the parts in the wheel well and use some edging film. Doesn't look as slick (also lord knows I am far from perfect- I was hand cutting that with a razor!), but it won't end up peeling up as easily now, it's more protected from edge puckers and vibrations of the fender liner...
    [​IMG]
     
    Last edited: May 28, 2018
  7. Jun 3, 2018 at 2:40 PM
    #47
    Nitori

    Nitori [OP] Well-Known Member

    Joined:
    May 3, 2016
    Member:
    #186058
    Messages:
    4,586
    Maricopa AZ
    Vehicle:
    2021 T4R SR5
    Tried to drive around on stock coils and no sway bar, but it was way too squirrelly. Did my usual "formation lap" wiggle at about 35 and got a whole lotta front lean and felt the beginning of a bit of oversteer. Exciting, yes, but for a DD I am not sold on it without stiffer rate coils. The feeling going over bumps was super solid though.

    So for now I put on the TRD Off Road 28mm sway bar @jessandjamie was gracious enough to hook me up with!
    I was originally just going to nab the bushings and brackets but it turned into the whole assembly, fresh endlinks and all! Definitely owe him a beer. :cheers:

    [​IMG]

    Once it's mounted up it looks so lonely in there compared to the SR/Sport style 31mm! Off the trucks it hardly looks like there is a difference:
    [​IMG]
    The effective spring rate difference is pretty pronounced though.

    I also still have the TRD Off Road sway I got from @snowtank which I can now fully dedicate to guinea pig status and work on a quick disconnect system for. :D
     
    mcharfauros and snowtank like this.
  8. Jun 3, 2018 at 2:47 PM
    #48
    snowtank

    snowtank Where the fuck did my beer go!

    Joined:
    Sep 14, 2012
    Member:
    #86930
    Messages:
    21,694
    Gender:
    Male
    First Name:
    Andrew
    Arizona
    Vehicle:
    11 txpro dcsb 08 trd sprt dcsb
    Some stuff here and there....
    I'm looking forward to the quick disconnect ones you make!
     
  9. Jun 10, 2018 at 7:51 PM
    #49
    Nitori

    Nitori [OP] Well-Known Member

    Joined:
    May 3, 2016
    Member:
    #186058
    Messages:
    4,586
    Maricopa AZ
    Vehicle:
    2021 T4R SR5
    Deposit on sliders has been placed! :D Gonna have Avid Offroad make me a set of weld-ons. I plan on keeping this truck for a loooong time so the weight savings of weld-on is exactly what I am looking for.

    In other news I picked up some white plasti dip on clearance and used it on the under-headlight trim piece I had warped with the heat gun to see what a paint-matched setup might look like.
    White plasti-dip is miserable to use because it is so thin, so you're forced to run multiple light coats that stick terribly especially in the tight confines of the "grille."
    I think I might be on to something, atrocious coverage aside:
    [​IMG]
    I'm gonna shoot off an email to my paint guy and see what he thinks, part of the trouble is gonna be making sure the paint doesn't get an orange peel effect from the very fine texture the plastic has. The other issue is the grille surround does rub on this piece on most trucks, as I have noticed with the MesoJDM prototypes. It's exaggerated due to the fact that they have to have some thickness to them to stick, but I'm getting bubbling that comes back every few hundred miles or so...
    [​IMG] [​IMG]
     
  10. Jun 14, 2018 at 8:41 AM
    #50
    Thirty8special

    Thirty8special Well-Known Member

    Joined:
    Aug 28, 2017
    Member:
    #228302
    Messages:
    138
    Gender:
    Male
    First Name:
    Lucas
    AL
    Vehicle:
    2017 Tacoma SR
    Grill, lights, wheels & tires
    Love the build! Makes me want to get fog lights and swap out my black front bumper/mirror caps. If you don't mind me asking what did you pay for the paint matched bumper and mirror caps?
     
    Nitori[OP] likes this.
  11. Jun 14, 2018 at 10:08 AM
    #51
    Nitori

    Nitori [OP] Well-Known Member

    Joined:
    May 3, 2016
    Member:
    #186058
    Messages:
    4,586
    Maricopa AZ
    Vehicle:
    2021 T4R SR5
    The paint match on the front bumper was 300 even because I took care of removal and reinstall myself.

    Mirror caps are available at any Toyota dealership already paint matched. It was something like $37 a side.
     
  12. Jun 14, 2018 at 10:44 AM
    #52
    Thirty8special

    Thirty8special Well-Known Member

    Joined:
    Aug 28, 2017
    Member:
    #228302
    Messages:
    138
    Gender:
    Male
    First Name:
    Lucas
    AL
    Vehicle:
    2017 Tacoma SR
    Grill, lights, wheels & tires
    Thanks, I was told by a local paint shop they wouldn't paint my factory SR black bumper because it was textured. They said I had to purchase a primed OEM bumper then spray it MGM so roughly $500-600. I did find some mirror caps so Ill probably pull the trigger on those and some fog lights.
     
  13. Jun 14, 2018 at 11:50 AM
    #53
    Nitori

    Nitori [OP] Well-Known Member

    Joined:
    May 3, 2016
    Member:
    #186058
    Messages:
    4,586
    Maricopa AZ
    Vehicle:
    2021 T4R SR5
    To shed a little more light on the subject, my paint guy does crazy top notch work on pretty much a revolving door of restorations and exotics so I 100% trust him to know his stuff.

    From what I understand of what he told me, there is actually no difference between the bumpers aside from one having a primer coat and one not. (There is no “texture”) The problem arises when you try to prep and there are any little nicks or imperfections from having been “in the wild.” Adding primer over anything like that is basically a nightmare. Spot fixes are almost impossible to keep from showing through on the final coat.

    I took the bumper off very carefully and swaddled it in freshly washed moving blankets, and it passed muster. I’m seriously amazed by how well he matched the white, which is notorious for being difficult. Shame I don’t live near him anymore.
     
  14. Jun 16, 2018 at 8:09 PM
    #54
    Nitori

    Nitori [OP] Well-Known Member

    Joined:
    May 3, 2016
    Member:
    #186058
    Messages:
    4,586
    Maricopa AZ
    Vehicle:
    2021 T4R SR5
    Picked up a project today:
    [​IMG]

    A quick scrub with my favorite cleaner and a rinse down later I've got them looking pretty:
    [​IMG]

    They're takeoffs from another TW member who went to Kings w/ resis in the rear. One of them is leaking and they're just generally due for a good rebuild and some custom valving.

    I'm hoping to add reservoirs to them, but I have to do a little bit more digging on how exactly the best way to go about it would be. Gonna get everything priced out beforehand and compare it to how much it would cost to grab a set of resi shocks new, but I'm thinking rebuilding these is gonna be the way to go, it'll come in slightly cheaper and with custom valving to boot.
     
    mcharfauros likes this.
  15. Jul 4, 2018 at 5:12 PM
    #55
    Nitori

    Nitori [OP] Well-Known Member

    Joined:
    May 3, 2016
    Member:
    #186058
    Messages:
    4,586
    Maricopa AZ
    Vehicle:
    2021 T4R SR5
    Yikes, been neglecting updates on my build thread again!

    Essentially all the shock gurus I spoke to said it wasn't worth it to add the resis to my secondhand Fox shocks. I failed to realize that the IFP construction would necessitate basically a straight up rebuild from the ground up...

    ... So I just bought ones with clickers instead. :spending:
    [​IMG]

    There was a good deal that was hard to pass up so I picked them up. Wasn't planning on it at this stage but when push came to shove I had to have 'em.

    Then I went back to stock on the light bar mount.:anonymous:
    [​IMG]
    My idea to run BD squadrons stealthily behind the grille just wasn't panning out. I wanted to push them up as close to the front of the Pro grille as possible to avoid losing much light, and... yeah it just wasn't working. I would have to take large swaths of material out with a saw and a dremel.

    Speaking of which, I had already dremel'd apart the air guides for the radiator, but foil tape to the rescue! This stuff has been my go-to for a long time. It may be ghetto, but it works and provides a STRONG repair.
    [​IMG]

    Also I need to get of my ass and make a prettier harness for those Hella Horns... or add a few more while I am at it.:devil:
     
  16. Jul 4, 2018 at 9:49 PM
    #56
    Nitori

    Nitori [OP] Well-Known Member

    Joined:
    May 3, 2016
    Member:
    #186058
    Messages:
    4,586
    Maricopa AZ
    Vehicle:
    2021 T4R SR5
    Oh, also sliders get welded on this Saturday! :D
     
  17. Jul 8, 2018 at 9:46 AM
    #57
    Nitori

    Nitori [OP] Well-Known Member

    Joined:
    May 3, 2016
    Member:
    #186058
    Messages:
    4,586
    Maricopa AZ
    Vehicle:
    2021 T4R SR5
    The design is mine, but I had a place called Static Motorsports in Tempe do the install.

    If you want, I could make any modifications you're thinking of to the file/design and send it your way. I think Static did a good job but there's plenty of other places in the valley.

    Just be aware that hood vinyl, and especially matte hood vinyl is a super duper punishing application (engine heat plus nearly constant UV rays) and it will not last the full "__ year" rating of the vinyl used. It will require some special care but nothing crazy. You can still wash it normally, just be careful of scratches as they cannot be "polished out" of a matte surface.
     
    0uTkAsT[QUOTED] likes this.
  18. Jul 12, 2018 at 9:56 PM
    #58
    Nitori

    Nitori [OP] Well-Known Member

    Joined:
    May 3, 2016
    Member:
    #186058
    Messages:
    4,586
    Maricopa AZ
    Vehicle:
    2021 T4R SR5
    [​IMG]

    Avid sliders welded on and looking good. I dig the simple lines a lot. Purely speaking from a visual standpoint I would maybe have tucked them in closer, but then again you'd lose protection for door dings by doing that.

    [​IMG]
    Shocks are cleaned up and re-stickered. Hoping to get a moment to install them soon.

    And to top it all off my new shot at a light mounting solution arrives tomorrow! :D
     
  19. Jul 14, 2018 at 8:56 PM
    #59
    Nitori

    Nitori [OP] Well-Known Member

    Joined:
    May 3, 2016
    Member:
    #186058
    Messages:
    4,586
    Maricopa AZ
    Vehicle:
    2021 T4R SR5
    UPS redeemed themselves and delivered on Saturday, even though it was a day late...

    N-Fab's multi-LED light bar mount!
    [​IMG]

    So far this looks like exactly what I was looking for! :D

    The configuration says for 1 30" bar, but there's tons of mounting holes and slots to choose from here. Copious room to mount 10(!!!!) Baja Designs Squadrons, or potentially mix and match some larger lights.

    Mounting looks relatively well thought out aside from a bracket they want you to put into the crash bar with some self-tappers, which makes me cringe. We'll see about that.
     
  20. Aug 25, 2018 at 5:42 PM
    #60
    Nitori

    Nitori [OP] Well-Known Member

    Joined:
    May 3, 2016
    Member:
    #186058
    Messages:
    4,586
    Maricopa AZ
    Vehicle:
    2021 T4R SR5
    Well the light mount took way longer than I would have hoped, turns out it was made slightly off-kilter and so it had about a 1/8" tilt to it when installed. Also those piece of shit self-tappers stripped immediately upon attempting straightening the bar's mounting. I decided to get some long 8mm bolts to bolt entirely thru the crash bar so the thing is rock solid now. It supported @snowtank's weight even though I told him not to. :rofl:

    I also managed to adjust most of the tilt out by using slightly smaller fasteners on the cross-bolt pieces to give me some adjustment slop, but there's still a slight (about 1/16" or less) tilt to it which is annoying but not too noticeable unless you get down and compare side to side.

    I honestly think it might be able to get totally dead level if I had a helper hold it while I tightened the bolts down, but I just haven't bothered yet because I've been waiting for connectors to come in and buying up some stuff to make good wiring harnesses.
    [​IMG]

    I was actually gonna take a shot at mounting up the lights today but in the meantime I decided to tuck my horn wires out of the way to try to clean up the look of everything, but that was a rabbit hole and it took a damn long time.


    Happy with the results, though! :D (ignore the copious monsoon dust)
    [​IMG]
     
    snowtank likes this.

Products Discussed in

To Top