1. Welcome to Tacoma World!

    You are currently viewing as a guest! To get full-access, you need to register for a FREE account.

    As a registered member, you’ll be able to:
    • Participate in all Tacoma discussion topics
    • Communicate privately with other Tacoma owners from around the world
    • Post your own photos in our Members Gallery
    • Access all special features of the site

Zach's 2013 DCSB Build

Discussion in '2nd Gen. Builds (2005-2015)' started by zscott, Nov 18, 2013.

  1. Dec 23, 2014 at 8:06 AM
    #141
    Andrew Kanter

    Andrew Kanter Member

    Joined:
    Nov 2, 2014
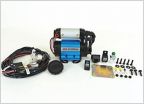
    Member:
    #141529
    Messages:
    11
    Gender:
    Male
    First Name:
    Andrew
    Gulf Coast Texas/Florida
    Vehicle:
    2014 Tacoma 4 cyl 5 speed 4x4 access cab
    Love the set up!
     
  2. Jan 5, 2015 at 9:33 AM
    #142
    Jamart5

    Jamart5 HoeRunner

    Joined:
    May 19, 2014
    Member:
    #130181
    Messages:
    9,148
    Gender:
    Male
    First Name:
    Juan
    SETX
    Vehicle:
    '16 4Runner TRD
    Are you running spacers with your steelies? I'm going back to stock 16's with 3 inch lift and wondering if I needed them. I do have aftermarket ucas.
     
  3. Jan 5, 2015 at 9:39 AM
    #143
    zscott

    zscott [OP] Well-Known Member Vendor

    Joined:
    Jul 16, 2013
    Member:
    #108365
    Messages:
    3,742
    Gender:
    Male
    First Name:
    Zach
    Utah
    Vehicle:
    13 DCSB Off-Road 4x4
    Depends on the 33's you are planning to run.

    I am not right now. My tires are 255-85-16s though (really narrow) I have a set of 285 75 16s that I will be putting on pretty soon and I am guessing I will need spacers because they are wider. Xoverland has the only tacoma I know of that is running 285's without spacers on a stock wheel. Even then they have minor rubbing on the uca and they have the TRD offroad wheels. The steel wheels have any less backspacing from what I can see.
     
  4. Jan 5, 2015 at 9:45 AM
    #144
    Jamart5

    Jamart5 HoeRunner

    Joined:
    May 19, 2014
    Member:
    #130181
    Messages:
    9,148
    Gender:
    Male
    First Name:
    Juan
    SETX
    Vehicle:
    '16 4Runner TRD
    Ok thanks I think the factory TRD wheels and tires are 265's I'll run these for awhile before getting new ones I have 18's on 275/65/18 and want to go to 17's.
     
  5. Jan 5, 2015 at 9:52 AM
    #145
    zscott

    zscott [OP] Well-Known Member Vendor

    Joined:
    Jul 16, 2013
    Member:
    #108365
    Messages:
    3,742
    Gender:
    Male
    First Name:
    Zach
    Utah
    Vehicle:
    13 DCSB Off-Road 4x4
    Yeah the 265's and 255's width tires will be fine on stock 16" or 17" wheels. The 285 width tires are where you will start to need spacers/trimming.
     
  6. Jan 5, 2015 at 9:57 AM
    #146
    Jamart5

    Jamart5 HoeRunner

    Joined:
    May 19, 2014
    Member:
    #130181
    Messages:
    9,148
    Gender:
    Male
    First Name:
    Juan
    SETX
    Vehicle:
    '16 4Runner TRD
    Sounds good thanks
     
  7. Jan 6, 2015 at 3:20 AM
    #147
    Acerwin

    Acerwin The unNORM NORM

    Joined:
    Nov 20, 2014
    Member:
    #142732
    Messages:
    32,629
    Gender:
    Male
    First Name:
    Andrew
    South Carolina
    Vehicle:
    Toyota Tundra
    Will these racks fit on a 15' DCSB off road even though I don't have the factory rails on my truck? This question may have been asked already but I didn't see it.
    Thanks, Andrew
     
  8. Jan 6, 2015 at 5:58 AM
    #148
    zscott

    zscott [OP] Well-Known Member Vendor

    Joined:
    Jul 16, 2013
    Member:
    #108365
    Messages:
    3,742
    Gender:
    Male
    First Name:
    Zach
    Utah
    Vehicle:
    13 DCSB Off-Road 4x4
    Andrew,

    They will indeed fit on the 2015's. The racks bolt to the factory mounting points under the weather stripping on the roof so no need for the factory rails.
     
  9. Jan 7, 2015 at 8:43 AM
    #149
    Acerwin

    Acerwin The unNORM NORM

    Joined:
    Nov 20, 2014
    Member:
    #142732
    Messages:
    32,629
    Gender:
    Male
    First Name:
    Andrew
    South Carolina
    Vehicle:
    Toyota Tundra
    Ok thanks I'll be ordering one soon!
     
  10. Jan 7, 2015 at 5:54 PM
    #150
    zscott

    zscott [OP] Well-Known Member Vendor

    Joined:
    Jul 16, 2013
    Member:
    #108365
    Messages:
    3,742
    Gender:
    Male
    First Name:
    Zach
    Utah
    Vehicle:
    13 DCSB Off-Road 4x4
    sweet looking forward to it.
     
  11. Jan 20, 2015 at 3:06 AM
    #151
    Acerwin

    Acerwin The unNORM NORM

    Joined:
    Nov 20, 2014
    Member:
    #142732
    Messages:
    32,629
    Gender:
    Male
    First Name:
    Andrew
    South Carolina
    Vehicle:
    Toyota Tundra
    Any new updates?
     
  12. Jan 20, 2015 at 6:48 AM
    #152
    zscott

    zscott [OP] Well-Known Member Vendor

    Joined:
    Jul 16, 2013
    Member:
    #108365
    Messages:
    3,742
    Gender:
    Male
    First Name:
    Zach
    Utah
    Vehicle:
    13 DCSB Off-Road 4x4
    A few. This thread has been neglected a bit but I should have some pics up soon.
     
  13. Jan 27, 2015 at 6:40 AM
    #153
    Acerwin

    Acerwin The unNORM NORM

    Joined:
    Nov 20, 2014
    Member:
    #142732
    Messages:
    32,629
    Gender:
    Male
    First Name:
    Andrew
    South Carolina
    Vehicle:
    Toyota Tundra
    Sounds good!
     
  14. Jan 27, 2015 at 7:57 AM
    #154
    zscott

    zscott [OP] Well-Known Member Vendor

    Joined:
    Jul 16, 2013
    Member:
    #108365
    Messages:
    3,742
    Gender:
    Male
    First Name:
    Zach
    Utah
    Vehicle:
    13 DCSB Off-Road 4x4
    A few updates to this neglected build. I will be trying to get full write ups on these installs and reviews as things progress but here are a few teaser pictures.

    20" Heretic Studios LITE Bar Installed on CBI Moab 2.0 Front Bumper

    IMG_5505_zpse4d555e2_d9afc3b16869a4f150d5600e7172369a02844074.jpg

    (2) 4" Heretic Studio LITE Bars Installed as reverse lights on Prinsu Design Studio Toprac

    IMG_5507_zps39b53b8f_3657835c0f58216f04e0df975b4ce9f4393f1527.jpg

    IMG_5508_zpsc8609f6b_cfde107b3f1fb63a587d495af2fed44927810765.jpg

    Amazon LED Spot Work Lamp Installed on the ceiling of Snugtop XV as a work lamp/camplight.

    IMG_5509_zps7cc6a2e4_9ff7cdebfce56cc44121cab973244b9867f80037.jpg

    Switched out the standard crossbars for HD Black anodized on my toprac and added torx hardware

    IMG_5511_zps974ddbe4_197075cb0863eff8d8451f44ee235af0c6ce3e96.jpg

    New battery terminals with extra connection points for all my accessories

    IMG_5512_zps6cb18610_2416dc3b9765c8a2e68f7d21fab1713dc64a4759.jpg

    IMG_5513_zps8fd84077_c4d09a19696556a603ed870c270cf104a0bdcab9.jpg

    Auxiliary fuse panel installed under hood for accessories near the front of the truck.
    I also have one of these behind the back seats that is hooked to my aux battery. This one is hooked to the main battery for now but will eventually be hooked the the aux. I just wanted a closer connection point for lights and accessories near the front of the vehicle.

    IMG_5518_zps77cda1b4_688b4e9632c144f634ad665d6c42da41a6ddd0ae.jpg
     
  15. Jan 27, 2015 at 8:03 AM
    #155
    zscott

    zscott [OP] Well-Known Member Vendor

    Joined:
    Jul 16, 2013
    Member:
    #108365
    Messages:
    3,742
    Gender:
    Male
    First Name:
    Zach
    Utah
    Vehicle:
    13 DCSB Off-Road 4x4
    Items that are coming soon or are installed but lack pictures.

    1. Blue Sea 12v flushmount outlet for bed of truck.
    2. PrInSu Design Studios 1/4" Aluminum Light Duty IFS Skid Plate
    3. Toyota OEM Bedmat
    4. ARB CKMA12 Compressor Installed behind rear seat.
    5. Cobra 1000 Watt inverter installed behind rear seat with faceplate extended to back
    of center console.
    6. PrInSu Design Studio Full Basket Kit installed on Toprac.
    7. CB Radio Install
    8. CBI Moab 2.0 Headlight hoops addition.
    9. Rocker Switch install near cup holder behind shift lever for aux lighting.
    10. SPC Light Racing Upper Ball Joint Replacement.
    11. Full Detail to get this thing cleaned up.
    12. Amber Lens cover on Heretic Studio 30" LITE bar mounted to PrInSu Design Studio Cabrac.
     
    Last edited: Jan 27, 2015
  16. Jan 27, 2015 at 8:07 AM
    #156
    Hendy

    Hendy Scoundrel

    Joined:
    Sep 27, 2013
    Member:
    #113337
    Messages:
    118
    Gender:
    Male
    First Name:
    Jeff
    Utah
    Vehicle:
    2012 MGM DCSB TRD Off-Road
    See my build thread!
    Nice setup!
     
  17. Jan 27, 2015 at 8:08 AM
    #157
    zscott

    zscott [OP] Well-Known Member Vendor

    Joined:
    Jul 16, 2013
    Member:
    #108365
    Messages:
    3,742
    Gender:
    Male
    First Name:
    Zach
    Utah
    Vehicle:
    13 DCSB Off-Road 4x4
    Thanks, its coming along! This spring and summer it is going to see a lot of trail time!
     
  18. Jan 27, 2015 at 10:52 AM
    #158
    Cohbsteq

    Cohbsteq Hood Rat

    Joined:
    Oct 27, 2013
    Member:
    #115350
    Messages:
    4,317
    Gender:
    Male
    First Name:
    Jacob
    SL,UT
    Vehicle:
    02 Supercharged 4x4
    Pretty much stock with some crap welded to it.
    where did u get the wire for ur fuse panel set p, ive been searching everywhere for mine haha
     
  19. Jan 27, 2015 at 10:59 AM
    #159
    zscott

    zscott [OP] Well-Known Member Vendor

    Joined:
    Jul 16, 2013
    Member:
    #108365
    Messages:
    3,742
    Gender:
    Male
    First Name:
    Zach
    Utah
    Vehicle:
    13 DCSB Off-Road 4x4
    The 14 gauge for my accessories I got from Amazon. 100' spools. The heavy stuff was left over from when I installed my national luna power pack. The power pack comes with like 24' cables I only used 16' or so and had some left for a few other projects. This was the last bit of it.

    You could go buy a decent set of jumper cables and cut them up into pieces to do it too. Just wake sure they are the right gauge for what you want.
     
  20. Jan 31, 2015 at 8:58 AM
    #160
    zscott

    zscott [OP] Well-Known Member Vendor

    Joined:
    Jul 16, 2013
    Member:
    #108365
    Messages:
    3,742
    Gender:
    Male
    First Name:
    Zach
    Utah
    Vehicle:
    13 DCSB Off-Road 4x4
    Swapped out the stock fog lights for some LED pods I used to have on CBI ditch light brackets. As much as the CBI brackets are a great product I never really saw a benefit from the lights in that location. They aways seemed to glare off the hood more than add to the light output in front of and to the sides of the vehicle. And then there was the issue of the stock antenna. The lights would glare off that too which was annoying. So I picked up some of the h11 extensions from Amazon.

    Extensions I used

    They aren't the best and were a little looser than I would like but work fine. I just added some electrical tape and zip ties to make sure they didn't come apart.

    Here are some pictures of the basic steps.

    Expose the wires from the LED pods you want to use.

    IMG_5523_zps9e48a55e_d6e71572fd3bb2b650162c02bb07328357be9577.jpg

    Cut the extensions in half (you will want the female end)

    IMG_5522_zpsfd3f0ee1_bcdb4718798f43baab22d109d4ed2f70ba96d2b9.jpg

    Use some splice connectors and shrink tube to connect them

    IMG_5525_zps998c234c_f64b483e579f47fb2ae08e316763a36d22e10628.jpg

    Finished product

    IMG_5526_zps3a4692f2_dfede7d6dcf01e7f009b672ce3cd1ddb09e78bf7.jpg

    Install on the truck (In my case they mounted perfectly to the CBI Moab 2.0 front bumper with no Modifications

    IMG_5527_zps820265d2_45719188033135901dfbcdcce9d292e7f022ffe9.jpg
     
To Top