1. Welcome to Tacoma World!

    You are currently viewing as a guest! To get full-access, you need to register for a FREE account.

    As a registered member, you’ll be able to:
    • Participate in all Tacoma discussion topics
    • Communicate privately with other Tacoma owners from around the world
    • Post your own photos in our Members Gallery
    • Access all special features of the site

Fati's Tacoma

Discussion in '1st Gen. Builds (1995-2004)' started by Fati Tacoma, Jul 16, 2012.

  1. Jul 16, 2012 at 7:22 AM
    #1
    Fati Tacoma

    Fati Tacoma [OP] Well-Known Member

    Joined:
    Apr 25, 2010
    Member:
    #35969
    Messages:
    70
    Gender:
    Male
    Tacoma World! How's it going? I posted this up on TTORA's Garage but wanted feed back so I'm putting it up here as well. Welcome to my build.


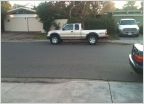
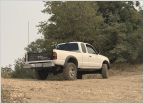
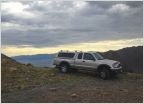
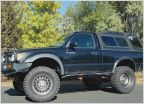
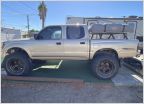
    The truck is a 2003 Tacoma TRD SR5 4x4, Manual with the 3.4L V6 and towing package. The previous owner put a 2in body lift and 1in diff drop on. They are still on.

    Here she sits about 2 months after purchase (no work yet)
    602566_622604274411_1799665672_n_1d32e3a5ba62e65e3241d4a687a920af89dc8f32.jpg

    Since the picture, the following work has been done (and I got the pics to prove it)

    Deck Plate Mod w/K&N (HERE)
    All Pro Rock Sliders (HERE)
    Custom Equipment Mount (HERE)
    Cadillac Alternator Swap (best 40 bucks I've spent) (HERE)
    Bose speakers, 6 (got em for free, figured why not)
    1200lb Clutch and Flywheel (only work I did not do, out of town...)

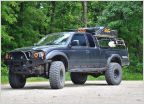
    Current:
    428786_622602927111_69898585_n_eb2364c527d62bddd7795ccfc5e5cbadb25c9575.jpg
    I'll get a cleaner picture eventually...

    I love wrenching and have big plans for this truck. The last project was really my motivation to start this build thread. I'll keep it going if you guys like what you see. End Game for the truck: LONG TRAVEL.

    Ok enough build up, time for the build pictures!
     
  2. Jul 16, 2012 at 7:23 AM
    #2
    Fati Tacoma

    Fati Tacoma [OP] Well-Known Member

    Joined:
    Apr 25, 2010
    Member:
    #35969
    Messages:
    70
    Gender:
    Male
    DECK PLATE MOD:
    very helpful write I followed can be found here http://www.trdoffroad.com/articles/deckplate/index.php

    575739_622100818341_1675060840_n_16dc8752ac33f38988d20252b8c9236e7fbf59e2.jpg
    The painters tape gives you something to write on. I used a dremel to cut it out.

    523879_622100868241_319809949_n_487d78ea27e2dab7f5de79990cee84accf9e4018.jpg
    Ruff cut *TAKE NOTE* As seen here I did not take out the MAF senor :xsmash: Don't do that. Mine worked after but I had to use floss to clean it

    557074_622100908161_572290559_n_a5ab811f9aa8439914468cd1e55604c13a208a5a.jpg
    Cleaned up

    417768_622100943091_733928991_n_6cf27ac342f6c5831b1bf59cfdc06ac2cdc9063d.jpg
    I used a razor blade to clean up a lot of the burrs on the inside. Kind of a pain in the ass but you want to get all that crap out of there, no burrs.

    563516_622100997981_1252923278_n_0a94f35232ad83cc66b612eb8a54a4ce61701a79.jpg

    376784_622101082811_431765296_n_6db6aa4dd1c335519229a14a3c62dfc30ad1ab42.jpg
    Silicone the holes. Honestly, I went heavy with the stuff but did not get a picture of it all. I whipped away (or cut after drying) the excess. I wanted to make sure I had a good seal with the cap ON.

    561412_622101127721_754136018_n_d47abc85351796d6a649e178a87e9c4d71dd0049.jpg
    480394_622101152671_273208547_n_377e00b3f277b47f938058bf74c24b073c29c295.jpg
    Finished Product.
     
  3. Jul 16, 2012 at 7:25 AM
    #3
    Fati Tacoma

    Fati Tacoma [OP] Well-Known Member

    Joined:
    Apr 25, 2010
    Member:
    #35969
    Messages:
    70
    Gender:
    Male
    ALL-PRO ROCK SLIDERS.

    First let me say this is a great product.

    I painted these with a can of bedliner I picked up from Autozone. It was a kit for about 60 bucks. I wouldn't paint my whole bed in the stuff but for armor and GRIP, it works great.

    382505_622101297381_1008946834_n_04f485c835fe8efd242cdb6b24aee856683b5a3b.jpg
    Ok so we have some rust build up. I firmly believe the key to any good paint job is prep so all the rust goes. I used a Craftsman rotary sander with 60 grit on as much of it as I could. The rest, I hand sanded... :banghead:

    582230_622101317341_1144264213_n_1f4be457eaab7f997e200f1ae25743ec8bc935cd.jpg
    545072_622101262451_1926428354_n_fa35f00451cde9eaba76dfaa8b3013b0b25a0826.jpg
    after all the sanding there was still some rust that I could not get. So I coated the whole thing in Naval Jelly rust remover. I let it sit for about 15 minutes then wiped it off with some soap and water. The above 2 pictures are right after.

    After the water dried I immediately used Rustoleum Auto Primer. I used 2 cans on each slider which was about 3 coats. Alas, I forgot to take a picture after the primer.

    The kit I bought came with a 4 inch paint roller (of sorts...) and a brush. If you have this kit and want the below effect, ONLY use the brush. Below is finished product
    293732_622101367241_533499020_n_756da98911d1202612ca551a857ef56e5916becd.jpg
    [​IMG]
    382466_622101422131_2109095021_n_903786a413beb01704189ff2e91b58c967542d96.jpg
    I put four coats total on and still have a ton of the stuff left over. In between coats 20-30 mins, I would use the brush DRY to kind of flatten out the paint as it kind of bubbles while it dries.
     
  4. Jul 16, 2012 at 7:26 AM
    #4
    Fati Tacoma

    Fati Tacoma [OP] Well-Known Member

    Joined:
    Apr 25, 2010
    Member:
    #35969
    Messages:
    70
    Gender:
    Male
    CUSTOM EQUIPMENT MOUNT:

    So I decided that I was tired of my dash cluttered with my GPS and XM radio. I also had a PA system controller that was mounted under the glove box and hard as hell to reach as the driver.

    I was influenced by heavily by Barlowrs's Yaesu 8900r mount (GREAT build) and wanted to be able to do something similar but with more equipment options.

    Here is Barlowrs's Yaesu 8900r mount :http://www.tacomaworld.com/forum/2n...-06-taco-expo-build-thread-2.html#post1429365.

    First I took a 1x1 square steel tube and split it down the center with a circular saw and metal cutting wheel. I made two length wise cuts to get about a 1cm lip on each side of the piece. I then mocked them up in the cab
    575829_622099910161_641200857_n_1cdf7f7ac89a21740d1c265d2ba8e3d128d776db.jpg
    As you can see I've bent them to match the slop of the roof. Basically, bend a little check, bend a little check...

    295344_622099835311_720765661_n_ba1c0f701cde3b19cdf8911f98fb04c710587835.jpg
    I chose the factory holes for the rear view mirror up front to mount to.

    295382_622099890201_1783642452_n_af991bc739b0f3619daf0042505804cb968ea1b4.jpg
    for the back I put bolts through the two factory holes on either side of the dome light. One of these holes has a clip for the wire to the dome light. I ripped out the clip...

    563889_622606100751_984398277_n_c112a43f4db3cc6efd503e2732b6b6d001d2beed.jpg
    599563_622606130691_390203611_n_04569705d627eb3bf7d72f4de2b2ad65e1fa0edb.jpg
    I then made support cross bars

    406059_622606185581_1407296080_n_a50a5395d6bda51ce7b584f58318755e99a4f71e.jpg
    I used a bit of epoxy and ziptied the cross brackets to the two main bars.

    578673_622605486981_889802451_n_048fee1f169466315b62bfa78a05821a3517f339.jpg
    Which allowed me to take it out and weld it exactly how I had it mocked up in the cab.

    426794_622605731491_393176700_n_90f9f172a256496c851c764ce1dde2863f2dbcba.jpg
    Welded.

    580854_622605966021_1118047617_n_fb8bcc2aa0c7dbd33885be4321f902a7fe08db32.jpg
    179907_622605631691_721607968_n_33d0ad6521a04ad45e6693d294dbeaa52ebc86c8.jpg
    599873_622605551851_499490812_n_21986c7420e93978b0f9e31e519ec08a2e6544f8.jpg
    Better view of the bend

    375639_622606220511_855004644_n_737c5c09d6211142be18c2250e252500ec1516da.jpg
    Ground down all the ruff edges and burrs. You can also see the holes for the XM and PA mount in this photo. The GPS did not get added until the and as I was waiting for the mount to come in the mail while I built this.

    402798_622588116791_1748568799_n_80e6fa6687402880ff04cc32fadca88decf8df30.jpg
    Again used 60 grit and rotary sander to prep for paint.

    Edit1_162c1e71952c0d1b59e9e89fb8d34e106951697b.jpg
    Paint and marked for brackets

    Edit2_6191efd5f4e570ad05a2e19b159c1d50f6b919f2.jpg
    Brackets added.

    At this point, I want to get into the wiring involved in this mod. The PA System (BLK, RED, GRN, GRN) was fairly easy. I did need about 2 more feet of wiring so I soldered and heat shrinked the extra footage.

    The Garmin and XM however were a problem. They drew power from standard cig lighter plugs. Those were certainly not long enough and had to go.

    I purchased a 1x2x4 project box from RadioShack and took the circuit boards out of the two cig plugs.

    560902_622174405871_1956515369_n_00ea948a7bf9e0bb1f6f1b422a17b5b9b2baf5b4.jpg
    Here you see just the XM circuit board. I had to unsolder, then resolder the power cable from this board to the XM radio. I then soldered in my own black and red wires onto the + and - terminals. You can kind of tell in this picture, I was able to keep the functionality of of the LED light.

    318740_622174515651_266730920_n_e4cefff766c7b2ae3b54993ccec05abad488b956.jpg
    Here you see both the XM and Garmin circuit boards. Again, I was able to incooperate the LED power light for the Garmin

    295418_622174570541_444751587_n_6692852218204a57ccc262a6db2943893b6af623.jpg
    603568_622174615451_1711935447_n_ab4cbb27f65efd54838da8805663b5804086bf2f.jpg
    LED for the XM (top) and Garmin (bottom). You can see how I routed the wires. After completion, I decided the wire routing sucked so I made a new box doing the same thing but routing the wires through the top of the box. I do not have a close up but you will see it in the next set of pictures.

    179564_622384784271_1036290704_n_da00432f2a2d3b403f34019dba63bd3e5a5d5af7.jpg
    FML. I did not want to do it, but realized the only was to route the wires to the firewall in a clean way was to take about the whole Fing dash.

    534480_622384564711_1610532172_n_07d3bf89b99a38a2ae0873e0c9a7d2d05259c485.jpg
    556014_622384644551_1368962975_n_feb8d2788f944b3f8791ec83c8a387019246fc5f.jpg
    What a damn mess. Clean it up!

    283744_622384594651_1806235469_n_2508365657aaa4ac268de5dc1909e01dc2f8cdff.jpg
    428929_622384694451_799206921_n_561bba208c3db20056d6470735e5aa1eca976d3e.jpg
    You can see the second and final XM/GPS power box in this picture.

    All power wires are currently sitting idle in my engine bay. I will be fabing a custom fuse block (again similar to Barlowrs build, THANKS MAN!) later to give power to the devices. (I'm waiting on parts)

    Onward...

    539628_622588206611_79347646_n_44cf36bfea33ff4668570a9a4a40b6b89ffe04e1.jpg
    Final check before Point of No Return... Cutting into the headliner :saw: As you can see I still have room to add a few more peripherals, I like options!

    8032_622588316391_391011169_n_50a067ca4169308f49c6510e8990a1d8792f2f74.jpg
    529491_622588271481_1062247922_n_046e542b871dc56b0000f8daed03e7a132ebac4a.jpg
    556412_622694992611_1621535083_n_2cb8e3dff778b7c17c324c33f244caead820191f.jpg
    600020_622694907781_387558077_n_79f95d6a9ab1e19ae32c29613ef64449417d0178.jpg
    295425_622695616361_1850016651_n_f6f2932c5479c20c8e04ec0208327841b8fd83b2.jpg
    DONE. For now.
     
  5. Jul 16, 2012 at 7:27 AM
    #5
    Fati Tacoma

    Fati Tacoma [OP] Well-Known Member

    Joined:
    Apr 25, 2010
    Member:
    #35969
    Messages:
    70
    Gender:
    Male
    Next up will be...

    528089_622101861251_681652812_n_730ef789614a5afa35a99382778f84e8f5df9897.jpg

    Cadillac Alternator Swap. I actually have already installed this but I will be beefing up the wiring in order to accommodate the new fuse block and heavier draw. I'll probably start working on it this Thursday and have some pics up by the weekend

    So far though I've had the alternator in for about 2 months and have had ZERO issues. I also wired it so that the 'no charge' dash warning light still functions. Ill be sure to take detailed pictures of the wiring as that was the hardest part of this swap.
     
  6. Jul 16, 2012 at 11:52 AM
    #6
    ilove_taco_ma

    ilove_taco_ma Well-Known Member

    Joined:
    Jun 13, 2010
    Member:
    #38877
    Messages:
    585
    Gender:
    Male
    fresno, california
    Vehicle:
    95 tacoma 4wd LX
    nothing, all stock expect got a OE replacement air filter K&N.
    love the mod of the roof.
     
  7. Jul 16, 2012 at 12:05 PM
    #7
    SupraT

    SupraT Tacoma Lover

    Joined:
    Feb 26, 2010
    Member:
    #32148
    Messages:
    2,515
    Gender:
    Male
    First Name:
    Tony
    Columbia Falls
    Vehicle:
    98 TRD SR5 4x4
    3" Lift Three leaf add and Bilstin 5100"s in back and Donahoe coilovers in front, Tinted Windows, Blackened parking light, tinted brake lights, clear bumper lights, Blacked out turn signals, AVS vent visors, Electric Fan mod, K&N CAI
    Yeah the roof mod gives me some ideas. Nice build so far
     
  8. Jul 16, 2012 at 3:31 PM
    #8
    Fati Tacoma

    Fati Tacoma [OP] Well-Known Member

    Joined:
    Apr 25, 2010
    Member:
    #35969
    Messages:
    70
    Gender:
    Male
    Thanks guys. It's all about the exchange of ideas SupraT.
     
  9. Mar 1, 2014 at 8:15 PM
    #9
    JoshuaKai

    JoshuaKai New Member

    Joined:
    Feb 13, 2014
    Member:
    #122968
    Messages:
    1
    Gender:
    Male
    First Name:
    Kai
    Hawaii, Oregon
    Vehicle:
    03 4x4 v6 tacoma
    6inch lift, work in progress…
    How do you get the cloth off of the ceiling? do you have to cut it? and how do you get it back on? Awesome build!
     
  10. Dec 9, 2014 at 4:59 AM
    #10
    Fati Tacoma

    Fati Tacoma [OP] Well-Known Member

    Joined:
    Apr 25, 2010
    Member:
    #35969
    Messages:
    70
    Gender:
    Male
    No need to cut it. once you remove all the plastic pieces, lights, hooks, etc you can just pull it off. Just be careful its actually a piece of fiberboard with carpet and insulation glued to it. So if you bend it, you'll crease it
     
  11. Dec 12, 2014 at 9:26 AM
    #11
    Fati Tacoma

    Fati Tacoma [OP] Well-Known Member

    Joined:
    Apr 25, 2010
    Member:
    #35969
    Messages:
    70
    Gender:
    Male
    Going to be doing a big project over this weekend and next. Using Monstaliner for the interior tub and filling up all cavities in the cab with 2-part polyurethane foam. Also will be doing a couple other minor modifications as I go. Here's all the supplies I will be using and the start of preparing the interior. Ill be uploading more stuff as I go. This weekend the goal is to get all the foam in. For now, enjoy the teaser photos.

    Supplies:

    photo3_add4ba68ef505cede2488a67c61015b0ab516ccb.jpg

    photo4_a8308c4b01330c61cae990815119a66ec29a819e.jpg

    Initial Prep:

    photo1_e36804e4bb49ff88ce0e5f5d8147b611ad3fed29.jpg

    photo2_d67f47adb80a66f83e158e491480a5c601d1127f.jpg

    Molds for the speaker boxes and all seat belt mechanisms:

    photo21_f927db3fa8ec1f219461b4bfb4f440fc3169887e.jpg

    photo11_9e24135fae6eb9f2fbb1121d3f157a5e771d5413.jpg
     
    Last edited: Dec 12, 2014

Products Discussed in

To Top