1. Welcome to Tacoma World!

    You are currently viewing as a guest! To get full-access, you need to register for a FREE account.

    As a registered member, you’ll be able to:
    • Participate in all Tacoma discussion topics
    • Communicate privately with other Tacoma owners from around the world
    • Post your own photos in our Members Gallery
    • Access all special features of the site

Enigma8246's 2001 Tacoma SR5 Build Thread (SOLD)

Discussion in '1st Gen. Builds (1995-2004)' started by Enigma8246, Apr 23, 2014.

  1. Apr 23, 2014 at 7:21 AM
    #1
    Enigma8246

    Enigma8246 [OP] Well-Known Member

    Joined:
    Mar 25, 2014
    Member:
    #126209
    Messages:
    1,144
    Gender:
    Male
    First Name:
    Lee
    Central Arkansas
    Vehicle:
    2007 4Runner Limited 4WD V8
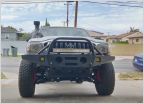
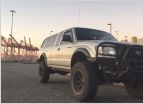
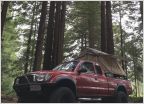
    This is the first time I've ever had a lot of parts to put on a vehicle at once rather than just putting things on as I can afford them so I figured I would do a build thread. I hope to be updating this quite a bit in the next few weeks but I just got back from a 14 month deployment so the house and all of our vehicles need a little TLC. Because of this, I haven't had much time to work on the truck yet.

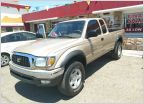
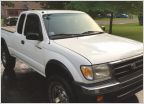
    About 2 months before I got home (Feb 14), I bought my '01 Tacoma Xtracab. It's a 4WD, V6 manual and I bought it bone stock except the radio head unit.


    I'd been wanting one of these for 3 or 4 years and every time I saw one I liked, I didn't have the money for it. Thanks to my deployment, I had the money for this one and it was too good of a deal to pass up. I bought it from my sister-in-law's boyfriend who was a shop supervisor at a dealership (Chevrolet?). He had already done a lot of maintenance on the truck including a new clutch master cylinder. He had Krank 17X9 wheels and Grabber AT2 tires on it and while they weren't terrible, I preferred the 5-star OEM wheels so I put those and some Goodyear Wrangler AT tires on.

    While I was deployed, I had a lot of time to figure out what direction I wanted to go with this truck. There is a lot of off-roading near where we live but it's mostly rock crawling or mudding. I didn't really want to go either of those routes but ultimately decided on trying to build an all-around off-road truck with an emphasis on overlanding. My wife has family in Phoenix and there are some really beautiful places not too far from us where you can drive old logging trails for days without seeing anyone else.

    As it sits now:

    [​IMG]

    See post 2 for a build sheet. Here's the general info:

    EXTERIOR:
    Century bed cap
    (Replaced with OEM) Diaz Fabrication emblem
    ruggedT 'SR5 Expedition' decals (Post #28)

    ENGINE & DRIVETRAIN:
    All OEM
    3.4L V6
    Manual transmission
    Stock Gearing
    Rear diff breather extension
    Safari Snorkel

    SUSPENSION:
    OME Nitrocharger front shocks with 882 springs (Post #8)
    Light Racing upper control arms (Post #8)
    OME Nitrocharger rear shocks and springs with AAL (Post #9)
    Crown Performance extended brake lines
    Self-fabricated BPV bracket

    WHEELS & TIRES:
    Toyota OEM '5-star' wheels
    Goodyear Wrangler A/T (265/75R16) (replaced at 5 years and 32k miles (dryrot, not tread wear))
    BFG KM3s (265/75R16)

    ARMOR:
    All-Pro front bumper
    All-Pro IFS skidplates
    CBI rear bumper
    CBI DOM sliders
    BAMF rear diff skidplate

    LIGHTING:
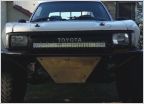
    (REMOVED & REPLACED) 40" Zeus Lighting dual color light bar (Post #34)
    (X2) Rigid Industries R2-46's w/ amber cover
    iJDMtoy.com Toyota OEM-style amber LED fog lights (Posts #19 & #20)
    Star DLXT reverse lights (Posts #7, #19 & #20)
    Coupe Concepts 3rd brake light pulse module (bed cap 3rd brake light)
    40" low profile LED bar for bed cap light (Posts #28, #33 & #35)

    COMMS:
    Cobra 18WSXTII CB with Radio Shack Magnetic Antenna (Post #17)

    INTERIOR:
    Hard-wired 12v outlet in XtraCab space for ARB fridge (Post #19)
    Weather-Tech floor mats

    RECOVERY:
    Warn ZEON-10S w/ Factor 55 Pro-link (Post #14)
    Warn recovery kit
    Hi-Lift Xtreme 48" jack with 'Wabbit's Foot' and slider adapter
    MAXSA traction mats

    MISC:
    PIAA dual tone horn (to make it sound like a truck instead of my DD Civic)
    Go-bag (Post #4)
    Weather-Tech window visors
    ARB 37qt fridge/freezer
    Custom locking Hi-Lift bed mount
     
    Last edited: Mar 18, 2021
  2. Apr 23, 2014 at 7:22 AM
    #2
    Enigma8246

    Enigma8246 [OP] Well-Known Member

    Joined:
    Mar 25, 2014
    Member:
    #126209
    Messages:
    1,144
    Gender:
    Male
    First Name:
    Lee
    Central Arkansas
    Vehicle:
    2007 4Runner Limited 4WD V8
    MAINTENANCE AND MODS

    2014.04.17
    168,155
    Goodyear Wrangler A/T (265/75R16)

    2014.04.21
    168,356
    Mobil 1 Full Syn Oil, Bosch Oil Filter, STP Engine Air Filter

    2014.05.10 (Post #8)
    169,285
    OME Front Shocks & 882 Springs
    Light Racing Upper Control Arms

    2014.05.12
    169,294
    Crown Performance Extended SS Brake Lines

    2014.05.16
    169,447
    CBI Rock Sliders w/ Tread Grip
    Trail Gear Rear Frame Reinforcement

    2014.05.30 (Post #9)
    169,734
    OME Dakar Leaf Springs, Add-a-Leaf & Nitrocharger Struts

    2014.06.17
    169,784
    CVJ Remanufactured CV Axles
    NAPA Lower Ball Joints (replaced with OEM 2014.07.03 due to knocking sounds)
    NAPA Outer Tie Rods
    NAPA Sway Bar End Links (destroyed originals when removing due to rust)

    2014.06.19
    169,784
    CBI Off Road Outback 1.0 Rear Bumper

    2014.06.21
    169,816
    AllPro Front Bumper
    Warn ZEON 10-S (Post #14)
    4" LED Fog Lights

    2014.06.25
    169,854
    LSPV Relocation Kit
    BAMF Rear Diff Skid

    2014.07.03
    169,986
    OEM Lower Ball Joints (Both sides)

    2014.07.17
    170,912
    Snorkel and Rear Diff Breather Extension

    2014.07.19
    170,943
    Changed Left Front Diff Output Needle Bearing to East Coast Gear Supply Bushing

    2014.09.06 (Post #17)
    Cobra 18WSXTII CB with Radio Shack Magnetic Antenna

    2014.10.13 (Post #21)
    173,165
    NAPA Radiator & Radiator Hoses
    OEM Water Pump
    OEM Hose from Water Pump to Trans Cooler
    OEM Thermostat
    OEM Timing Belt, Timing Belt Pulley & Tensioner
    OEM Idler Pulley
    OEM Power Steering, A/C, & Alternator Belts

    2014.10.26
    174,074
    Bosch Oil Filter & Castrol Full Synthetic Oil

    2014.11.27
    NAPA Bed Mat

    2014.12.20 (Post #34)
    Zeus Lighting 40" Dual Color Light Bar

    2015.02.25
    177,292
    NAPA Throttle Position Sensor (replaced with OEM 2016.05.06 due to hesitation issues)

    2015.04.12
    178,118
    NAPA Power Steering Pump

    2015.06.05
    179,882
    OEM Filter and 5.5 Qt Castrol Full Synthetic Oil

    2015.11.01
    184,356
    Duralast Platinum AGM Battery

    2015.11.10
    Windshield Gasket and Rust Repair

    2016.04.01 (Post #40)
    187,573
    OEM Valve Cover Gaskets
    OEM PCV Valve
    OEM Spark Plugs & Spark Plug Wires
    OEM Intake Manifold Gaskets

    2016.04.02
    187,584
    Bosch Long Life Filter and 5.5 Qt Castrol Full Synthetic Oil

    2016.04.08
    187,686
    NAPA Fuel Filter

    2016.04.09
    187,722
    Denso Coil Packs (all 3)

    2016.04.21
    187,811
    OEM PCV Hose & Grommet

    2016.04.23
    187,818
    Denso Downstream O2 Sensor

    2016.05.02
    187,896
    Denso Upstream O2 Sensor

    2016.05.06
    187,941
    OEM Throttle Position Sensor

    2016.05.17
    188,089
    Refurbished NAPA Steering Rack & Bushings (Replaced 2019.11.08 under warranty)
    NAPA Power Steering Hoses
    OEM Front Differential Right Seal

    2016.05.28
    188,629
    STP Engine Air Filter

    2017.04.14
    194,823
    Bosch Premium Oil Filter and Castrol Full Synthetic 5W-30
    Bosch Icon Wiper Blades

    2017.04.29
    195,326
    Aisin Pressure Plate
    Seco Clutch
    Luk Flywheel
    Nachi Throwout Bearing
    Pilot Bearing
    OEM Slave Cylinder
    OEM Rear Main Seal

    2018.05.05
    198,753
    Bosch Premium Filter and 5.5 Qt Castrol Full Synthetic Oil
    Fram Extra Guard Engine Air Filter

    2019.04.04
    200,484
    BFG KM3 Tires (265/75R16)

    2019.06.07
    201,224
    Bosch Premium Filter and 5.5 Qt Castrol Full Synthetic Oil

    2019.07.22
    201,517
    Odyssey Battery

    2019.11.08
    201,742
    New NAPA Steering Rack & Bushings
    Upgraded SPC upper ball joints to greaseable model.

    2021.04.04
    205,549
    STP Extended Life Filter and 5.5 Qt Castrol Full Synthetic Oil


    NEED TO INSTALL:


    PLANNED FOR FUTURE:
     
    Last edited: Apr 6, 2021
  3. Apr 24, 2014 at 7:29 PM
    #3
    Enigma8246

    Enigma8246 [OP] Well-Known Member

    Joined:
    Mar 25, 2014
    Member:
    #126209
    Messages:
    1,144
    Gender:
    Male
    First Name:
    Lee
    Central Arkansas
    Vehicle:
    2007 4Runner Limited 4WD V8
    TRIPS:
    2014.08.30: Hot Springs ORV Park, Arkansas (Post #16)

    2014.11.01: Hot Springs ORV Park, Arkansas (Posts #31 & #32)

    2015.12.11: Soldier's Pass and Broken Arrow in Sedona, Arizona (in a Heep (Post #38))

    2016.05.19-21: High Water Mark Trail, Arkansas (highlights in Post #41, all pictures here)

    2016.11.10: Ozark National Forest, Arkansas (Post #42)

    2017.10.20-21: NSO Rendezvous in the Ozarks (Post #44)

    2018.04.28-29: NSO Bonfire Rendezvous (Post #48)
     
    Last edited: Apr 29, 2018
  4. Apr 25, 2014 at 8:47 AM
    #4
    Enigma8246

    Enigma8246 [OP] Well-Known Member

    Joined:
    Mar 25, 2014
    Member:
    #126209
    Messages:
    1,144
    Gender:
    Male
    First Name:
    Lee
    Central Arkansas
    Vehicle:
    2007 4Runner Limited 4WD V8
    I also wanted to share this. When I deployed I really liked that all of the vehicles had go-bags. In a contingency environment, these usually consisted of ammo and some MRE's. While I don't need 500 rounds of ammo at home and my day-to-day routine doesn't take me to areas where I would need this kit, I still like to be able to take spontaneous off-road trips and I feel more comfortable doing that with this kit. If the vehicle has a failure or gets stuck and is not recoverable, I have more than enough supplies to get to help. I put two of these together, one for my truck and one for my wife’s vehicle.

    [​IMG]

    Right to left, top to bottom:
    .30 cal Feeder Bag from First Spear (discontinued)
    Gerber Myth Field Dress Kit
    Goal Zero Solar & Hand Crank Flashlight
    Sawyer Life Straw
    Datrex 3600 Calorie Food Bar
    2L of Water
    Sunto Compass
    2 Mylar Blankets
    Stormproof Matches
    100 ft of Paracord on a Spool Tool w/ Bic Lighter
    Pocket Chainsaw
    Basic Fishing Kit in Altoids Tin

    Since this picture I've added some Baddest Bee Fire Fuses. They're made from beeswax so they supposedly don't have a shelf life like Wet Fire.

    Everything fits perfectly into the feeder bag with the exception of the 2 liters of water. I’m planning to run a circuit under the seat of each vehicle to keep the flashlight charged at all times.
     
    Last edited: Dec 17, 2015
  5. Apr 25, 2014 at 9:40 AM
    #5
    Archer550

    Archer550 Well-Known Member

    Joined:
    Jan 30, 2012
    Member:
    #71799
    Messages:
    90
    Gender:
    Male
    Winnipeg
    Vehicle:
    04 xtracab TRD MT
    ARB for now
    Do you have winter where you are?
    If so I would throw a candle and fuel tabs into that kit.
    Excited to see your build progresses. Is your cbi rear a swing out?
     
  6. Apr 25, 2014 at 3:43 PM
    #6
    Enigma8246

    Enigma8246 [OP] Well-Known Member

    Joined:
    Mar 25, 2014
    Member:
    #126209
    Messages:
    1,144
    Gender:
    Male
    First Name:
    Lee
    Central Arkansas
    Vehicle:
    2007 4Runner Limited 4WD V8
    Arkansas winters are pretty mild except for the last couple of years. That might not be a bad idea.

    The CBI bumper does not have a swing-out. I considered it but decided that at this point I'd rather be able to put my canoe in the bed. If I add a camper shell and roof rack capable of holding the canoe I may add a swing-out. I got tracking info that it made it to Dallas today so once I get it in and make a few modifications to it and the front bumper, I'll be dropping everything off at the powdercoater.

    I put in an order today for a couple of miscellaneous non-reuseable parts for the timing belt and water pump and hope to be doing that next weekend.
     
  7. Apr 30, 2014 at 8:37 PM
    #7
    Enigma8246

    Enigma8246 [OP] Well-Known Member

    Joined:
    Mar 25, 2014
    Member:
    #126209
    Messages:
    1,144
    Gender:
    Male
    First Name:
    Lee
    Central Arkansas
    Vehicle:
    2007 4Runner Limited 4WD V8
    Since I ordered a bumper that has an integrated tow hitch, I wanted a surface mounted reverse light that wouldn't require removing too much material from the bumper. I wanted something that was low profile and preferably LED. I did not want something that hung down below the bumper and could potentially be ripped off or damaged by a rock or brush. What I came up with are Star DLXT strobes for emergency vehicles. They can be programmed to use different patterns, including a solid burn. They're definitely not as bright as Rigids or other popular lights but they're surface mount, low profile and should be plenty bright for what I need.

    http://www.911lights.com/products/dlxt

    I had a little trouble deciding where I would mount these on the bumper. If I mounted them outside the shackle mount, they would throw the light where I needed it but would be vulnerable to backing into trees, swiped fenders, etc. If I positioned them inside the shackle mounts, they would be more protected but I would likely have a hot spot in the center and not much light on the edges where my mirrors can actually see. The solution was to mount them outside the shackle mounts and have tabs welded above and below the lights to protect them. Here it is mocked up:

    [​IMG]

    I intended to take more pictures of this but my camera battery died after the first two pictures. I'm going to try to get the tabs welded on Saturday along with some expanded metal that I cut out for the 4" fog light openings in the All-Pro front bumper. After that, the bumpers, rock sliders and skid plates will be going to the powder coater.

    Friday night my wife graduates college and Saturday we'll probably be spending time with family that will be in town for graduation. Sunday I'm hoping to do the engine tune-up, timing belt, water pump and radiator.
     
    Last edited: May 1, 2014
  8. May 12, 2014 at 4:11 PM
    #8
    Enigma8246

    Enigma8246 [OP] Well-Known Member

    Joined:
    Mar 25, 2014
    Member:
    #126209
    Messages:
    1,144
    Gender:
    Male
    First Name:
    Lee
    Central Arkansas
    Vehicle:
    2007 4Runner Limited 4WD V8
    I had intended to not do anything on the truck before doing the tune-up. However, the engine is running well and this past weekend my dad was available to give me a hand with the suspension so I decided to tackle that first. Unfortunately, by the time we finished the front, storms were moving in and we weren't able to do the back. We installed OME nitrocharger shocks with 882 springs and Light Racing upper control arms. Here's the front finished:

    [​IMG]

    Removing the upper ball joints was a bit of a challenge but we managed to get them. We found the best way to remove them was to separate the ball joint from the upper control arm with a three jaw puller, then cut the bolt off of the ball joint with a grinder, put the fitting from the ball joint press on top and press the ball joint fitting with the three jaw puller. Pressing the fittings in for the new ball joints was actually a lot easier than I expected thanks to a setup my dad rigged up:

    [​IMG]

    The upper portion is just a grade 8 washer that protects the press fitting from getting marred by the impact socket. The lower portion is a receiving sleeve from a ball joint press and two grade 8 washers. The upper and lower portions are connected by a grade 8 bolt with the nut on top. We cleaned the opening, greased the press fitting, then heated the spindle and hit the nut with an impact. Each side pressed in in about 30 seconds.

    Today I took it in for an alignment and had the shop install the Crown Performance extended stainless steel brake lines that we didn't get around to Saturday. This is the third vehicle I've taken there for an alignment in the past month so they installed them for practically nothing.

    I'm hoping to pick up the bumpers, skid plates and sliders from the powder coater later this week. It will be a few weeks before I'm able to get the rear suspension installed. I really don't want to put the heavier bumpers on until the suspension is completely done and i get the rear frame reinforcement welded on.

    Slowly but surely...
     
    Last edited: May 12, 2014
  9. Jun 3, 2014 at 11:59 AM
    #9
    Enigma8246

    Enigma8246 [OP] Well-Known Member

    Joined:
    Mar 25, 2014
    Member:
    #126209
    Messages:
    1,144
    Gender:
    Male
    First Name:
    Lee
    Central Arkansas
    Vehicle:
    2007 4Runner Limited 4WD V8
    I managed to get most of the rear suspension installed this past Friday. I say 'most' because I was missing one of the bushings for the rear shocks. I sent Cruiser Outfitters an email Sunday and Monday they sent me one 2nd day air. Can't say enough good things about those guys.

    I went ahead and installed the add-a-leaf (AAL) to prevent sagging when we loadup for camping trips or if I have to do any hauling and especially wanted this because the rear bumper from CBI is considerably heavier than the factory bumper.

    Unfortunately my next two weekends are tied up and it will be a while before I get to do much more work on it. I'm really wanting to get the bumpers mounted but have noticed one of the CV axles leaking grease. Since I don't know how old they are and I plan on being off-road in isolated areas, I ordered three (one spare) CV axles with high-angle boots from CVJ Axles. I also picked up a couple of lower ball joints from Napa due to one boot being torn and the other being extremely dry-rotted. This is next on my list so I can get my core back on two of the CV axles.
     
    Last edited: Aug 13, 2014
  10. Jun 25, 2014 at 10:11 AM
    #10
    Enigma8246

    Enigma8246 [OP] Well-Known Member

    Joined:
    Mar 25, 2014
    Member:
    #126209
    Messages:
    1,144
    Gender:
    Male
    First Name:
    Lee
    Central Arkansas
    Vehicle:
    2007 4Runner Limited 4WD V8
    I have gotten a lot done on the truck but have not had a chance to update. I got the CV axles replaced and wanted to do the ball joints at the same time. Good thing I got them because the left one was trashed. I wound up having to remove the sway bar end links to get clearance to remove the CV axles and stripped the allen wrench inserts due to the amount of rust. Then I noticed that the boots on my tie rod end links were trashed too so I went ahead and replaced those. The result is that about the only suspension part on this truck that has NOT been replaced is the sway bar. Since replacing the CV axles, I have a very slow drip of gear oil from my front diff where it meets the left CV axle and am planning on replacing the left seal sometime soon. Here’s what the wheel well of the bad CV axle looked like when I removed the wheel. This picture really doesn’t do it justice. I found grease all the way at the back of the rock slider:

    [​IMG]

    After getting that done, I went ahead and installed the CBI rear bumper. I don’t have any pictures right now but will try to update later. I still need to mount and wire the auxiliary reverse lights. I considered doing this before mounting the bumper but decided not to since I wasn’t sure if I would wind up having to re-route wiring once the bumper was on the vehicle. I haven’t driven it much since I got the rear bumper on but it looks great and has features that, while not necessarily innovative, I couldn’t find all together on any other bumper.

    Right now I’m working on getting the front bumper mounted. I was making pretty good progress until I discovered that All-Pro left the lower valence out of my shipment. I called yesterday and they said they would get it out that day along with another small part for free. I was extremely pleased with this, especially because it’s been so long since I placed my order. I ordered my bumper and skid plates from them probably 5-6 months ago while I was still deployed. Good to see there are still some companies out there with good customer service.

    I’ve been working on the truck somewhat obsessively lately because I’m trying to get it ready in time for an upcoming trip on which I hope to do some trail riding. I may wind up installing the lower valence for the front bumper w/o paint just for the trip and having it powder coated when we get back. I also have a snorkel that should be in today and will be picking up fuel line to relocate the rear diff breather. I don't know if I'll have time to get those installed before the trip but if I'm waiting for the parts from All-Pro, I may have time.


    Last edited: Sep 30, 2014
  11. Jun 28, 2014 at 2:46 PM
    #11
    Enigma8246

    Enigma8246 [OP] Well-Known Member

    Joined:
    Mar 25, 2014
    Member:
    #126209
    Messages:
    1,144
    Gender:
    Male
    First Name:
    Lee
    Central Arkansas
    Vehicle:
    2007 4Runner Limited 4WD V8
    I was planning on wiring the winch and doing the CV axle seal today but had a knock in my suspension. I couldn't figure out what it was so I took it to the dealership. Turns out the new ball joint that I just installed is bad. Unfortunately I'll be doing it again. Fortunately NAPA is going to back their part and they aren't too hard to change on these trucks.
     
  12. Jul 23, 2014 at 6:12 AM
    #12
    Enigma8246

    Enigma8246 [OP] Well-Known Member

    Joined:
    Mar 25, 2014
    Member:
    #126209
    Messages:
    1,144
    Gender:
    Male
    First Name:
    Lee
    Central Arkansas
    Vehicle:
    2007 4Runner Limited 4WD V8
    After replacing the ball joint with yet another NAPA ball joint, I still had my suspension knock. Just to be sure, I replaced both lower ball joints with Toyota OEM but STILL had the suspension knock.

    After taking our trip I took the truck to 3 different shops, including the dealership, to figure out what the knock was. One of them finally diagnosed it as play in the left CV axle allowing the CV axle hub to 'slap' the differential when going over bumps. I replaced the differential needle bearing with a bushing from East Coast Gear Supply this past weekend and haven't heard the sound again. Hopefully that issue is resolved.

    I did get to do some minor trail riding on our trip but since I was the only 4WD there, the tractor was broken down and my winch wasn't wired yet, I didn't want to get into anything too hairy.

    [​IMG]
     
    Last edited: Aug 18, 2014
  13. Aug 7, 2014 at 6:48 PM
    #13
    Enigma8246

    Enigma8246 [OP] Well-Known Member

    Joined:
    Mar 25, 2014
    Member:
    #126209
    Messages:
    1,144
    Gender:
    Male
    First Name:
    Lee
    Central Arkansas
    Vehicle:
    2007 4Runner Limited 4WD V8
    Put the truck to use tonight. I am hauling some firewood and an engine hoist to my dad's and so far have been very pleased with the OME suspension. I'm definitely glad I put the AAL in though.

    [​IMG]
     
    Last edited: Jun 26, 2015
  14. Aug 13, 2014 at 9:01 AM
    #14
    Enigma8246

    Enigma8246 [OP] Well-Known Member

    Joined:
    Mar 25, 2014
    Member:
    #126209
    Messages:
    1,144
    Gender:
    Male
    First Name:
    Lee
    Central Arkansas
    Vehicle:
    2007 4Runner Limited 4WD V8
    I finally had some time this past weekend to get the winch working. I managed to cram a Warn ZEON 10-S into my All-Pro bumper but had to either trim my grille or relocate the solenoid. I really wanted to avoid trimming the grille so I wound up mounting the solenoid remotely. My truck does not have cruise control which left a large open spot on the passenger side of my engine bay. This was just a little further away from the winch than the relocation kit allowed so I wound up having to extend the cables by another 18" or so using 6 connectors similar to these:

    [​IMG]

    You can see 3 of them just outside the solenoid in this picture. The red wire you see is the 12V outlet that I installed in my xtracab space for my ARB fridge:

    [​IMG]

    Because the space was open but not completely empty, I wound up having to mount a plate to raise the solenoid up. First, I used a dremel to square up three existing holes that were for the cruise control so I could use carriage bolts. I wanted to use these to prevent sharp edges in the wheel well.

    [​IMG]

    Then I used 3 pieces of ~2" metal tubing to raise the aluminum plate above what I think I remember was the ignition control. The aluminum plate mounted via the carriage bolts and the solenoid mounts to the plate.

    [​IMG]

    The wires were then run from the solenoid, under the air box, through the headlight opening and to the winch. I cut a piece of fuel line open and wrapped the headlight opening to prevent the cable from lying against the sharp edge.

    [​IMG]

    And here's a shot of the bumper with winch and prolink:

    [​IMG]
     
    Last edited: Jun 26, 2015
  15. Aug 13, 2014 at 12:19 PM
    #15
    Hockeyman90

    Hockeyman90 Well-Known Member

    Joined:
    Jul 15, 2012
    Member:
    #82711
    Messages:
    308
    Gender:
    Male
    First Name:
    Kaleb
    Craig, Co
    Vehicle:
    2001 Gold SR5
    Custom front bumper, bed liner, 33" wrangler duratracs on 16" ATX series Mojave rims, OME 3" suspension, 882 coils, custom rear bumper
    Very nice :thumbsup:
     
  16. Aug 30, 2014 at 7:51 PM
    #16
    Enigma8246

    Enigma8246 [OP] Well-Known Member

    Joined:
    Mar 25, 2014
    Member:
    #126209
    Messages:
    1,144
    Gender:
    Male
    First Name:
    Lee
    Central Arkansas
    Vehicle:
    2007 4Runner Limited 4WD V8
    Got out to Hot Springs today with my godfather and his two sons. This was the first time I've had the truck off road. I'm on 32's so we were only able to do 1's and 2's with the exception of one 3 and I was very pleased with the way it performed. There were only two spots that were a little concerning but got out without any damage. One spot was due to the length of the truck and a tight turn and the other was due to having to turn around in a tricky spot after my godfather 'misplaced' the map.

    [​IMG]

    [​IMG]

    [​IMG]
     
    Last edited: Jun 26, 2015
  17. Sep 22, 2014 at 11:52 AM
    #17
    Enigma8246

    Enigma8246 [OP] Well-Known Member

    Joined:
    Mar 25, 2014
    Member:
    #126209
    Messages:
    1,144
    Gender:
    Male
    First Name:
    Lee
    Central Arkansas
    Vehicle:
    2007 4Runner Limited 4WD V8
    I finally got around to installing my CB. I went with the Cobra 18WXSTII. I know this is a basic setup but I liked that it mounted in-dash and had an integrated front-facing speaker. It mounts perfectly in the dash and looks pretty much factory. Excuse the partially disassembled dash. I'm still working on wiring and switches for my reverse, fog and roof lights.

    [​IMG]

    I really need to find somewhere to mount my mic but it's not hurting anything there and I want to wait until I get my lighting wiring done.

    I ran the antenna wire through the wiring plug under the passenger seat, along the top of the mounts for my sliders and up the gap between the cab and the bed. I realize this isn't an optimal place to mount the antenna but I don't think the cable for the antenna that I have is long enough to reach the center of the roof and I didn't want the wire hanging down. I was also concerned about how well the magnet would stay on the thin roof metal with low-hanging limbs. I made a 3/8" thick mounting plate welded to piece of small angle. I made sure this was grounded to the bed well so the magnetic antenna would have a good ground plane.

    [​IMG]

    I haven't had it tuned yet because I'm debating on putting on a taller antenna to try to compensate for the cheap CB and less than optimal mounting location before having everything tuned. Even without a tune, I've had some fun with it listening to truckers on the interstate on long drives.

    Here's the only one who I think enjoys the truck as much as I do:

    [​IMG]

    She's not too crazy about the antenna location because it's in her way when she sticks her head out the side but she's adapting.

    After seeing how easy the radio area was to get to, I would like to replace my radio head unit at some point. I really don't like it but the previous owner had it put in and it works well enough for now.
     
    Last edited: Jun 26, 2015
  18. Sep 22, 2014 at 12:36 PM
    #18
    Enigma8246

    Enigma8246 [OP] Well-Known Member

    Joined:
    Mar 25, 2014
    Member:
    #126209
    Messages:
    1,144
    Gender:
    Male
    First Name:
    Lee
    Central Arkansas
    Vehicle:
    2007 4Runner Limited 4WD V8
    I'm not sure why I'm just now seeing this but thanks!
     
  19. Oct 5, 2014 at 1:01 PM
    #19
    Enigma8246

    Enigma8246 [OP] Well-Known Member

    Joined:
    Mar 25, 2014
    Member:
    #126209
    Messages:
    1,144
    Gender:
    Male
    First Name:
    Lee
    Central Arkansas
    Vehicle:
    2007 4Runner Limited 4WD V8
    I finally got some time to work on wiring the lights for the truck. Yesterday I got the fog lights, reverse lights and roof lights wired. I used DPDT switches. These switches have two on positions and one off position. In one on position, the lights come on (accessory power must be on). In the other on position, the lights are controlled by splices with other lights. If all three switches are in this position, the fog lights will come on with the low beams, the roof light will come on with the high beams and the aux reverse lights will come on with the factory reverse lights. On the fog and roof lights I used the switches to activate relays. The reverse lights draw less than 1 amp though (measured about 750 mA) so I did not use a relay for them. They are wired to ACC power for one switch position and directly to the reverse light splice for the other.

    Here's the JEGS fuse box that I mounted to the firewall. I'm pretty pleased with it:

    [​IMG]

    Wiring in the engine bay:

    [​IMG]

    Once I get the LED bar mounted and wires run I'll put everything in wire loom. Here are the GAMA electronics DPDT switches that I'm also very happy with:

    [​IMG]

    They can be a little intimidating if you don't have experience with wiring but this was a cool challenge for me and I wound up getting my lights wired exactly the way I wanted them.

    I drove through the ECP at the LRAFB with wires hanging out of my dash and center console. I'm honestly surprised I didn't get searched. The guard did give my dash a second glance though.

    [​IMG]

    The LED light bar that I have is capable of putting out white and amber light. I liked this but wasn't too fond of the switches included in the wiring harness that came with the bar. The switch that came with the kit was SPST so it wasn't capable of being wired to be controlled by either the switch or another light. I also wanted all of the switches to match. The switch that came with the wiring harness to select color also looked cheap and didn't really have a good way to mount. I wound up with this setup:

    [​IMG]

    The DPDT switch control sends power, when appropriate, to the 1/4" toggle switch to the right. This is an ON/ON switch that does not turn off and it directs power to one relay or the other depending on it's position. Down is white, up is amber.

    The DPDT switches also have an LED light on both sides of the switch. I wired it so that the amber light is on any time the accessory power is on. This is so I can see them at night. The red switch comes on any time it's respective light is on. This serves as an indicator light to me so I'm not driving around during the daytime with my roof lights or aux reverse lights on.

    And finally, here is the 12V outlet that I wired up in the xtracab space. I wanted an outlet that was always on for my ARB refrigerator. I added a rocker switch with an LED indicator to prevent any parasitic drain or if I want to turn the fridge off without unplugging it.

    [​IMG]

    I'll try to get some pictures of the fog and reverse lights tonight. However, when I went to mount my light bar, I found that the brackets I have were for radius bars only and wouldn't mount my straight bar without it hitting the roof. I'm currently trying to decide whether I want to order some or fabricate them. I did put it on the roof and wire it up temporarily just to see the output and check function of the switches and it is awesome. The switches work better than the wiring harness that came with it and I can't wait to get it mounted.
     
    Last edited: Jun 26, 2015
    SwampYota likes this.
  20. Oct 5, 2014 at 6:38 PM
    #20
    Enigma8246

    Enigma8246 [OP] Well-Known Member

    Joined:
    Mar 25, 2014
    Member:
    #126209
    Messages:
    1,144
    Gender:
    Male
    First Name:
    Lee
    Central Arkansas
    Vehicle:
    2007 4Runner Limited 4WD V8
    I took a couple of pictures tonight. I have edited these a little to try to get them closer to the actual output and they're both pretty accurate.

    Fogs:

    [​IMG]

    Reverse:

    [​IMG]

    The reverse lights are not as bright as Rigid's or something similar but they meet my needs.
     
    Last edited: Jun 26, 2015

Products Discussed in

To Top