1. Welcome to Tacoma World!

    You are currently viewing as a guest! To get full-access, you need to register for a FREE account.

    As a registered member, you’ll be able to:
    • Participate in all Tacoma discussion topics
    • Communicate privately with other Tacoma owners from around the world
    • Post your own photos in our Members Gallery
    • Access all special features of the site

Nate's build

Discussion in '2nd Gen. Builds (2005-2015)' started by Nate87, Oct 2, 2014.

  1. Mar 25, 2015 at 7:40 PM
    #141
    Nate87

    Nate87 [OP] Well-Known Member

    Joined:
    May 7, 2013
    Member:
    #103748
    Messages:
    751
    Gender:
    Male
    First Name:
    Nate
    CONUS
    Vehicle:
    2013 AC TRD OR
    Hell, might as well knock it out all at the same time! Towers, flip, springs and shocks. DO IT! :boink: Don't think about it, just do it.

    And to think, I planned to keep the truck stock till I met the evils of TacomaWorld:rolleyes:
     
  2. Mar 25, 2015 at 7:44 PM
    #142
    NC15TRD

    NC15TRD Well-Known Member

    Joined:
    Sep 14, 2010
    Member:
    #43212
    Messages:
    6,517
    Gender:
    Male
    First Name:
    Nick
    PA
    Vehicle:
    16 Sierra SLT All Terrain
    Readylift, Truxedo, Husky Liners, Carven
    Already have Dakars and b110 shocks in prep for shackle flip. Just don't think it'd be worth it to me to relocate too. I always keep it in the back of my mind down the road I may decide to trade the truck off for a different one and want it to be somewhat capable of being stock again
     
  3. Mar 25, 2015 at 7:59 PM
    #143
    Nate87

    Nate87 [OP] Well-Known Member

    Joined:
    May 7, 2013
    Member:
    #103748
    Messages:
    751
    Gender:
    Male
    First Name:
    Nate
    CONUS
    Vehicle:
    2013 AC TRD OR
    HAHA! That's EXACTLY what my plan was too..... till it wasn't :facepalm: TW ruined me.

    Wanted to keep everything reversible just in case but it's too late for that now. Ohh well.
     
  4. Mar 30, 2015 at 7:52 AM
    #144
    Crom

    Crom Super-Deluxe Member

    Joined:
    Jun 22, 2009
    Member:
    #18782
    Messages:
    9,634
    Gender:
    Male
    First Name:
    Nick
    San Diego, CA
    Vehicle:
    2009 4x4 DCSB Camp Supreme
    Millions
    Nate, you've done some amazing work to your truck and your photos and explanations are great! Love what you've done. :thumbsup:
     
  5. Mar 30, 2015 at 6:53 PM
    #145
    Nate87

    Nate87 [OP] Well-Known Member

    Joined:
    May 7, 2013
    Member:
    #103748
    Messages:
    751
    Gender:
    Male
    First Name:
    Nate
    CONUS
    Vehicle:
    2013 AC TRD OR
    Thanks man. I like what you are doing to your truck! The dual battery and ARB fridge in the rear really help for those longer road/camping trips. I've been looking at solar also. That'll have to wait till the roof rack goes on to figure out dimensions on that. I have this foldable/portable 62W panel for now and will eventually integrate it as well as a fixed panel. It folds up pretty nice. Great for when you are in the field.
    [​IMG]

    I'm really trying to get better at taking decent photos while doing installs. I just always happen to do work on the truck in the middle of the night with horrible lighting and take blurry pictures. That, and you never feel like stopping what you're doing, finding phone, removing gloves then taking photos. I'll try to get better at it or even use a real camera instead of my old phone.

    Nate
     
  6. Mar 30, 2015 at 10:24 PM
    #146
    jerent66

    jerent66 Well-Known Member

    Joined:
    May 1, 2012
    Member:
    #78038
    Messages:
    176
    Gender:
    Male
    Santa Cruz County
    Vehicle:
    TRD OFFROAD 6SPD MT 4x4
    My top 3 favorite build on TW. Beautiful truck
     
  7. Mar 31, 2015 at 11:37 AM
    #147
    Iggy

    Iggy Well-Known Member

    Joined:
    Feb 2, 2012
    Member:
    #71971
    Messages:
    4,016
    Gender:
    Male
    Northern CA
    Vehicle:
    09 4x4 Off-Road Access Cab
    Check out the build
    Subb'd.

    My "inspiration" thread.
     
  8. Mar 31, 2015 at 11:12 PM
    #148
    Nate87

    Nate87 [OP] Well-Known Member

    Joined:
    May 7, 2013
    Member:
    #103748
    Messages:
    751
    Gender:
    Male
    First Name:
    Nate
    CONUS
    Vehicle:
    2013 AC TRD OR
    Really?! Sweet! Thanks guys.

    ----
    And speaking of crappy, blurry night time install photos...
    Time for the snorkel to go on. Mud was getting up in the intake since taking the liners out to fit the larger tires. Nothing super crazy, but also not something I wanted to leave that way. This was back before the Sema show before ARB released the new 2nd gen model specific snorkel. I contacted Cruiser Outfitters for the Safari Snorkel. It's made for a different truck but modified to fit the 2nd Gen Tacos.

    I followed the detailed instructions HERE to help along the way. Many of members have posted their process and results to help anyone looking to do the same install.

    Tape up the template the provide for a starting point.
    [​IMG]

    Then use a center spring loaded punch to mark then drill pilot holes
    [​IMG]

    Take your time and elongate the intake opening as needed as well as drill out the mounting holes
    [​IMG]

    Only after checking fitment multiple times and tightening down the bolts to ensure final placement of the snorkel should you drill the A pillar holes for the bracket
    [​IMG]

    I ended up cutting and reusing the factory intake tubing and just used a few different hose clamps and tubes to get the fit just right
    From right to left would be:
    Plastic snorkel body with trimmed outlet, trimmed supplied 90 degree bend rubber connector, 30 degree 3" tubing, 3" rubber connector, straight 3" tubing, can't remember but I believe next is a larger than 3" hardware supply rubber connector to the cut factory intake tubing. You can eliminate a few of those if you were to have a longer end after the 3" 30 degree bend. That's just what I had on hand at the time.
    [​IMG]
    Factory intake holes were plugged to make it a sealed intake path. Put your hand over the snorkel intake tube and the engine will cut out. Sounds legitimate to me.

    For those looking to do the same, I tried many different degree bends for the intake tube connector and found that a 30 degree bend would be ideal to get the angle just right to fit and line up with the cut factory intake tubing. That's 3" tubing by the way. Like many others, I ended up cutting quite a bit of the snorkel plastic off as well as the rubber hose to be able to line up with the factory fender well hole and not have to cut it open larger. Unfortunately I don't have any photos of that or during the process but similar installs can be found in the linked thread above.

    I did sand/shave/file some plastic off the snorkel body to get a better fit to the fender. It helped to conform it and lessen the gaps a little to not look out of place. I'll try and get some photos of where it was filed down next time I have the snorkel off. Off the top of me head, it was the very forward bottom edge and the rear end before it bends upward up the A pillar. I just tightened the bolts and saw where it was rubbing then removed and filed away.

    I also used some color matched touch up paint you can get at the dealership on all edges that were drilled or cut before final snorkel install. I'll try and get more detailed photos up later. I will say that it was a pain in my ass to install that thing. I've read many had an easy install that was quick and smooth. Mine definitely wasn't like that. Lots of installing, measuring, uninstalling, cutting, reinstalling ect.. Did that a few dozen times before it was just right. You don't want to cut too much off the screw yourself and be able to go back. Take your time.

    A few with it on
    60ac1b3b-5e6b-4625-88d2-cff83349aaad_zps_089a1ca01bf85d9394635b6baebf4c4f73966a91.jpg

    [​IMG]

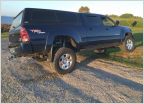
    And testing travel and clearance again
    [​IMG]

    Gotta keep an eye on that parking brake cable. It was super tight and rubbing the inside of the tire here. Might take off that bracket and do some sort of spring retention. We'll see.
    [​IMG]

    That's it for now. More to follow...

    Nate
     
  9. Mar 31, 2015 at 11:20 PM
    #149
    stihlfoursix_0

    stihlfoursix_0 Well-Known Member

    Joined:
    Mar 11, 2010
    Member:
    #33022
    Messages:
    187
    Gender:
    Male
    Idaho
    Vehicle:
    05 DC TRD OR
    this is such a rad truck!
     
  10. Apr 1, 2015 at 5:00 AM
    #150
    jztacoma

    jztacoma Trust me I’m an Engineer

    Joined:
    Sep 13, 2013
    Member:
    #112426
    Messages:
    2,355
    Gender:
    Male
    First Name:
    John
    Upstate NY
    Vehicle:
    2024 Tacoma TRD Offroad
    Semi Stockish
    Looking good!! :thumbsup: I am having the same problem with the e-brake cable. Probably going to have to disconnect the bracket
     
  11. Apr 1, 2015 at 10:35 AM
    #151
    dakotasyota

    dakotasyota Just a Fringe of the Ging in your Minge

    Joined:
    Jun 11, 2013
    Member:
    #106099
    Messages:
    7,938
    Gender:
    Male
    First Name:
    Dakota
    Ellensburg, WA
    Vehicle:
    06 Access Cab, Manual, V6, 4x4, TRD Off-Road
    Total Chaos +2 LT w/ 2.5 x 8 Kings, 700 lb coils, Chevy 63s, BAMF Shock relocation, 12" King Smoothies, Locker Anytime Mod, 5% Tint All Around, 4xInnovations full skids, Custom Made Rock Sliders, 4xInnovations HC Rear Bumper w/ Tire Carrier, SOS Original Plate 2 Front Bumper, 130 w KC Slimlites, Homertaco Raptor Grill, Bestop Supertop, Smittybilt 9500 lb winch, Flowmaster 40 series, JVC deck w/ 12" Rockford Fosgate T1 in custom box, and lots more!!
    Damn you nate! Love that snorkel and da flex :drool:
     
  12. Apr 2, 2015 at 2:39 AM
    #152
    XPOTRON

    XPOTRON Is LIVE on the GRID.

    Joined:
    Feb 1, 2011
    Member:
    #50358
    Messages:
    6,808
    Gender:
    Male
    First Name:
    Stefen
    Chandler, Arizona
    Vehicle:
    IG: @ST3F3NS
    DUROBUMPS Use TRON10 for 10% Off & Free Shipping
    Damn. Looking good man!:thumbsup:
     
  13. Apr 2, 2015 at 6:46 AM
    #153
    MattB77

    MattB77 Well-Known Member

    Joined:
    Jul 4, 2013
    Member:
    #107600
    Messages:
    367
    Gender:
    Male
    First Name:
    Matt
    OR
    Vehicle:
    2013 AC TRD Sport
    Sick build dude !
     
  14. Apr 2, 2015 at 6:51 PM
    #154
    Nate87

    Nate87 [OP] Well-Known Member

    Joined:
    May 7, 2013
    Member:
    #103748
    Messages:
    751
    Gender:
    Male
    First Name:
    Nate
    CONUS
    Vehicle:
    2013 AC TRD OR
    Thanks gents! It's really coming together how I envisioned. Really glad I took the time to plan it out and do it right(in my eyes). What makes it worth it is when you walk away after parking and still look back to check it out :) That, and I enjoy working on cars and seeing the transformation after all the hard work. I've always had a project car to work on since high school. It's pretty relaxing turning wrenches. So the projects never end ;)

    I might be able to get a little more out of the rear with some different shackles/angles. We'll see. Been able to keep the rear planted while out wheeling so it'll stay like that for a bit.
    I've heard of guys doing that but wouldn't want to just let it dangle. I'd have to still retain it in some way.

    ----
    Now I need to figure out where to mount these. Any suggestions? Access cab space is pretty limited. I'd like to utilize unused/hidden spaces. Thinking about bolting underneath the bed somewhere to have a short run to my second battery location and extend the breathers up to the bed rail area. Might make a bracket to bolt manifold to compressor and hopefully make mounting easier.... Ain't nobody got time for that.
    [​IMG]
     
  15. Apr 2, 2015 at 8:48 PM
    #155
    Iggy

    Iggy Well-Known Member

    Joined:
    Feb 2, 2012
    Member:
    #71971
    Messages:
    4,016
    Gender:
    Male
    Northern CA
    Vehicle:
    09 4x4 Off-Road Access Cab
    Check out the build
    Nate,

    That compressor is on my list too, and I've been thinking of places as well. I had one idea to put it in the engine bay on the passenger side, however I worry about the heat in that area.

    There's under the truck where the spare tire goes, but that also exposes it to the elements. My other idea was in a tall ammo can in front of the wheel well bolted down in the bed.

    How wide is it?
     
  16. Apr 2, 2015 at 9:42 PM
    #156
    Nate87

    Nate87 [OP] Well-Known Member

    Joined:
    May 7, 2013
    Member:
    #103748
    Messages:
    751
    Gender:
    Male
    First Name:
    Nate
    CONUS
    Vehicle:
    2013 AC TRD OR
    Iggy,
    Do you have a double cab or access? Can't really tell from your thread. But if double, guys have put it behind the rear seat.

    I've also thought about in that under hood spot. One member(mik4stlcards) here has pulled off the best example of that location I've seen HERE. I'd still need to mount the manifold and eventually run plumbing for an air tank in the rear so I'd like to keep it close to the future tank and second battery in the cab but that spot might end up being my best bet.

    I was thinking under the bed as far forward, near the cab, right above the drive shaft area. And just making a simple splash guard with sheet metal or something for rocks and some water. Being in SoCal we don't really worry about water, and from what I understand, these are really resilient to the elements as long as its not submerged while operating.

    The bulk of the compressor body is 11"W x 8"L x 4.5"H
    The wire stick out a little more though.
     
  17. Apr 2, 2015 at 10:08 PM
    #157
    Iggy

    Iggy Well-Known Member

    Joined:
    Feb 2, 2012
    Member:
    #71971
    Messages:
    4,016
    Gender:
    Male
    Northern CA
    Vehicle:
    09 4x4 Off-Road Access Cab
    Check out the build
    I have an access cab too. For a second I thought the same thing after seeing your wiring in the back. You only see that done on doubles.

    That is a sweet looking mount, since I don't have the ABS pump in that area I thought of mounting the ARB 1gal tank there with the compressor on top, but I wasn't sure if the unit was too big. It looks like that might work! The heat is still an issue, but you can probably run the manifolds to a cooler spot.

    The second idea is great and you can run the manifolds into the bed to keep them out of the rare water. Lastly, if you mount the tank make sure it's a position where you can drain it from time to time to make sure you don't build up water in the tank and send it off into the tires, or worse into a locker.
     
  18. Apr 2, 2015 at 10:11 PM
    #158
    BOWSandTACOS

    BOWSandTACOS Active Member

    Joined:
    Aug 1, 2013
    Member:
    #109556
    Messages:
    32
    Gender:
    Male
    First Name:
    Kasey
    Colorado Springs
    Vehicle:
    2009 Double Cab TRD-X
    ARB Front Bumper, IFS Lights: 2 Flood/1Spot, TRD FJ Cruiser Wheels Body Armor Rear Bumper, ARB On-Board Air, ARB Drawers hard mounted in bed, Mag-lite Mount, ARB Simpson III Tent
    Nice looking truck man!
     
  19. Apr 2, 2015 at 10:40 PM
    #159
    Nate87

    Nate87 [OP] Well-Known Member

    Joined:
    May 7, 2013
    Member:
    #103748
    Messages:
    751
    Gender:
    Male
    First Name:
    Nate
    CONUS
    Vehicle:
    2013 AC TRD OR
    Thanks man :cheers:
    Right on. Yeah, like I said, I'm trying to put things in unused space and that's one of the reasons why I went with the wiring back there vs under the hood.

    You are lucky! I have that smog pump there but might be able to relocate it. I'll have to look into that some more. As for the heat, I know compressors get pretty hot when on and the hotter electronics get the more resistance they have, but for how little it'd be used, it may not be a problem. Many other have them mounted under the hood without issue.

    As for the tank, I'm thinking where the spare tire used to be with drain orientated down. I'll have to look into water separators for that crap when it comes time for that.
     
  20. Apr 2, 2015 at 10:55 PM
    #160
    millertime89

    millertime89 Flatlander

    Joined:
    Oct 8, 2014
    Member:
    #139936
    Messages:
    1,619
    Gender:
    Male
    First Name:
    Erik
    Saskatchewan
    Vehicle:
    06 TRD Sport DCLB 4x4
    Yes sir
To Top