1. Welcome to Tacoma World!

    You are currently viewing as a guest! To get full-access, you need to register for a FREE account.

    As a registered member, you’ll be able to:
    • Participate in all Tacoma discussion topics
    • Communicate privately with other Tacoma owners from around the world
    • Post your own photos in our Members Gallery
    • Access all special features of the site

Igor: Double Cab 4x4. Frankenstein's Helper

Discussion in '1st Gen. Builds (1995-2004)' started by Blackdawg, Sep 8, 2015.

  1. Dec 28, 2016 at 4:01 PM
    #221
    Blackdawg

    Blackdawg [OP] Dr. Frankenstein

    Joined:
    Dec 31, 2010
    Member:
    #48500
    Messages:
    80,741
    Gender:
    Male
    First Name:
    Monte
    Wyoming/St. Louis
    Vehicle:
    The Trifecta of Taco's
    ALL OF THEM!...Then some more.
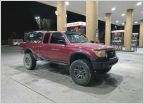
    Got this a day or so ago

    image.jpg

    $90 door handle to replace the one my brother finally put out of commison last week.

    Have a busy weekend planned:

    -New Door handle
    -New inner and outer Tie Rods
    -New Steering Rack bushings
    -Steering Tac mod

    And im going back to my OEM Brake booster and MC to see how it feels and then i'll have a wrap up on the Tundra brake mod over haul i did.

    Plenty to do!

    Also my new Ray10s should be here in 2-3 weeks! Super stoked for that!
     
  2. Dec 28, 2016 at 9:44 PM
    #222
    JBTacoma

    JBTacoma Well-Known Member

    Joined:
    Feb 16, 2015
    Member:
    #148844
    Messages:
    11,093
    Gender:
    Male
    First Name:
    Jeff
    Cullman Alabama
    Vehicle:
    2000 SR5, 2003 Double Cab and a Suzuki Samurai
    http://www.ebay.com/itm/95-04-Tacom...Left-Driver-L-/170897237740?fits=Model:Tacoma
     
    This site contains affiliate links for which the site may be compensated.
  3. Dec 28, 2016 at 9:46 PM
    #223
    Blackdawg

    Blackdawg [OP] Dr. Frankenstein

    Joined:
    Dec 31, 2010
    Member:
    #48500
    Messages:
    80,741
    Gender:
    Male
    First Name:
    Monte
    Wyoming/St. Louis
    Vehicle:
    The Trifecta of Taco's
    ALL OF THEM!...Then some more.
    This site contains affiliate links for which the site may be compensated.
    Glow_wanders likes this.
  4. Dec 29, 2016 at 4:51 PM
    #224
    Digiratus

    Digiratus Adventurer

    Joined:
    Mar 26, 2010
    Member:
    #34006
    Messages:
    22,981
    Gender:
    Male
    First Name:
    Mike
    Roaming the PNW
    Vehicle:
    The RedHead
    2002 XtraCab TRD 4x4 SCv6 AutoTrans With Lots of Mods ADS COs w/Compression Adjusters Camburg Uniball UCAs Whiteline Lower Control Arm Bushings Kartek 7" Limit Straps Plastics Guy Front Bumpstops Custom Alcan Springs +800 lbs +3" ADS 10" Stroke Triple Bypass w/Resi Rear Shocks Custom Rear Shock Relocate All-Pro U-bolt Flip w/Timbren Bumpstops 4.88 Nitro Gears ARB Front Locker ARB Twin Compressor Black 17x8 Konig Countersteer Type X 285/70r17 Falken A/T3w Gunmetal 16x8 SCS Ray10s 255/85r16 Maxxis Bighorns Limited Edition (Relentless) Elite Front Bumper Smittybilt X2O 10K Winch Diode Dynamics SS3 Sport Selective Yellow Fog Lights in the Bumper Diode Dynamics SS3 Pro 4,000 Kelvin SAE Driving Lights with Clear Lenses on the Bumper Morimoto D2S Projectors XB35 Ballasts + 4300K Bulbs Badland Sliders FrankenFab Tire Carrier Swingout bumper w/kitchen BudBuilt Front & Bellypan Skids BAMF Rear Diff Skid Dometic CFX 55im Fridge/Freezer Alpha II Hardshell RTT Badland Custom Bed Rack Denso 210-0461 105 amp alternator Dual Northstar 24F AGM batteries BlueSea 7622 ML-ACR Battery controller Peak DBI Dual Battery Voltage Monitor Magnuson MP62 Supercharger w/2.37" Pulley Haltech Elite 2000 Standalone ECU Denso 650cc Fuel Injectors Doug Thorley Headers Aeromotive Stealth 340 Fuel Pump TransGo A340F Reprogramming Shift Kit Magnaflow Hi-Flow CAT, Magnaflow 18" Muffler w/Vibrant Resonator 13WL Brake Calipers Braided Steel Brake Lines ScanGauge II OBDII Scanner Kenwood TM-71A Dual Band Ham Radio Larson 70CM/2M Antenna Uniden 520xl CB radio 3' Firestik Adjustable tip antenna Pioneer DEH-P9400BH HU Alpine Amps & Type R components (F) and coaxials (R) Wet Okole Seat Covers Weathertech Digital Liners Deck Plate Mod 1" Diff Drop Carrier Bearing Drop
    I'll be interested in hearing what you think after doing the steering column tack weld thing. I've considered doing it too.
     
  5. Dec 29, 2016 at 4:58 PM
    #225
    Blackdawg

    Blackdawg [OP] Dr. Frankenstein

    Joined:
    Dec 31, 2010
    Member:
    #48500
    Messages:
    80,741
    Gender:
    Male
    First Name:
    Monte
    Wyoming/St. Louis
    Vehicle:
    The Trifecta of Taco's
    ALL OF THEM!...Then some more.
    Yea me too. See how it feels.
     
  6. Dec 29, 2016 at 5:05 PM
    #226
    JBTacoma

    JBTacoma Well-Known Member

    Joined:
    Feb 16, 2015
    Member:
    #148844
    Messages:
    11,093
    Gender:
    Male
    First Name:
    Jeff
    Cullman Alabama
    Vehicle:
    2000 SR5, 2003 Double Cab and a Suzuki Samurai
    Used one on my 97 for six years, still good when I traded it. Hadn't heard about Others problems, OEM is good though.
     
    Blackdawg[QUOTED][OP] likes this.
  7. Dec 29, 2016 at 5:57 PM
    #227
    Digiratus

    Digiratus Adventurer

    Joined:
    Mar 26, 2010
    Member:
    #34006
    Messages:
    22,981
    Gender:
    Male
    First Name:
    Mike
    Roaming the PNW
    Vehicle:
    The RedHead
    2002 XtraCab TRD 4x4 SCv6 AutoTrans With Lots of Mods ADS COs w/Compression Adjusters Camburg Uniball UCAs Whiteline Lower Control Arm Bushings Kartek 7" Limit Straps Plastics Guy Front Bumpstops Custom Alcan Springs +800 lbs +3" ADS 10" Stroke Triple Bypass w/Resi Rear Shocks Custom Rear Shock Relocate All-Pro U-bolt Flip w/Timbren Bumpstops 4.88 Nitro Gears ARB Front Locker ARB Twin Compressor Black 17x8 Konig Countersteer Type X 285/70r17 Falken A/T3w Gunmetal 16x8 SCS Ray10s 255/85r16 Maxxis Bighorns Limited Edition (Relentless) Elite Front Bumper Smittybilt X2O 10K Winch Diode Dynamics SS3 Sport Selective Yellow Fog Lights in the Bumper Diode Dynamics SS3 Pro 4,000 Kelvin SAE Driving Lights with Clear Lenses on the Bumper Morimoto D2S Projectors XB35 Ballasts + 4300K Bulbs Badland Sliders FrankenFab Tire Carrier Swingout bumper w/kitchen BudBuilt Front & Bellypan Skids BAMF Rear Diff Skid Dometic CFX 55im Fridge/Freezer Alpha II Hardshell RTT Badland Custom Bed Rack Denso 210-0461 105 amp alternator Dual Northstar 24F AGM batteries BlueSea 7622 ML-ACR Battery controller Peak DBI Dual Battery Voltage Monitor Magnuson MP62 Supercharger w/2.37" Pulley Haltech Elite 2000 Standalone ECU Denso 650cc Fuel Injectors Doug Thorley Headers Aeromotive Stealth 340 Fuel Pump TransGo A340F Reprogramming Shift Kit Magnaflow Hi-Flow CAT, Magnaflow 18" Muffler w/Vibrant Resonator 13WL Brake Calipers Braided Steel Brake Lines ScanGauge II OBDII Scanner Kenwood TM-71A Dual Band Ham Radio Larson 70CM/2M Antenna Uniden 520xl CB radio 3' Firestik Adjustable tip antenna Pioneer DEH-P9400BH HU Alpine Amps & Type R components (F) and coaxials (R) Wet Okole Seat Covers Weathertech Digital Liners Deck Plate Mod 1" Diff Drop Carrier Bearing Drop
    Since you are doing the steering rack bushings at the same time, it may difficult to know how much difference the tack weld makes.
     
  8. Dec 29, 2016 at 5:59 PM
    #228
    Blackdawg

    Blackdawg [OP] Dr. Frankenstein

    Joined:
    Dec 31, 2010
    Member:
    #48500
    Messages:
    80,741
    Gender:
    Male
    First Name:
    Monte
    Wyoming/St. Louis
    Vehicle:
    The Trifecta of Taco's
    ALL OF THEM!...Then some more.
    True. Though when I did steering rack bushing on Frank...it did..nothing. Wasn't impressed.

    Everyone says this makes a huge difference.
     
  9. Dec 29, 2016 at 6:16 PM
    #229
    Digiratus

    Digiratus Adventurer

    Joined:
    Mar 26, 2010
    Member:
    #34006
    Messages:
    22,981
    Gender:
    Male
    First Name:
    Mike
    Roaming the PNW
    Vehicle:
    The RedHead
    2002 XtraCab TRD 4x4 SCv6 AutoTrans With Lots of Mods ADS COs w/Compression Adjusters Camburg Uniball UCAs Whiteline Lower Control Arm Bushings Kartek 7" Limit Straps Plastics Guy Front Bumpstops Custom Alcan Springs +800 lbs +3" ADS 10" Stroke Triple Bypass w/Resi Rear Shocks Custom Rear Shock Relocate All-Pro U-bolt Flip w/Timbren Bumpstops 4.88 Nitro Gears ARB Front Locker ARB Twin Compressor Black 17x8 Konig Countersteer Type X 285/70r17 Falken A/T3w Gunmetal 16x8 SCS Ray10s 255/85r16 Maxxis Bighorns Limited Edition (Relentless) Elite Front Bumper Smittybilt X2O 10K Winch Diode Dynamics SS3 Sport Selective Yellow Fog Lights in the Bumper Diode Dynamics SS3 Pro 4,000 Kelvin SAE Driving Lights with Clear Lenses on the Bumper Morimoto D2S Projectors XB35 Ballasts + 4300K Bulbs Badland Sliders FrankenFab Tire Carrier Swingout bumper w/kitchen BudBuilt Front & Bellypan Skids BAMF Rear Diff Skid Dometic CFX 55im Fridge/Freezer Alpha II Hardshell RTT Badland Custom Bed Rack Denso 210-0461 105 amp alternator Dual Northstar 24F AGM batteries BlueSea 7622 ML-ACR Battery controller Peak DBI Dual Battery Voltage Monitor Magnuson MP62 Supercharger w/2.37" Pulley Haltech Elite 2000 Standalone ECU Denso 650cc Fuel Injectors Doug Thorley Headers Aeromotive Stealth 340 Fuel Pump TransGo A340F Reprogramming Shift Kit Magnaflow Hi-Flow CAT, Magnaflow 18" Muffler w/Vibrant Resonator 13WL Brake Calipers Braided Steel Brake Lines ScanGauge II OBDII Scanner Kenwood TM-71A Dual Band Ham Radio Larson 70CM/2M Antenna Uniden 520xl CB radio 3' Firestik Adjustable tip antenna Pioneer DEH-P9400BH HU Alpine Amps & Type R components (F) and coaxials (R) Wet Okole Seat Covers Weathertech Digital Liners Deck Plate Mod 1" Diff Drop Carrier Bearing Drop
    When I did it on the redhead, it was definitely noticeable. It might be related to how bad the rubber ones were tho.

    edit: It may also be a fat versus skinny tire thing too.
     
  10. Dec 29, 2016 at 6:17 PM
    #230
    Blackdawg

    Blackdawg [OP] Dr. Frankenstein

    Joined:
    Dec 31, 2010
    Member:
    #48500
    Messages:
    80,741
    Gender:
    Male
    First Name:
    Monte
    Wyoming/St. Louis
    Vehicle:
    The Trifecta of Taco's
    ALL OF THEM!...Then some more.
    Yea true.

    I don't think mine are bad really. Just figured might as well now.
     
  11. Jan 4, 2017 at 12:06 PM
    #231
    rngr

    rngr Aix sponsa

    Joined:
    Jan 13, 2015
    Member:
    #146258
    Messages:
    9,244
    Gender:
    Male
    Vehicle:
    01 SR5 4x4 2.7L
    Very, very nice. Your attention to detail and step by step pics in your write-ups are second to none. :thumbsup:
     
    Blackdawg[OP] likes this.
  12. Jan 4, 2017 at 12:16 PM
    #232
    Blackdawg

    Blackdawg [OP] Dr. Frankenstein

    Joined:
    Dec 31, 2010
    Member:
    #48500
    Messages:
    80,741
    Gender:
    Male
    First Name:
    Monte
    Wyoming/St. Louis
    Vehicle:
    The Trifecta of Taco's
    ALL OF THEM!...Then some more.
    Thanks! I'm glad they are useful. Just want it to be helpful.
     
    rngr[QUOTED] likes this.
  13. Jan 7, 2017 at 7:44 PM
    #233
    SilverGhost

    SilverGhost Well-Known Member

    Joined:
    Sep 16, 2013
    Member:
    #112635
    Messages:
    8,709
    Gender:
    Male
    First Name:
    RayRay
    Reunion, Co
    Vehicle:
    02,03 some 04, it's complicated
    #junkyardparts
    :rockband: Because DC build :D sub
     
    Blackdawg[OP] likes this.
  14. Jan 7, 2017 at 8:08 PM
    #234
    Blackdawg

    Blackdawg [OP] Dr. Frankenstein

    Joined:
    Dec 31, 2010
    Member:
    #48500
    Messages:
    80,741
    Gender:
    Male
    First Name:
    Monte
    Wyoming/St. Louis
    Vehicle:
    The Trifecta of Taco's
    ALL OF THEM!...Then some more.
    Hell yea!
     
    SilverGhost[QUOTED] likes this.
  15. Jan 14, 2017 at 4:29 PM
    #235
    Blackdawg

    Blackdawg [OP] Dr. Frankenstein

    Joined:
    Dec 31, 2010
    Member:
    #48500
    Messages:
    80,741
    Gender:
    Male
    First Name:
    Monte
    Wyoming/St. Louis
    Vehicle:
    The Trifecta of Taco's
    ALL OF THEM!...Then some more.
    Tundra Brakes and Brake overhaul:

    So this is a tad overdue as I did most of this in September before my Utah trip. But I wasn't happy with the performance of it so I waited until i tweaked things to make it work how I wanted.

    What I did to Igors brakes:

    -Tundra 13wl Calipers and Rotors
    -Deleted the ABS front lines and controller
    -Deleted the OEM BPV and added a manual BPV
    -New steel brake lines Front and Rear
    -Experimented with Dual Diaphragm Booster and T100 1 1/16'' MC

    So lets get started.

    I gathered parts first ordering some Callahan Calipers from Ebay like these: http://www.ebay.com/itm/Front-Brake...UOIA-TUNDRA-/272213381146?hash=item3f612e901a

    And rotors from there too: http://www.ebay.com/itm/Front-Brake...2WD-4WD-4X4-/281697990693?hash=item4196823825

    Front SS lines from Wheelers: Those aren't the exact links i used but they are gone now. I just bought calipers and then the rotors and pads came together. This at the time was cheaper then buying all 3 at once from someone.

    I also bought a T100 Master Brake Cylinder from RockAuto: http://www.rockauto.com/en/moreinfo.php?pk=966315&cc=1278828&jsn=19

    I got a Dual Diaphram Tacoma Booster and all the NON ABS front brake lines from my good buddy Brett @BossFoss in Lander

    For the rear I went to Front Range Offroad to get a super nice Rear brake line and the manual BPV.

    Brake line: http://frontrangeoffroadfab.com/stainless-braided-brake-hoses/

    Manual BPV: http://frontrangeoffroadfab.com/proportioning-valve-kit/

    many parts :)

    [​IMG]TundraBrakes.jpg by Monte Nickles Photos, on Flickr

    Lets start simple and with the rear, or part of the rear anyways.

    I ripped out the stock BPV. Was pretty simple, just 4 bolts hold it to the frame rails and you have to undo the three brake lines. Two more down on the axle.

    [​IMG]ManyMods.jpg by Monte Nickles Photos, on Flickr

    After it's gone, looks like this

    [​IMG]TundraBrakes-2.jpg by Monte Nickles Photos, on Flickr

    From there i unbolted the brake line bracket to help remove the stock one. Plus it was horrible and i wanted to clean it and paint it.

    [​IMG]TundraBrakes-3.jpg by Monte Nickles Photos, on Flickr

    This is the small clip that holds on the brakes. Can be a bitch to get out as you'll see in the front. With the bracket it out was easy to pop off though.

    [​IMG]TundraBrakes-4.jpg by Monte Nickles Photos, on Flickr

    Stupid Midwest winters. Spent three out there and practically seems to have rusted half the frame away.

    [​IMG]TundraBrakes-5.jpg by Monte Nickles Photos, on Flickr

    Will clean this and paint it.

    [​IMG]TundraBrakes-6.jpg by Monte Nickles Photos, on Flickr

    After painting it I reinstalled it.

    [​IMG]TundraBrakes-48.jpg by Monte Nickles Photos, on Flickr

    You have to use the provided E clip on the back side and use the OEM clip on the front side to hold the new line in.

    Sucker is LONG. Can get them longer too. Very nice brake line and much longer then the one at Wheelers(19'' vs 25'').

    [​IMG]TundraBrakes-61.jpg by Monte Nickles Photos, on Flickr

    Lets do the front now.

    Pretty simple to take the calipers off. Just 3 bolts, one for the brake line and two mounting bolts.

    [​IMG]TundraBrakes-7.jpg by Monte Nickles Photos, on Flickr
    [​IMG]TundraBrakes-8.jpg by Monte Nickles Photos, on Flickr

    Quite a bit bigger.

    [​IMG]TundraBrakes-9.jpg by Monte Nickles Photos, on Flickr

    To get the rotor off, id suggest either a Hard plastic mallet, mayber a rubber or normal hammer and block of wood. Just smack the sucker till it pops off.

    [​IMG]TundraBrakes-10.jpg by Monte Nickles Photos, on Flickr

    Then set the new rotor on. I used two lugs to hold it on to place and suck it down.

    [​IMG]TundraBrakes-35.jpg by Monte Nickles Photos, on Flickr

    Here is my Wheelers front SS line. Nice quality. Its the Tacoma one, not the Tundra one.

    [​IMG]TundraBrakes-40.jpg by Monte Nickles Photos, on Flickr

    I cleaned off my Caliper bolts before reinstalling too.

    [​IMG]TundraBrakes-36.jpg by Monte Nickles Photos, on Flickr
    [​IMG]TundraBrakes-37.jpg by Monte Nickles Photos, on Flickr

    Bolted up the new calipers and started the brake line when i noticed this..

    [​IMG]TundraBrakes-30.jpg by Monte Nickles Photos, on Flickr

    Thats as tight as it goes too. Discouraged i check the other caliper and it was fine.

    [​IMG]TundraBrakes-29.jpg by Monte Nickles Photos, on Flickr

    The nipple on the inside of the caliper wasn't pushed far enough down in the bad one. Annoying.

    I contacted the seller on eBay and never heard back. NOT cool. Will have to replace it later. Probably go with the Powerstop ones.

    For now, i double stacked crush washers, not exactly a good thing but works for now.

    [​IMG]TundraBrakes-31.jpg by Monte Nickles Photos, on Flickr

    Then i noticed something else bad while doing the other side with the brake lines.

    [​IMG]TundraBrakes-42.jpg by Monte Nickles Photos, on Flickr

    That was way to close for comfort for me.

    So i swapped the lines and had them angle inwards.

    [​IMG]TundraBrakes-43.jpg by Monte Nickles Photos, on Flickr

    No problems now.

    [​IMG]TundraBrakes-44.jpg by Monte Nickles Photos, on Flickr

    Put the new hardware and brakes in

    [​IMG]TundraBrakes-38.jpg by Monte Nickles Photos, on Flickr
    [​IMG]TundraBrakes-39.jpg by Monte Nickles Photos, on Flickr

    This is how it goes together.

    [​IMG]TundraBrakes.jpg by Monte Nickles Photos, on Flickr

    Ahh done! Super easy.

    [​IMG]TundraBrakes-32.jpg by Monte Nickles Photos, on Flickr

    Not the hard part...

    Getting the top half down was a bitch to say the least. Main removing and reinstalling the hard lines was not fun.

    Started with the brake booster. Had to come out.

    [​IMG]TundraBrakes-5.jpg by Monte Nickles Photos, on Flickr

    Pretty simple really, just disconnect the two brake lines and undo the 4 bolts in the cab behind the brake pedal.

    [​IMG]TundraBrakes-6.jpg by Monte Nickles Photos, on Flickr

    Takes a little finagling but it will come out. And leaves you with this mass of brake lines.

    [​IMG]TundraBrakes-15.jpg by Monte Nickles Photos, on Flickr

    I then removed the hard lines from the soft lines by the front. Uses the same clip as the rear but I could not get mine out further then this.

    [​IMG]TundraBrakes-3.jpg by Monte Nickles Photos, on Flickr

    So dual vice grips came out.

    [​IMG]TundraBrakes-4.jpg by Monte Nickles Photos, on Flickr

    Somehow it worked and i could remove the line. PITA. Other side was much easier.

    The hard line to the driver side is short so once its undone from the lower area it comes right out. Same with the rear.

    The Passenger side is a long line that runs along the fire wall. If you have ABS you have 4 lines like this...

    [​IMG]TundraBrakes-16.jpg by Monte Nickles Photos, on Flickr

    Oh joy! Undo all the bolts of the clips holding them down.

    Then you have to undo them from the controller.

    [​IMG]TundraBrakes-22.jpg by Monte Nickles Photos, on Flickr
    [​IMG]TundraBrakes-23.jpg by Monte Nickles Photos, on Flickr

    At this point just remove the controller. Just a couple bolts and comes out. The wiring harness actually came off pretty easy.

    [​IMG]TundraBrakes-24.jpg by Monte Nickles Photos, on Flickr

    I guess that thing is worth some money. Maybe..ha

    Either way, now you have to somehow get the lines out. This takes time and lots of effort to get the around the motor and everything. But you can get them out..

    [​IMG]TundraBrakes-25.jpg by Monte Nickles Photos, on Flickr

    To be replaced with this.

    [​IMG]TundraBrakes-26.jpg by Monte Nickles Photos, on Flickr

    Almost funny how different it all is. Still a PITA to get the passenger side line in but not as bad. I just reused the clips from the 4 lines. Seems like it'll work just fine.

    Now it time to talke MC and Boosters.

    I have 3 MCs and two boosters. All are different, lets start with the MCs.

    From left to right:

    OEM 01-04 Tacoma 13/16'' bore 2 bolt flange
    OEM 96-00 Tacoma 1'' bore 4 bolt flange
    T100 95-97 Heavy Duty 1 1/16'' bore 4 bolt flange

    [​IMG]TundraBrakes-7.jpg by Monte Nickles Photos, on Flickr

    T100

    [​IMG]TundraBrakes-8.jpg by Monte Nickles Photos, on Flickr

    96-00 1'' Bore Tacoma

    [​IMG]TundraBrakes-9.jpg by Monte Nickles Photos, on Flickr

    01-04 13/16'' bore Tacoma

    [​IMG]TundraBrakes-10.jpg by Monte Nickles Photos, on Flickr

    Now its has been documented by a few out there that swapping to the T100 larger bore MC greatly improves their braking. The idea being its a larger piston which moves more fluid. So one would think that it would do the same and be nice when running larger Tundra calipers yes?

    No.

    This is NOT what I found out. More on that later though.

    For this configuration I still wanted to try it though so the T100 MC was too go on.

    You must have the right Booster though to use it, the Stock on from my truck only had a 2 bolt flange, you need a 4 bolt flange one which means its Dual diaphragm vs the 2 bolt and smaller single diaphragm. They look drastically different.

    Top is my OEM one, the Single. Bottom is Dual.

    [​IMG]TundraBrakes-11.jpg by Monte Nickles Photos, on Flickr

    They are very different in a lot of ways besides just thickness.

    The studs are different lengths and the output shafts are different as are the connecting rod ends.

    [​IMG]TundraBrakes-11.jpg by Monte Nickles Photos, on Flickr
    [​IMG]TundraBrakes-13.jpg by Monte Nickles Photos, on Flickr

    While they are different thickness'. Check out the aluminum spacer on the Single. This makes the mounting position of the MC the exact same distance.

    [​IMG]TundraBrakes-14.jpg by Monte Nickles Photos, on Flickr

    Studs are different but again, that due to the spacer.

    [​IMG]TundraBrakes-18.jpg by Monte Nickles Photos, on Flickr
    [​IMG]TundraBrakes-19.jpg by Monte Nickles Photos, on Flickr

    The brake shafts are quite different too.

    [​IMG]TundraBrakes-27.jpg by Monte Nickles Photos, on Flickr

    First thing to do was swap the rod ends over.

    [​IMG]TundraBrakes-21.jpg by Monte Nickles Photos, on Flickr

    However the shaft of the dual diaphragm boost is much too long so i cut off about 1/2''. Less would work too.

    [​IMG]TundraBrakes-51.jpg by Monte Nickles Photos, on Flickr

    Then I had to modify the brake pedal. Instead of just being hooked straight to the pedal like Frankenstein or how pretty much any tacoma with a dual diaphragm booster works. I have this complex dual lever setup.

    [​IMG]TundraBrakes-49.jpg by Monte Nickles Photos, on Flickr

    So need to disconnect all those pins and undo the lower bolt.

    [​IMG]TundraBrakes-50.jpg by Monte Nickles Photos, on Flickr

    i saved all of this(thankfully)

    [​IMG]TundraBrakes-53.jpg by Monte Nickles Photos, on Flickr

    And was left with this.

    [​IMG]TundraBrakes-54.jpg by Monte Nickles Photos, on Flickr

    Threw the booster in and saw this..

    [​IMG]TundraBrakes-55.jpg by Monte Nickles Photos, on Flickr

    Damn.

    No problem though, just unbolted the brake pedal and marked where to drill a hole.

    [​IMG]TundraBrakes-56.jpg by Monte Nickles Photos, on Flickr

    Small hole, hope i get this right.

    [​IMG]TundraBrakes-57.jpg by Monte Nickles Photos, on Flickr
    [​IMG]TundraBrakes-58.jpg by Monte Nickles Photos, on Flickr

    And it worked!

    [​IMG]TundraBrakes-59.jpg by Monte Nickles Photos, on Flickr

    With the booster mounted i set about getting the rear BPV setup.

    The kit from Front Range is great. It comes with a standard Jegs BPV but Brian has done all the work of finding the metric adapters for you. Pretty slick.

    [​IMG]TundraBrakes-33.jpg by Monte Nickles Photos, on Flickr

    Now, I basically followed Bretts @BDN on this and i highly suggest checking out his writeup: https://www.tacomaworld.com/threads/bretts-average-build-thread.305098/page-28#post-12388470

    So I went ahead and bend up the adapter lines as needed. You NEED to use brake line benders for this. Or you risk kinking the lines. Your call i guess.

    [​IMG]TundraBrakes-34.jpg by Monte Nickles Photos, on Flickr

    I attached the new BPV to the rear line and then slapped in the T100 MC and connected up my lines.

    [​IMG]TundraBrakes-60.jpg by Monte Nickles Photos, on Flickr
    [​IMG]TundraBrakes-46.jpg by Monte Nickles Photos, on Flickr

    I tightened everything up and bled the system.

    This is where i became disappointed.

    I bled the brakes a ton. Like went through 2 quarts a brake fluid. And finally let it be.

    The problem was the pedal feel. I hated it. It was insanely soft. Hell i couldn't even get the brakes to lock up until it was totally floored! Compared to stock I was not happy.

    After digging more and talking to a few people here is what i've found out.

    The larger the MC the LESS PRESSURE there is and MORE VOLUME. The dual diaphragm makes the pedal softer, its its job. And a dual vs a single makes it much easier to push the pedal.

    What i also came to realize was every tacoma i had read about doing this swap. Was SAS. They where using much larger full size brakes. They needed the volume. The guys I had talked to how had done this swap with the tundra brakes had the same result as me.

    Which then brought up an interesting theory to light about the tundra brake swap.

    The whole point to trying this was to avoid soft pedal feel. Which MANY people claim has happen when they do the Tundra brake swap. My theory is that those people have 95-00 Tacoma's. The years that came with the 1'' Bore MC and Dual Diaphragm booster. Everyone who rants and raves are 01-04s with single diaphragm boosters and 13/16'' MC.

    To test this myself, I decided to swap BACK to my OEM 13/16'' MC and single diaphragm booster this christmas after driving thousands of miles on the T100 MC and Dual Booster.

    Out with the new in with the old :p

    [​IMG]TundraBrakes-62.jpg by Monte Nickles Photos, on Flickr
    [​IMG]TundraBrakes-63.jpg by Monte Nickles Photos, on Flickr

    Thank god i kept everything.

    WOW what a difference. Brakes are sensitive again and i can lock them up fully no problem.

    So as far as i can tell, my theroy is true. But I haven't looked into it enough to confirm. I am confident that if anyone says they have a soft pedal after the Tundra swap they have the larger MC and Booster.

    Overall I am VERY happy with the tundra brakes. They work amazing and the rear BPV i think works too. I think my rear shoes are near shot though so they aren't work as great as I would like yet. Easy fix though and will hopefully do it this summer.

    Tundra brakes are worth it IMO for later model Tacomas hands down.

    Cheers for now! Have a couple more write ups of mods in the works.
     
    Last edited: Jan 14, 2017
    This site contains affiliate links for which the site may be compensated.
  16. Jan 14, 2017 at 6:06 PM
    #236
    SilverGhost

    SilverGhost Well-Known Member

    Joined:
    Sep 16, 2013
    Member:
    #112635
    Messages:
    8,709
    Gender:
    Male
    First Name:
    RayRay
    Reunion, Co
    Vehicle:
    02,03 some 04, it's complicated
    #junkyardparts
    Awesome work bud! :thumbsup:
     
    unstpible and Blackdawg[OP] like this.
  17. Jan 14, 2017 at 6:25 PM
    #237
    Zam15

    Zam15 Well-Known Member

    Joined:
    Nov 7, 2012
    Member:
    #90678
    Messages:
    880
    Gender:
    Male
    First Name:
    Derek
    San Diego
    Vehicle:
    Needs power..
    ARMOR
    That just saved me a ton of work in the future. I am actually really happy with my swap. Will likely be putting a BPV on the rear end, I am not sure how my setup will like the new discs out back.

    Also want to completely remove the ABS like that. Will add some room for on-board water, or another battery.
     
    unstpible likes this.
  18. Jan 14, 2017 at 6:41 PM
    #238
    Blackdawg

    Blackdawg [OP] Dr. Frankenstein

    Joined:
    Dec 31, 2010
    Member:
    #48500
    Messages:
    80,741
    Gender:
    Male
    First Name:
    Monte
    Wyoming/St. Louis
    Vehicle:
    The Trifecta of Taco's
    ALL OF THEM!...Then some more.
    Thanks!

    yea i have my 2nd battery there in Frankenstein.

    Your new rear brake may benefit from the T100 MC swap. But not sure really. I would think so..but never done it. Or did you already have the T100?
     
  19. Jan 14, 2017 at 6:43 PM
    #239
    SilverGhost

    SilverGhost Well-Known Member

    Joined:
    Sep 16, 2013
    Member:
    #112635
    Messages:
    8,709
    Gender:
    Male
    First Name:
    RayRay
    Reunion, Co
    Vehicle:
    02,03 some 04, it's complicated
    #junkyardparts
    I just put the Valve on today at BDN house. Im so glad I did. The Braking is so much better now.
     
    Deathbysnusnu and jubei like this.
  20. Jan 14, 2017 at 6:44 PM
    #240
    Blackdawg

    Blackdawg [OP] Dr. Frankenstein

    Joined:
    Dec 31, 2010
    Member:
    #48500
    Messages:
    80,741
    Gender:
    Male
    First Name:
    Monte
    Wyoming/St. Louis
    Vehicle:
    The Trifecta of Taco's
    ALL OF THEM!...Then some more.
    Im hoping my improves..but right now it wasn't noticable. Changing the dial does nothing for me. Rear pads are no doubt shot haha

    But my front brakes stop it in a damn hurry. Almost to the point i wish id wired up a disable switch for the ABS instead of ripping it out :anonymous:

    not really though, just gonna learn the brakes again.
     
    unstpible likes this.
To Top