

-
Welcome to Tacoma World!
You are currently viewing as a guest! To get full-access, you need to register for a FREE account.
As a registered member, you’ll be able to:- Participate in all Tacoma discussion topics
- Communicate privately with other Tacoma owners from around the world
- Post your own photos in our Members Gallery
- Access all special features of the site
 Lower Control Arm Replacement + BP-51 Rebuild in SoCal
 Installed mud flaps, and found out that...
 Switch Pro mounted on 3TPAM Dash Mount
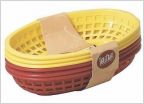 Looking for a dog basket
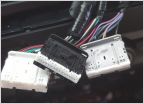 Kenwood DMX1057XR
Getting ride of Chrome Rear Bumper pieces on 2017 SR5
Discussion in '3rd Gen. Tacomas (2016-2023)' started by dantheman0101, Mar 31, 2017.
Page 1 of 2
Page 1 of 2


