

-
Welcome to Tacoma World!
You are currently viewing as a guest! To get full-access, you need to register for a FREE account.
As a registered member, you’ll be able to:- Participate in all Tacoma discussion topics
- Communicate privately with other Tacoma owners from around the world
- Post your own photos in our Members Gallery
- Access all special features of the site
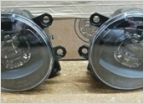 Upgrade fog lights to OEM LED?
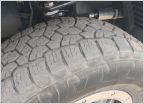 Fox Shocks keep leaking
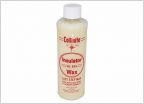 Opticoat AND Solar guard?
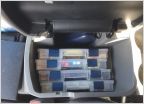 Switch's center console storage: The Swiss Army Knife of center consoles
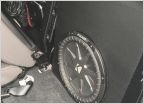 2016 Tacoma DBCB Sub Box Build
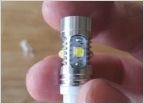 REVERSE LIGHT BULBS
3rd Gen - AC Outlet in Cab and 400w Anytime
Discussion in '3rd Gen. Tacomas (2016-2023)' started by djembefola, Aug 12, 2017.
Page 1 of 14
Page 1 of 14
Products Discussed in


