

-
Welcome to Tacoma World!
You are currently viewing as a guest! To get full-access, you need to register for a FREE account.
As a registered member, you’ll be able to:- Participate in all Tacoma discussion topics
- Communicate privately with other Tacoma owners from around the world
- Post your own photos in our Members Gallery
- Access all special features of the site
 Transmission washer help
 How'd you choose a lift?
 Who makes a good Lug Nut replacement for the cheap OEM's
 Best way to go about leveling out my truck?
 Electric chainsaw?
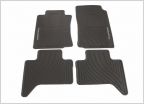 OEM all Weather Mat Question
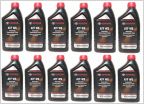
Updated T-SB-0326-08 Oil Leak
Discussion in '2nd Gen. Tacomas (2005-2015)' started by BeefTaco, Oct 31, 2008.
Page 1 of 4
Page 1 of 4
