

-
Welcome to Tacoma World!
You are currently viewing as a guest! To get full-access, you need to register for a FREE account.
As a registered member, you’ll be able to:- Participate in all Tacoma discussion topics
- Communicate privately with other Tacoma owners from around the world
- Post your own photos in our Members Gallery
- Access all special features of the site
 Ideas on how to unfuck myself?
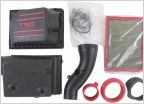 Cold air intake
 Need Some help deciding on the First two mods to my Tacoma OR
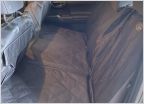 Dogs in a 3rd Gen
 My Gen 3 brake upgrade
 Power steering return line leaking at reservoir
Magnuson Supercharger Mega Thread for 16+ Tacoma - Unboxing, Install DIY, Dyno Video
Discussion in '3rd Gen. Tacomas (2016-2023)' started by androofoo, Nov 7, 2020.
Page 1 of 173
Page 1 of 173
Products Discussed in


