1. Welcome to Tacoma World!

    You are currently viewing as a guest! To get full-access, you need to register for a FREE account.

    As a registered member, you’ll be able to:
    • Participate in all Tacoma discussion topics
    • Communicate privately with other Tacoma owners from around the world
    • Post your own photos in our Members Gallery
    • Access all special features of the site

1 Bored Clerk's Garage Built Camper

Discussion in 'Other Builds' started by 1 Bored Clerk, Oct 24, 2016.

  1. Nov 10, 2020 at 8:52 PM
    #1861
    Slashaar

    Slashaar Trail Limo Supreme & Certified Hole Massager

    Joined:
    Nov 23, 2017
    Member:
    #236717
    Messages:
    15,459
    Gender:
    Male
    First Name:
    Josh
    Kansas City, MO
    Vehicle:
    2015 Tacoma TRD-Sport DC LB
    Coastal HC Front, 6112s+650lb King Coils, JD 62 Swap + 14" Fox 2.0s
    :rofl:I just wanted to save money! Enjoyed building it. :welder:
     
  2. Nov 11, 2020 at 10:11 AM
    #1862
    1 Bored Clerk

    1 Bored Clerk [OP] Well-Known Member

    Joined:
    Sep 18, 2013
    Member:
    #112786
    Messages:
    1,999
    Gender:
    Male
    Vancouver, WA
    Vehicle:
    '13 4x4 AC TRD OR
    Oh, I get it. It's not like projects are unknown to me. :D
     
    Slashaar[QUOTED] likes this.
  3. Nov 11, 2020 at 2:25 PM
    #1863
    Slashaar

    Slashaar Trail Limo Supreme & Certified Hole Massager

    Joined:
    Nov 23, 2017
    Member:
    #236717
    Messages:
    15,459
    Gender:
    Male
    First Name:
    Josh
    Kansas City, MO
    Vehicle:
    2015 Tacoma TRD-Sport DC LB
    Coastal HC Front, 6112s+650lb King Coils, JD 62 Swap + 14" Fox 2.0s
    We all know you've got the skills and the patience for it!
     
  4. Nov 11, 2020 at 6:52 PM
    #1864
    1 Bored Clerk

    1 Bored Clerk [OP] Well-Known Member

    Joined:
    Sep 18, 2013
    Member:
    #112786
    Messages:
    1,999
    Gender:
    Male
    Vancouver, WA
    Vehicle:
    '13 4x4 AC TRD OR
    So, I was sitting around watching people work really hard (AKA, crossfit games), and decided that I was bored. So I came out into the garage and knocked out a tiny part of the awning project that I was micro stressing about.

    PXL_20201112_024304641.jpg
    PXL_20201112_024312203.jpg
    PXL_20201112_024336702.jpg
    I drilled the mounting holes in the cover and dropped the awning onto the mount. Miraculously, all the holes line up! And these bolts are a tight fit in the holes. :thumbsup: I definitely overthink stuff like this. It's going to be hard to do it right and not have the cover all twisted and janky and none of the holes are going to line up...:sadviolin: Yeah, no, this is 1BC were talking about! That shits lining up fo sho! :rofl:
    Took all of about 10 minutes. Nice to have that done. Next dry day when I'm home, I'll finish up all the test fit and mockup then get it out for powdercoat! I'm planning to do some more weight reduction on this giant awning mount this weekend. It's always going to be much heavier than it needs to be but it doesn't need to be this out of hand.

    Oh, I was also able to put the awning material away really easily even with it laying on its back. Bodes well for ease of use in the field...on a ladder cuz my trucks tall and my legs short.
     
    Last edited: Nov 11, 2020
    Spintly, SoCalTbird, POOLGUY and 3 others like this.
  5. Nov 12, 2020 at 11:00 AM
    #1865
    SaphiraTaco

    SaphiraTaco Well-Known Member

    Joined:
    Feb 8, 2018
    Member:
    #243869
    Messages:
    483
    Gender:
    Male
    First Name:
    Sean
    Seattle WA
    Vehicle:
    2013 DCLB TRD Sport
    About halfway done...
    I've been learning so much from your build. Thanks for sharing.
    I decided to give epoxy coating plywood a try for my base plate in the bed.
    This is what I used because the temp range matched my unheated garage.
    https://www.amazon.com/gp/product/B01K7WP1X6/ref=ppx_yo_dt_b_asin_title_o01_s00?ie=UTF8&psc=1
    What are your thoughts on thining the epoxy with acetone? What brush do you prefer that doesn't fall apart?
    I've been cleaning my brush with acetone trying to get a few uses out of it...
    Do you have a different epoxy you like for wood and why?
     
    1 Bored Clerk[OP] likes this.
  6. Nov 12, 2020 at 12:59 PM
    #1866
    1 Bored Clerk

    1 Bored Clerk [OP] Well-Known Member

    Joined:
    Sep 18, 2013
    Member:
    #112786
    Messages:
    1,999
    Gender:
    Male
    Vancouver, WA
    Vehicle:
    '13 4x4 AC TRD OR
    I'm glad you're finding it useful!

    I use west systems epoxy. They have a really good measurement system with pumps that make it pretty much fool proof to get the right mixture...no measuring. They also have fast and slow cure hardeners for different temp ranges. As well as all the various supporting items that all work well together.

    I use foam brushes exclusively. They're cheap, epoxy doesn't eat them and they don't shed bristles. One use them throw away. There are epoxy specific foam rollers too. You can also use a plastic spreader with epoxy. Those work pretty well for getting the epoxy spread around on a large surface.

    I've never felt the need to thin my epoxy. I only use acetone to clean up when I get epoxy on something I didn't intend to get epoxy on. But you could try it! Just don't try it on your actual project. Practice pieces are your friend.

    For coating plywood, I put one coat down, wait for it to get tacky then put another coat. Then I wait for it to cure. If necessary, once cured, I'll wipe with acetone, sand and add coats as I feel necessary. Once the epoxy has cured, you need to wipe it with acetone (that's what I have on hand most so I use it) to get all of the waxy residue off that forms on top of cured epoxy. If you don't remove it, it will gum up sandpaper immediately and future layers of epoxy won't adhere well.

    If you glass over plywood, you MUST do an epoxy coat on the plywood, let it get tacky, then do another coat as you lay the glass down. If you just wet out the plywood then drop glass on it, the glass will pull all of the epoxy off the wood and you can just peel the glass off easily.

    My max tracks mount is the only epoxy coated plywood I have that's out in the elements all the time. Who knows how it will hold up. Much better than any other liquid coating, I'd guess. I'll find out this winter! Make sure you coat the inside of any holes you drill. Any exposed wood will suck up all the moisture it can. Also, I've used marine grade plywood all along.

    One last note. Epoxy doesn't work well on hardwoods. There isn't enough grain/void in hardwood to let epoxy soak in. Softwoods it works pretty good.

    Have fun!
     
  7. Nov 14, 2020 at 12:43 PM
    #1867
    1 Bored Clerk

    1 Bored Clerk [OP] Well-Known Member

    Joined:
    Sep 18, 2013
    Member:
    #112786
    Messages:
    1,999
    Gender:
    Male
    Vancouver, WA
    Vehicle:
    '13 4x4 AC TRD OR
    Another good morning. Slow to start as usual when it's cold and wet outside but that's okay.

    PXL_20201114_185406314.jpg
    Cut out all of the vertical braces on the awning mount. Here the closest one is cut out and the others are marked.

    PXL_20201114_192205403.jpg
    Test fit it on the camper again.

    PXL_20201114_192220893.jpg
    Figured out how much of a spacer I'll need on top of the rear box. 1/8" will allow the awning mount to just barely clear the painted part of the camper and bridge to the front box. Since all the bolts will be in the aluminum boxes, this is perfect. I'll put sealant under the entire length of the awning mount to both keep water out of the aluminum boxes and form a seal between the fiberglass part of the camper and the awning mount to act as a rain gutter above the door when the awning is deployed. :thumbsup: The only issue with this design is snow buildup behind the awning. It could be quite heavy and hard to remove if it's wet or has a lot of freezing rain mixed in.

    PXL_20201114_193940997.jpg
    PXL_20201114_195039532.jpg
    PXL_20201114_202627419.jpg
    Use a step drill (aka the greatest invention of mankind) to create a nice radius in all of the inside corners. Then an angle grinder or jigsaw to cut the straights. I used an angle grinder as I don't care to put that much stress on my jigsaw. These trims are areas where I don't need the full flange for bolting purposes. Take some weight out where it's not needed. In fact, I bet I could remove all of the diagonals and have big open areas between each set of bolt holes and be fine. :sawzall: Or just stop thinking about this stuff and get it done!
     
    Last edited: Nov 14, 2020
  8. Nov 15, 2020 at 11:46 AM
    #1868
    1 Bored Clerk

    1 Bored Clerk [OP] Well-Known Member

    Joined:
    Sep 18, 2013
    Member:
    #112786
    Messages:
    1,999
    Gender:
    Male
    Vancouver, WA
    Vehicle:
    '13 4x4 AC TRD OR
    What am I doing this Sunday? Working on the camper, of course! Took the dry morning to do a full test fit of the awning mount and all three rack crossbars. This gave me a chance to figure out how much of the cross bars I want to chop off to properly meet up with the awning mount. Didn't take pics of that. Was working quickly in case rain moved in.

    PXL_20201115_175551272.jpg
    Then I clamped up the corner brace and match drilled the mounting holes.

    PXL_20201115_185421105.jpg
    PXL_20201115_185427812.jpg
    Did a little trimming then welded the corner brace on for good.

    PXL_20201115_193747560.jpg
    Then hauled out the Milwaukee Porta Band and cut the crossbars to length. I'll end up welding a piece of angle steel to the end that allows me to bolt the end of the crossbar to the awning mount. I think that will give all the support I could possibly need.

    PXL_20201115_194521046.jpg
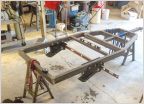
    I also trimmed back a long section of upper flange. This lines up with the roof vent fan. Can't put crossbars there so no need for mounting flange. I'm very close to getting this out for powder coat. Just need more dry hours and energy.
     
    tacoma16, Slashaar, Spintly and 4 others like this.
  9. Nov 15, 2020 at 4:00 PM
    #1869
    1 Bored Clerk

    1 Bored Clerk [OP] Well-Known Member

    Joined:
    Sep 18, 2013
    Member:
    #112786
    Messages:
    1,999
    Gender:
    Male
    Vancouver, WA
    Vehicle:
    '13 4x4 AC TRD OR
    Just wrapped up my day.

    PXL_20201115_220557825.jpg
    PXL_20201115_225951000.jpg
    Set up my SWAG Off-road Porta Band table and foot pedal. After some fiddling with the setup, it's awesome! Way faster and more accurate than a hacksaw. I may end up finding a home somewhere in the garage to leave this set up. The portal band is nice to use on its own so I'm not sure...

    PXL_20201115_230911145.jpg
    I used the bandsaw to cut the roof rack crossbars to size, cut these aluminum spacers for under the back of the awning mount, and cut the angle brackets for the cross bar to awning mount connection. Did some work on the combination sander to put some nice corners on while I was at it.

    PXL_20201115_232119966.jpg
    Shhhh...don't tell anyone but I made a mistake that needed fixing. I got all stupid with the measuring tape and the uni bit and made a mess. So I cut a disc of steel and fit it in the hole.

    PXL_20201115_232445556.jpg
    Weld it up.

    PXL_20201115_232935254.jpg
    Grind it down. Do the same on the other side and call it done. It's not perfect but neither am I. :D

    Next steps before powdercoat are to mock everything up on the roof again so I can properly mark the angle brackets so I can weld them to the crossbars. Then back up on the roof to drill the three holes to bolt it all together. After that, drill the holes in the awning mount where they'll go through the aluminum boxes. Clean it all up then send it off for powder coat. So, basically another dry morning should do it.
     
    Pchop, tacoma16, Slashaar and 5 others like this.
  10. Nov 18, 2020 at 3:47 PM
    #1870
    1 Bored Clerk

    1 Bored Clerk [OP] Well-Known Member

    Joined:
    Sep 18, 2013
    Member:
    #112786
    Messages:
    1,999
    Gender:
    Male
    Vancouver, WA
    Vehicle:
    '13 4x4 AC TRD OR
    Got the 4 Runner brakes installed yesterday. Paid a shop to do it because it'll be months before I'd get to it...if ever. :rofl:Brakes feel pretty good. Pedal is definitely a little mushy up top with more travel before you really engage the brakes but I read up on this and that's about right. I can add a tundra brake booster if I want later. Oil change tomorrow then off on vacation
     
    Last edited: Nov 18, 2020
    HomerTaco and Drainbung like this.
  11. Nov 18, 2020 at 4:38 PM
    #1871
    tacoma16

    tacoma16 Well-Known Member

    Joined:
    Mar 15, 2011
    Member:
    #53109
    Messages:
    11,030
    Gender:
    Male
    First Name:
    Peter
    Ontario
    Vehicle:
    Double cab SR5 4x4
    I found the stopping distance to be better but the pedal still felt crappy as you mentioned.

    awning and all the metal fab is looking great!
     
  12. Nov 18, 2020 at 4:49 PM
    #1872
    1 Bored Clerk

    1 Bored Clerk [OP] Well-Known Member

    Joined:
    Sep 18, 2013
    Member:
    #112786
    Messages:
    1,999
    Gender:
    Male
    Vancouver, WA
    Vehicle:
    '13 4x4 AC TRD OR
    Yeah it's not great but, honestly, it's better than I thought it would be. I was never impressed with the brake pedal feel of the stock brakes. Knowing there is an improvement available makes me comfortable with this mod. If I don't get used to it, I can make it better by throwing even more money at it! :annoyed:
     
    tacoma16[QUOTED] and Drainbung like this.
  13. Nov 18, 2020 at 4:53 PM
    #1873
    Drainbung

    Drainbung Somedays you are the show....

    Joined:
    Sep 2, 2010
    Member:
    #42629
    Messages:
    9,275
    Gender:
    Male
    First Name:
    Bob
    Fallabama, NV
    Vehicle:
    10 DCLB
    TRD Fleshlight
    I did this front brake upgrade and found that I needed to do a manual adjust on the rears to get it to feel right.

    https://www.tacomaworld.com/threads...t-oem-parts-part-s-provided-installed.443656/
     
    Slashaar likes this.
  14. Nov 18, 2020 at 6:27 PM
    #1874
    tacoma16

    tacoma16 Well-Known Member

    Joined:
    Mar 15, 2011
    Member:
    #53109
    Messages:
    11,030
    Gender:
    Male
    First Name:
    Peter
    Ontario
    Vehicle:
    Double cab SR5 4x4
    Throwing money at it? Story of my life.....
     
  15. Nov 18, 2020 at 6:56 PM
    #1875
    1 Bored Clerk

    1 Bored Clerk [OP] Well-Known Member

    Joined:
    Sep 18, 2013
    Member:
    #112786
    Messages:
    1,999
    Gender:
    Male
    Vancouver, WA
    Vehicle:
    '13 4x4 AC TRD OR
    The real problem is that it doesn't feel like it all sticks! Half of it just blows away in the wind, I think.
     
    Drainbung and tacoma16[QUOTED] like this.
  16. Nov 18, 2020 at 6:56 PM
    #1876
    tacoma16

    tacoma16 Well-Known Member

    Joined:
    Mar 15, 2011
    Member:
    #53109
    Messages:
    11,030
    Gender:
    Male
    First Name:
    Peter
    Ontario
    Vehicle:
    Double cab SR5 4x4
    Lol or broken and left on the shop floor....
     
  17. Nov 18, 2020 at 8:54 PM
    #1877
    Slashaar

    Slashaar Trail Limo Supreme & Certified Hole Massager

    Joined:
    Nov 23, 2017
    Member:
    #236717
    Messages:
    15,459
    Gender:
    Male
    First Name:
    Josh
    Kansas City, MO
    Vehicle:
    2015 Tacoma TRD-Sport DC LB
    Coastal HC Front, 6112s+650lb King Coils, JD 62 Swap + 14" Fox 2.0s
  18. Nov 20, 2020 at 8:15 AM
    #1878
    1 Bored Clerk

    1 Bored Clerk [OP] Well-Known Member

    Joined:
    Sep 18, 2013
    Member:
    #112786
    Messages:
    1,999
    Gender:
    Male
    Vancouver, WA
    Vehicle:
    '13 4x4 AC TRD OR
    Well, I'm at the dealership. I had them do an oil change yesterday and when I went to leave this morning, I had a terrible shimmy at freeway speeds. I didn't take the freeway yesterday after my oil change (and they rotated the tires). So I figured Id loosen and re torque (stepped star pattern) the wheels. Well, one lug on the passenger side was nearly stripped...it was a bit rough. Two on the driver's side were completely stripped...I could only back those two off a half turn before they froze. I've had all of my routine maintenance done at this dealership for 7 years with no issues. So, I guess I was due for an oopsie. Hopefully they can get me sorted in a few hours. Not the start to my trip I was hoping for. Glad I found all of this now rather than middle of nowhere Nevada.
     
    Philrab, Spintly, Slashaar and 3 others like this.
  19. Nov 20, 2020 at 11:46 AM
    #1879
    1 Bored Clerk

    1 Bored Clerk [OP] Well-Known Member

    Joined:
    Sep 18, 2013
    Member:
    #112786
    Messages:
    1,999
    Gender:
    Male
    Vancouver, WA
    Vehicle:
    '13 4x4 AC TRD OR
    Lugs fixed...now I have one mismatched lug nut...it's chrome but short. Whatever, I just want to get out of town! But I still have the shimmy so now waiting for three hours at the tire shop for a rebalance on the two front tires. The world may be telling me I'm not taking any vacations this year.
     
    Slashaar and Drainbung like this.
  20. Nov 20, 2020 at 1:44 PM
    #1880
    Slashaar

    Slashaar Trail Limo Supreme & Certified Hole Massager

    Joined:
    Nov 23, 2017
    Member:
    #236717
    Messages:
    15,459
    Gender:
    Male
    First Name:
    Josh
    Kansas City, MO
    Vehicle:
    2015 Tacoma TRD-Sport DC LB
    Coastal HC Front, 6112s+650lb King Coils, JD 62 Swap + 14" Fox 2.0s
    FTFY
     
To Top