

-
Welcome to Tacoma World!
You are currently viewing as a guest! To get full-access, you need to register for a FREE account.
As a registered member, you’ll be able to:- Participate in all Tacoma discussion topics
- Communicate privately with other Tacoma owners from around the world
- Post your own photos in our Members Gallery
- Access all special features of the site
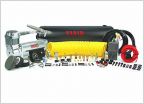 Viair 450c mounting
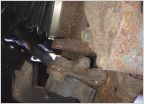 HELP! New strut too long! Cannot attach lbj!
 O2 sensor nuts
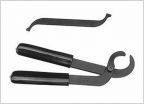 3rz Valve Clearance Tool
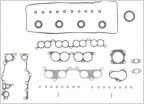 What is this Gasket?
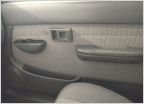 Converting manual locks and windows to power
How-to: Rebooting a Tacoma CV Axle
Discussion in '1st Gen. Tacomas (1995-2004)' started by turbodb, Apr 15, 2019.
Page 2 of 3
Page 2 of 3


