1. Welcome to Tacoma World!

    You are currently viewing as a guest! To get full-access, you need to register for a FREE account.

    As a registered member, you’ll be able to:
    • Participate in all Tacoma discussion topics
    • Communicate privately with other Tacoma owners from around the world
    • Post your own photos in our Members Gallery
    • Access all special features of the site

Av8er's Basic '09 Build

Discussion in '2nd Gen. Builds (2005-2015)' started by Av8er, Jul 19, 2012.

  1. Jul 19, 2012 at 10:15 AM
    #1
    Av8er

    Av8er [OP] Well-Known Member

    Joined:
    Apr 29, 2012
    Member:
    #77844
    Messages:
    516
    Gender:
    Male
    First Name:
    Taylor
    Formaly Houston, now Tampa, FL.
    Vehicle:
    09 Prerunner SR5/TRD DC, LB, w/ Tow
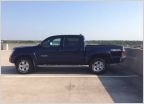
    So this is the first vehicle I've had in 32 years that I truly wanted and plan to have for many years! Now that I've got it I wanted to keep it simple and do a few things to it with some additions which are practical to my lifestyle and family uses as well as minor gains in efficiency and performance. I strive for a fun-to-drive truck with utilitarian elements and the ability to do fun things with the family, i.e. towing a boat, travel trailer, camping trips to the mountains/beach, etc.

    Current state:

    [​IMG]
    [​IMG]


    So here's my truck in it's mod. infancy and early stages:

    Day I got her:
    [​IMG]

    Additions: (Pictures Included below)

    Seat Belt Warning customized to the "off" position.
    Replaced stock antennae with 13" shortie from Autozone
    Replaced front windshield (paid for by Lexus dealer) due to a small crack
    Weathertech's (Digital Fit)- Grey front and back
    K&N Drop-In Filter
    AeroTurbine 2525XL Muffler-Sounds amazing!!
    3rd Brake Light Cover/Decal- by Sockmonkey (spears-Go Noles)
    Red Caliper Paint Kit
    Red "TRD" FJ Cruiser center wheel caps
    Interior Led Mod using two "white" map's and one "red" dome led as well as license plate led's.
    Replaced fog light bulbs with two new Sylvania Silverstars (after original busted)
    Cleaned and refurbed one of the fog light assemblies.
    303 Aerospace to clean/protect/restore all external rubber and plastic surfaces. Awesome turnout.
    Painted Engine Cover and added decal
    Added TW and multiple decals
    Tailgate locking clamp and dual washer mod
    Plasti-derped the front valance
    Center Console Lock Mod
    "FSU" Bottle Opener in bed post
    Added a custom "TRD" Oil Cap
    Wet Okoles
    Bed Lights switched from the cab via a custom Otrattw Carling Switch
    Driver side mag light mount
    Ultragauge and "bike reflector" mount
    Added a Cargo Bar in the bed
    Plasti dip'd front emblem, badges and roof.
    Flyzeye custom interior lighting (Amber, White, Red-Silver Housing)
    Picked up some Firestone Ride Rites for towing, carrying heavy loads. Stay tuned for updated install pics.

    To-Add List:


    "The Spray Box" addition to the bed
    CB install with 4' Firestik and a fold down mount on a "door jamb" mount so I can run it with a Tonn. Cover.
    Tint on front to match rears. Somewhere between 25-35% based on what amount is preexisting.
    Tonno-Pro Tri-Fold tonneau cover
    Tacoma Cargo Bed Mat
    TRD shifter with red lettering stitched in.
    Tires (when current ones are toast)
    Towing components: weight distribution hitch, etc.


    Added the shortie antenna:
    [​IMG]


    Next the Sockmonkey 3rd Brake Light Decal:
    [​IMG]


    Before caps:
    [​IMG]

    After caps:
    [​IMG]

    During the process. Very easy to switch out with no extra mods needed:
    [​IMG]

    [​IMG]

    Sorry for the lame picture of the K&N box, just don't have much to add right now. ;)
    [​IMG]


    Next are the Weathertechs. Went with the grey ones front and back. Love them!

    [​IMG]
    [​IMG]
    [​IMG]
    [​IMG]


    Next was the interior LED lighting! Definitely an easy mod with great results. I went with two white led's for the map lights and one red led for the dome light as well as the license plate two white led lights included in LEDsolutions stage II package.

    Edit: The map lights have completely stopped working. Replaced with Superbrightleds.com's.

    Here is LEDsolutions stage II kit:

    [​IMG]

    This is the method I used to get out the map light bulbs....tks to SalmonTaco for the idea:
    [​IMG]

    Interior Map Lights Only Before:
    [​IMG]


    Interior Map Lights Only After:
    [​IMG]

    Edit: Replaced dome's with superbrightled's.

    The Red Dome Light (The camera used makes it look way brighter than it actually is.) Don't get me wrong the light is very powerful however it's more of a very soft red glow and not the bright glow as it appears here. Couldn't get the camera to take a decent pic. So this comes on when the doors are opened/closed and fade in and out just as the stock bulb did.
    [​IMG]


    Before of License Plate stock bulbs:
    [​IMG]


    After License Plate Led's:
    [​IMG]

    Next came the red caliper paint kit. I know it's ricey and I don't care. I liked the way the red ties into the trucks stock red/black badging and pin-stripping as well as the red center caps and interior lighting. Silver truck with hints of red throughout is taking shape.

    [​IMG]

    [​IMG]

    [​IMG]


    [​IMG]

    [​IMG]

    [​IMG]

    [​IMG]

    Next a few pics of the 303 Aerospace Protectant both before and after application. This stuff is amazing and definitely restored a few of my external surfaces. They went from faded black back to a shiny restored black. Highly recommend this stuff as a restoring protectant.

    [​IMG]

    [​IMG]

    [​IMG]


    [​IMG]


    Next up was the high performance, fuel efficient "sticker" mod:


    Plasti-derped the front valance:
    [​IMG]

    Next up was the Tailgate Lock mod including the dual washers on either side of the tailgate supports:
    [​IMG]
    [​IMG]
    [​IMG]

    So after my wife accidentally ran over my first painted, finished and drying engine cover, this was my attempt at number 2:
    [​IMG]
    [​IMG]
    [​IMG]
    [​IMG]
    [​IMG]

    Added a new Oil Cap:
    [​IMG]

    Next was the Bottle Opener in the bed addition:

    removed the tail light for access to the back of the post so I could install the hardware:
    [​IMG]
    [​IMG]

    Used some silicone to seal up the new holes/hardware:
    [​IMG]

    [​IMG]

    [​IMG]


    Added some Wet Okole's!(black and charcoal)
    [​IMG]


    Next was the UltraGauge addition with modded bicycle mount. Here's a link (12/11/2012) to the hardware I used which includes the appropriate horizontal side-loaded mount for our Tacoma A-pillar's: http://www.amazon.com/Sunlite-Piece...e+4+Piece+Bicycle+Reflector+Set+with+Brackets

    [​IMG]

    The standard bike reflector mount (as shown) didn't work right due to the pitch after attached to the A-pillar. I got lucky because included in the package was another horizontally based, OFFSET to the right mount instead of this vertically based one:
    [​IMG]

    This is the offset or horizontally based mount which allows clearance between the hardware elements to enable the ultragauge to be tilted up to the correct viewing angle:
    [​IMG]

    Had to do some cutting with the dremmel to clean it up and get rid of the excess mount portion which WILL block one of the buttons on the back. Very easy to do though. You can see the initial cut line:
    [​IMG]

    Cut flush with actual UG bracket:
    [​IMG]

    Here it is mounted but prior to running cable clean. Because the hardware was side mounted, the UG is able to be angled correctly:
    [​IMG]

    Next was to run the cable down the A-pillar rubber protector and down to the OBD port. More than enough cable length and then wire tired up under the dash out of sight:
    [​IMG]


    Next up was the flashlight mount:
    [​IMG]

    Next up was my "Bed Lights Project". Click the link to my write up page if interested. http://www.tacomaworld.com/forum/2n...ed-lights-project-heres-lengthy-how-post.html

    [​IMG]

    [​IMG]


    Added a "cargo bar" so my bags don't slide around on the way to/from work. Worked out great for what I needed. $20
    [​IMG]


    Plasti Dipped Emblem, Badges, and Roof:

    [​IMG]
    [​IMG]
    [​IMG]
    [​IMG]
    [​IMG]
    [​IMG]
    [​IMG]
    [​IMG]
    [​IMG]

    Installed my Firestone Ride Rite's. These airbags will be great for towing. They added about 3/4 to 1" in height in the back with the min 5psi. With higher psi it raises the rear end significantly higher until a load is put in bed or towed. Looking forward to towing boats and travel trailers, etc. with these!! Knuckle busting install but easy none the less.

    [​IMG]

    [​IMG]


    So that's it for now. Thanks for checkin' it out. Have fun out there and be safe!!
     
  2. Oct 24, 2012 at 2:04 AM
    #2
    brian

    brian Another Traitor

    Joined:
    Apr 15, 2009
    Member:
    #16011
    Messages:
    7,551
    Gender:
    Male
    Elizabeth City, NC
    Vehicle:
    2017 F-250 Powerstroke
    Silly ERJ pilots..... :D

    Lets see you install your HUD in your truck.... lol Always wanted to do something like that.
     
  3. Oct 24, 2012 at 11:18 AM
    #3
    Av8er

    Av8er [OP] Well-Known Member

    Joined:
    Apr 29, 2012
    Member:
    #77844
    Messages:
    516
    Gender:
    Male
    First Name:
    Taylor
    Formaly Houston, now Tampa, FL.
    Vehicle:
    09 Prerunner SR5/TRD DC, LB, w/ Tow
    ;) Yea I know it's just a little erj but I gotta admit, it's been a fun bird to fly the last few years!

    That would be freaking sweet to do a HUD setup. I have no doubt that, presented with the challenge, someone with a lot of time and money could figure out a way to make it happen on this forum. ;)
     
  4. Oct 24, 2012 at 2:21 PM
    #4
    krob32

    krob32 Well-Known Member

    Joined:
    Feb 18, 2012
    Member:
    #73075
    Messages:
    1,367
    Gender:
    Male
    First Name:
    Kelly
    Sierra Vista, AZ / Asheville, NC
    Vehicle:
    2012 MGM TRD Sport DCLB
    WeatherTec Digi Liners, AVS Bugflector II, TRD FJ SE Anthracite Rims, BF Goodrich AT KO2 265/75/16, AVS In-Channel Wind Deflectors, Extang Solid Fold, Pop & Lock, Color Match Grill Emblem (Anthracite), Plasti Dip Emblems, Tacoma Bed Mat, Tacoma Door Sill Protectors, ToyTec Ultimate Lift Kit, ICON UCAs, Wheeler's Progressive AAL, Wet Okoles, Sockmonkey 3rd Brake Light Cover, LED Hood/Bed Lighting w/ OTRATTW Switches, Famous Fabrication Sliders, Sockmonkey TRD Bed Decal, Proven Design 4x4 Mudflaps, BenWA's Rear Power Sliding Window, Jasper Off Road 6" Reverse LED Pod, ImMrYo Rear View Mirror Bracket, GrillCraft w/ Black Mesh and color matched Land Cruiser Emblem, LED Tail Lights, Badge Removal and Vinyl TRD/Tacoma Stickers, Bullaculla Trailer Harness Relocation.
    Good start. Engine cover turned out great.
     
  5. Oct 27, 2012 at 3:55 AM
    #5
    Av8er

    Av8er [OP] Well-Known Member

    Joined:
    Apr 29, 2012
    Member:
    #77844
    Messages:
    516
    Gender:
    Male
    First Name:
    Taylor
    Formaly Houston, now Tampa, FL.
    Vehicle:
    09 Prerunner SR5/TRD DC, LB, w/ Tow
    Hey thanks a lot. One of those random easy projects but I'm still happy with the way it turned out and it's held up well so far.
     
  6. Oct 27, 2012 at 11:01 AM
    #6
    Fightman80

    Fightman80 Well-Known Member

    Joined:
    Aug 27, 2012
    Member:
    #85634
    Messages:
    590
    Gender:
    Male
    Capreol Ontario Canada
    Vehicle:
    05 TRD DCLB Speedway Blue
    Tinted Tail lights, Nerb Bars, Tonneau Cover, Vent Visors, Hood Deflector, Foglight/highbeam mod, Custom homemade grill, Carbon Fibre Interior.
    Nice Truck man! I LOVE your engine cover too! Great mods so far!
     
  7. Oct 27, 2012 at 9:41 PM
    #7
    Av8er

    Av8er [OP] Well-Known Member

    Joined:
    Apr 29, 2012
    Member:
    #77844
    Messages:
    516
    Gender:
    Male
    First Name:
    Taylor
    Formaly Houston, now Tampa, FL.
    Vehicle:
    09 Prerunner SR5/TRD DC, LB, w/ Tow
    Hey thanks a lot! It's been a lot of fun customizing it with the projects I've done so far. I've since added Wet Okole's and will be adding bed lights shortly.

    Appreciate ya'll taking a look at it and chiming in.
     
  8. Nov 17, 2012 at 8:34 PM
    #8
    JMoorer

    JMoorer Mac Geek

    Joined:
    Nov 10, 2012
    Member:
    #90831
    Messages:
    22
    Gender:
    Male
    First Name:
    Jordan
    Pensacola, FL
    Vehicle:
    Speedway Blue PreRunner SR5
    De-badged, Painted grille emblem, Tonneau cover, Loud horn mod, Hose clamp mod
    I dig the bottle opener. It's clever.
     
  9. Nov 18, 2012 at 5:25 AM
    #9
    Av8er

    Av8er [OP] Well-Known Member

    Joined:
    Apr 29, 2012
    Member:
    #77844
    Messages:
    516
    Gender:
    Male
    First Name:
    Taylor
    Formaly Houston, now Tampa, FL.
    Vehicle:
    09 Prerunner SR5/TRD DC, LB, w/ Tow
    Hey thanks a lot. It's one of my best mods! ;)
     
  10. Dec 11, 2012 at 11:05 AM
    #10
    Monster Coma

    Monster Coma Well-Known Member

    Joined:
    Jun 15, 2012
    Member:
    #80740
    Messages:
    26,280
    Gender:
    Male
    First Name:
    Corey
    Pittsburgh, PA/Houston, TX
    Sponsored by Mom and Dad
    Looks like a good build, thanks for the ultragauge info :thumbsup:
     
  11. Jan 26, 2013 at 6:38 AM
    #11
    Av8er

    Av8er [OP] Well-Known Member

    Joined:
    Apr 29, 2012
    Member:
    #77844
    Messages:
    516
    Gender:
    Male
    First Name:
    Taylor
    Formaly Houston, now Tampa, FL.
    Vehicle:
    09 Prerunner SR5/TRD DC, LB, w/ Tow
    Tks bud, hope the ultragauge set up worked for ya.
     
  12. Jan 26, 2013 at 7:39 AM
    #12
    Monster Coma

    Monster Coma Well-Known Member

    Joined:
    Jun 15, 2012
    Member:
    #80740
    Messages:
    26,280
    Gender:
    Male
    First Name:
    Corey
    Pittsburgh, PA/Houston, TX
    Sponsored by Mom and Dad
    I unfortunately haven't been able I try it.. I was unemployed over my winter break (yes yes I know it's only $7) but with truck payments I'm trying to save everything I can but I'm going back to work in a couple days so ill try it then as let you know how it works!
     
  13. Jan 26, 2013 at 7:42 AM
    #13
    Av8er

    Av8er [OP] Well-Known Member

    Joined:
    Apr 29, 2012
    Member:
    #77844
    Messages:
    516
    Gender:
    Male
    First Name:
    Taylor
    Formaly Houston, now Tampa, FL.
    Vehicle:
    09 Prerunner SR5/TRD DC, LB, w/ Tow
    Sounds good buddy. sorry to hear about the unemployment but good luck heading back in! Hang in there!
     
  14. Jan 26, 2013 at 7:51 AM
    #14
    File IFR

    File IFR "... Intercepting The Localizer"

    Joined:
    Mar 4, 2012
    Member:
    #74145
    Messages:
    4,499
    Gender:
    Male
    First Name:
    Mike
    Central MA
    Vehicle:
    2012 MGM 4X4 DC-LB TRD Sport
    Taylor, That looks awesome bud! I like the engine cover too. :thumbsup:
     
  15. Jan 26, 2013 at 8:11 AM
    #15
    calebm12

    calebm12 Well-Known Member

    Joined:
    Dec 2, 2012
    Member:
    #92305
    Messages:
    68
    Gender:
    Male
    MD
    Vehicle:
    2011 trd tx
    Weathertech, hand turned wood shift knob, rear view mirror mod, grillecraft MX, hella 500s
    when you did the badges did you tape in between the letters as well? Or just around? Started this project but taping between the letters became a PIA in the cold weather. Is it not necessary?
     
  16. Jan 26, 2013 at 8:13 AM
    #16
    Monster Coma

    Monster Coma Well-Known Member

    Joined:
    Jun 15, 2012
    Member:
    #80740
    Messages:
    26,280
    Gender:
    Male
    First Name:
    Corey
    Pittsburgh, PA/Houston, TX
    Sponsored by Mom and Dad
    As long as you are using plasti dip you dont need to tape in between
     
  17. Jan 26, 2013 at 11:05 AM
    #17
    calebm12

    calebm12 Well-Known Member

    Joined:
    Dec 2, 2012
    Member:
    #92305
    Messages:
    68
    Gender:
    Male
    MD
    Vehicle:
    2011 trd tx
    Weathertech, hand turned wood shift knob, rear view mirror mod, grillecraft MX, hella 500s
    is there a trick for removing the plastidip from the areas in between the letters....or do the raised letters naturally cause the dip to tear at the right spots when you remove.
     
  18. Jan 26, 2013 at 11:35 AM
    #18
    Av8er

    Av8er [OP] Well-Known Member

    Joined:
    Apr 29, 2012
    Member:
    #77844
    Messages:
    516
    Gender:
    Male
    First Name:
    Taylor
    Formaly Houston, now Tampa, FL.
    Vehicle:
    09 Prerunner SR5/TRD DC, LB, w/ Tow
    Monster nailed it. Be sure to use plenty of coats of the plasti dip. My brother in law only did two and had a nightmare trying to get it out of the letters. I overkilled with like 6-7 coats and it was easy peasy using toothpicks for the tight spots and tweezers for the semi-tight spots. The majority comes off due to exactly what you said, the natural tendency of the lettering. The thicker it is, the easier and more uniformly it removes.

    I actually have a video of me pulling it off for my brother in law. I'll post it later today when I transfer it over from my phone.


    Good luck-
     
  19. Jan 26, 2013 at 11:36 AM
    #19
    Av8er

    Av8er [OP] Well-Known Member

    Joined:
    Apr 29, 2012
    Member:
    #77844
    Messages:
    516
    Gender:
    Male
    First Name:
    Taylor
    Formaly Houston, now Tampa, FL.
    Vehicle:
    09 Prerunner SR5/TRD DC, LB, w/ Tow
    Hey thanks a lot!! Appreciate ya checkin' it out and chiming in. ;)
     
  20. Jan 26, 2013 at 12:36 PM
    #20
    Av8er

    Av8er [OP] Well-Known Member

    Joined:
    Apr 29, 2012
    Member:
    #77844
    Messages:
    516
    Gender:
    Male
    First Name:
    Taylor
    Formaly Houston, now Tampa, FL.
    Vehicle:
    09 Prerunner SR5/TRD DC, LB, w/ Tow

Products Discussed in

To Top