

-
Welcome to Tacoma World!
You are currently viewing as a guest! To get full-access, you need to register for a FREE account.
As a registered member, you’ll be able to:- Participate in all Tacoma discussion topics
- Communicate privately with other Tacoma owners from around the world
- Post your own photos in our Members Gallery
- Access all special features of the site
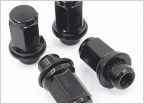 Do TRD rims requires new lugs?
 Airbag light after upper control arms install
 SnugTop Camper Shell Badges
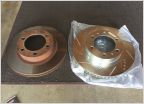 Power Stop Brake Kit Install w/ Pics
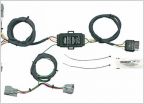 2Questions, Headlight adjustment N Trailer pigtail
 Can Grid lines be removed from stock back up cam??
Water/Moisture Inside Headlights
Discussion in '2nd Gen. Tacomas (2005-2015)' started by TXtycoon, Apr 11, 2013.


