

-
Welcome to Tacoma World!
You are currently viewing as a guest! To get full-access, you need to register for a FREE account.
As a registered member, you’ll be able to:- Participate in all Tacoma discussion topics
- Communicate privately with other Tacoma owners from around the world
- Post your own photos in our Members Gallery
- Access all special features of the site
 Supreme Suspensions lift for 2019 TRD Offroad
 Universal Bump stops
 Pre lift questions
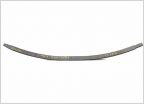 Dakar springs worn out?
 OME Dakars on AMAZON 224.57
Fox Remote Resi Install
Discussion in 'Suspension' started by chipnoreo, Jul 17, 2013.


