1. Welcome to Tacoma World!

    You are currently viewing as a guest! To get full-access, you need to register for a FREE account.

    As a registered member, you’ll be able to:
    • Participate in all Tacoma discussion topics
    • Communicate privately with other Tacoma owners from around the world
    • Post your own photos in our Members Gallery
    • Access all special features of the site

Zach's 2013 DCSB Build

Discussion in '2nd Gen. Builds (2005-2015)' started by zscott, Nov 18, 2013.

  1. Feb 24, 2014 at 10:11 AM
    #41
    ckeene9

    ckeene9 Well-Known Member

    Joined:
    Sep 20, 2012
    Member:
    #87325
    Messages:
    10,868
    Gender:
    Male
    Chesterfield, VA
    Vehicle:
    '12 DCSB Supercharged 4x4 TRD Sport
    See Build Thread
    Yeah, they're sitting in the garage. Need to practice welding some more before I tackle installing them.
     
  2. Feb 24, 2014 at 11:35 AM
    #42
    zscott

    zscott [OP] Well-Known Member Vendor

    Joined:
    Jul 16, 2013
    Member:
    #108365
    Messages:
    3,742
    Gender:
    Male
    First Name:
    Zach
    Utah
    Vehicle:
    13 DCSB Off-Road 4x4
    Nice. I went back and forth on whether or not to get full hoops and finally my wife decided on the single grill hoop.
     
  3. Feb 24, 2014 at 11:36 AM
    #43
    zscott

    zscott [OP] Well-Known Member Vendor

    Joined:
    Jul 16, 2013
    Member:
    #108365
    Messages:
    3,742
    Gender:
    Male
    First Name:
    Zach
    Utah
    Vehicle:
    13 DCSB Off-Road 4x4
    Keep an eye out in the next few days and I should have the new roof rack and and shell rack on the truck. I know you had said you were interested in one for the shell so this should give you a better idea of what it will look like.
     
  4. Feb 24, 2014 at 11:56 AM
    #44
    ckeene9

    ckeene9 Well-Known Member

    Joined:
    Sep 20, 2012
    Member:
    #87325
    Messages:
    10,868
    Gender:
    Male
    Chesterfield, VA
    Vehicle:
    '12 DCSB Supercharged 4x4 TRD Sport
    See Build Thread
    Good deal! It'll be a while since I'm saving to get a gas tank skid before I punch a hole in it.
     
  5. Feb 24, 2014 at 3:07 PM
    #45
    happy

    happy Well-Known Member

    Joined:
    Nov 2, 2013
    Member:
    #115725
    Messages:
    234
    Gender:
    Male
    Eagle, CO
    Vehicle:
    '14 DCSB SR5 4x4 Silver Sky
    CBI Moab 2.0, 2.5" Radflo Coilovers, Light Racing UCA, Dakar Leaf Pack, 265/75 16 Kelly Safari TSR, Leer XR100
    Nice bumper choice! (I have the same one :p)
     
  6. Feb 24, 2014 at 4:30 PM
    #46
    zscott

    zscott [OP] Well-Known Member Vendor

    Joined:
    Jul 16, 2013
    Member:
    #108365
    Messages:
    3,742
    Gender:
    Male
    First Name:
    Zach
    Utah
    Vehicle:
    13 DCSB Off-Road 4x4
    Its a good one that is for sure. The guys at CBI are great.
     
  7. Feb 25, 2014 at 7:38 PM
    #47
    TreadUp

    TreadUp Well-Known Member

    Joined:
    Feb 7, 2014
    Member:
    #122532
    Messages:
    243
    Gender:
    Male
    First Name:
    Justin
    Belville, NC
    Vehicle:
    2007 DBCL TRD Sport
    Bilstein 5100's Toytec Springs / AAL SOS Sliders FN Five Star Wheels Falken Wild Peak AT3W 32"x 10.5"
    Great looking truck! I really enjoyed reading through this thread and seeing all the obviously well thought out additions to your truck. Did you do all the design and fabrication yourself? Just curious what you do for work and if your training/daily job played any part in this.
    Also, pretty cool you include your lady in your thoughts while you build your rig. I'm sure you don't mind the creature comforts you have added for her either.
     
  8. Feb 25, 2014 at 9:07 PM
    #48
    zscott

    zscott [OP] Well-Known Member Vendor

    Joined:
    Jul 16, 2013
    Member:
    #108365
    Messages:
    3,742
    Gender:
    Male
    First Name:
    Zach
    Utah
    Vehicle:
    13 DCSB Off-Road 4x4
    Thanks for the compliments. I have designed and fabricated some things, and relied on other people for others. I am finishing up my last semester of school right now in a Landscape Architecture and Environmental Planning degree. I have worked as a landscape designer and draftsman for about 5-6 years now. My studies and profession help me out with visualization techniques, design methods and drawing/CAD so in that way it has affected the truck build. Really I just enjoy designing and building things. I have since I was young a will probably continue till I die.
     
  9. Feb 26, 2014 at 5:08 AM
    #49
    TreadUp

    TreadUp Well-Known Member

    Joined:
    Feb 7, 2014
    Member:
    #122532
    Messages:
    243
    Gender:
    Male
    First Name:
    Justin
    Belville, NC
    Vehicle:
    2007 DBCL TRD Sport
    Bilstein 5100's Toytec Springs / AAL SOS Sliders FN Five Star Wheels Falken Wild Peak AT3W 32"x 10.5"
    Very cool line of work. A few people I know are in the same field. As you stated, I'm sure you use cad etc... quite often for work.

    I need to show my father in law your truck. He definitely could use your bed rack design Always has too much gear and not enough room in his bed.
     
  10. Feb 26, 2014 at 10:25 AM
    #50
    sytfu510

    sytfu510 Instagram: tacoma510

    Joined:
    Aug 27, 2011
    Member:
    #62453
    Messages:
    4,868
    Gender:
    Male
    First Name:
    Alex
    Bay Area
    Vehicle:
    06 DBL Cab Long Bed TRD Sport
    Dirt Designs LT kit front and 3 link kit rear SCS Wheels BAMF rack, bumper ,sliders
    Truck is looking good. Looking forward to your next mods. Might have to look into that Nat Luna Power pack as I've got a ton of extra crap running.
     
  11. Feb 26, 2014 at 1:25 PM
    #51
    zscott

    zscott [OP] Well-Known Member Vendor

    Joined:
    Jul 16, 2013
    Member:
    #108365
    Messages:
    3,742
    Gender:
    Male
    First Name:
    Zach
    Utah
    Vehicle:
    13 DCSB Off-Road 4x4
    Added a color matched grill and went out for a little run to test out the new bumper. Got "stuck" to give my wife a little training on the winch so she knows how to use it in the future. Very impressed with the CBI Bumper and the TJM Stealth Winch.

    IMG_3821_zpsac2c1e2d_be026aefd877680b6982bba0d767eb41be12eb91.jpg

    IMG_3820_zps273ae466_bf477b8bc345af31c0ec9c132d9080683376cec6.jpg

    IMG_3818_zpsf7b33d10_d2b3cf47d6faf849d45248049d8ec1c84b28e317.jpg
     
  12. Feb 26, 2014 at 1:27 PM
    #52
    zscott

    zscott [OP] Well-Known Member Vendor

    Joined:
    Jul 16, 2013
    Member:
    #108365
    Messages:
    3,742
    Gender:
    Male
    First Name:
    Zach
    Utah
    Vehicle:
    13 DCSB Off-Road 4x4
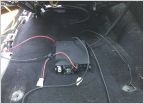
    Thanks, the National Luna is a pretty nice setup. Sometimes I wish I would've went with a permanent dual battery mounted under the hood and out of the way, but then I realize how versatile the power pack is and am glad I went with it. It is easy to move around wherever I want and easy to remove completely if I don't need it. You can also take it out and haul it into a ground tent to power stuff if your tent is pitched away from the truck.
     
  13. Feb 26, 2014 at 5:19 PM
    #53
    krob32

    krob32 Well-Known Member

    Joined:
    Feb 18, 2012
    Member:
    #73075
    Messages:
    1,367
    Gender:
    Male
    First Name:
    Kelly
    Sierra Vista, AZ / Asheville, NC
    Vehicle:
    2012 MGM TRD Sport DCLB
    WeatherTec Digi Liners, AVS Bugflector II, TRD FJ SE Anthracite Rims, BF Goodrich AT KO2 265/75/16, AVS In-Channel Wind Deflectors, Extang Solid Fold, Pop & Lock, Color Match Grill Emblem (Anthracite), Plasti Dip Emblems, Tacoma Bed Mat, Tacoma Door Sill Protectors, ToyTec Ultimate Lift Kit, ICON UCAs, Wheeler's Progressive AAL, Wet Okoles, Sockmonkey 3rd Brake Light Cover, LED Hood/Bed Lighting w/ OTRATTW Switches, Famous Fabrication Sliders, Sockmonkey TRD Bed Decal, Proven Design 4x4 Mudflaps, BenWA's Rear Power Sliding Window, Jasper Off Road 6" Reverse LED Pod, ImMrYo Rear View Mirror Bracket, GrillCraft w/ Black Mesh and color matched Land Cruiser Emblem, LED Tail Lights, Badge Removal and Vinyl TRD/Tacoma Stickers, Bullaculla Trailer Harness Relocation.
    Great looking truck! Really like the way the bumper/hoop looks. Of course there is no comparison to the color.
     
  14. Feb 26, 2014 at 5:48 PM
    #54
    Hillclimber

    Hillclimber Well-Known Member

    Joined:
    Jan 7, 2014
    Member:
    #120136
    Messages:
    50
    Gender:
    Male
    First Name:
    Justin
    NW Iowa
    Vehicle:
    2012 Baja
    Nice job! I like everything you did. Someday I'm going to build a nice bed rack for mine.
     
  15. Feb 26, 2014 at 6:38 PM
    #55
    zscott

    zscott [OP] Well-Known Member Vendor

    Joined:
    Jul 16, 2013
    Member:
    #108365
    Messages:
    3,742
    Gender:
    Male
    First Name:
    Zach
    Utah
    Vehicle:
    13 DCSB Off-Road 4x4
  16. Feb 26, 2014 at 7:02 PM
    #56
    happy

    happy Well-Known Member

    Joined:
    Nov 2, 2013
    Member:
    #115725
    Messages:
    234
    Gender:
    Male
    Eagle, CO
    Vehicle:
    '14 DCSB SR5 4x4 Silver Sky
    CBI Moab 2.0, 2.5" Radflo Coilovers, Light Racing UCA, Dakar Leaf Pack, 265/75 16 Kelly Safari TSR, Leer XR100
    Looks awesome-- by the way, how did you use the 12" brackets supplied by CBI? In an email from CBI, i thought they were supposed to mount using the swaybar mounting points. I hadn't installed the brackets because I have a swaybar relocate spacer there.It looked in one pic like you drilled holes in the side of the frame just above the swaybar mount?
     
  17. Feb 26, 2014 at 7:29 PM
    #57
    zscott

    zscott [OP] Well-Known Member Vendor

    Joined:
    Jul 16, 2013
    Member:
    #108365
    Messages:
    3,742
    Gender:
    Male
    First Name:
    Zach
    Utah
    Vehicle:
    13 DCSB Off-Road 4x4
    My brackets use both the sway bar mounts and a hole in the frame directly above where the sway bar mounts. I had to remove some little plastic plug type things to access the hole but they just pop right out. On a side note, you can actually fit the brackets in there with the sway bar relocate on. It makes it so the sway bar has minimal space to move up front near the skid plate but it will fit. Just install the bracket, then the relocate spacer, then the hangers for he sway bar. I took my relocate spacer off cause it seemed to make my truck handle differently and I didn't like it. I haven't had problems with the coils hitting it yet so hopefully I will be ok.
     
  18. Feb 26, 2014 at 8:38 PM
    #58
    Jon850FL

    Jon850FL is Lurkin'

    Joined:
    Aug 1, 2011
    Member:
    #60972
    Messages:
    2,392
    Gender:
    Male
    First Name:
    Jon
    DFS, FL
    id choose this one then the one your currently building....lol
     
  19. Feb 26, 2014 at 8:49 PM
    #59
    zscott

    zscott [OP] Well-Known Member Vendor

    Joined:
    Jul 16, 2013
    Member:
    #108365
    Messages:
    3,742
    Gender:
    Male
    First Name:
    Zach
    Utah
    Vehicle:
    13 DCSB Off-Road 4x4
    I really liked the strength of that one, also the tie-dow idea that I got from Boxrocket, but it was heavy compared to the new aluminum one and I prefer the rail mounting system better. I wanted something easy to add and remove depending on my needs or wants at the time and the one you like better always seemed to try and scratch my roof when I removed it. :eek:
     
  20. Feb 27, 2014 at 8:52 AM
    #60
    Jon850FL

    Jon850FL is Lurkin'

    Joined:
    Aug 1, 2011
    Member:
    #60972
    Messages:
    2,392
    Gender:
    Male
    First Name:
    Jon
    DFS, FL
    ohh ok, didnt know you removed it on and off alot. makes more sense.
     
To Top