1. Welcome to Tacoma World!

    You are currently viewing as a guest! To get full-access, you need to register for a FREE account.

    As a registered member, you’ll be able to:
    • Participate in all Tacoma discussion topics
    • Communicate privately with other Tacoma owners from around the world
    • Post your own photos in our Members Gallery
    • Access all special features of the site

LT Issues... Weak Coil Buckets

Discussion in 'Long Travel Suspension' started by DirtRev., Jul 15, 2015.

  1. Jul 15, 2015 at 10:09 PM
    #1
    DirtRev.

    DirtRev. [OP] Kick the tires and light the fires...

    Joined:
    Jun 8, 2015
    Member:
    #157030
    Messages:
    66
    Gender:
    Male
    Oregon
    Vehicle:
    95 4x4 LT Tacoma
    Blood, Sweat, and Beers
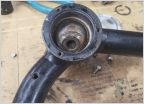
    The stock coil buckets on these trucks are by no means a strong point and then with alot of the LT coilovers you have to cut or notch the front of the bucket to clear the res. hose, making them even weaker. Even if you are able to get by without notching the bucket you still have a pretty good chance of mushrooming the top after a couple good hits... The total chaos gussets are great and I have them but they are used to double shear the upper control arm bolt and they do not help the top of the bucket... So heres my story, after my LT kit was done being fabricated and I was in the shop putting it all together we found that in order to make my coilover upper mount work we needed to notch the coil bucket (suprise, suprise) so my fabricator had to ditch the snazzy bolt-in upper hanger he had made and we resorted to cutting the bucket and welding 2 steel sleeves on top for the bolt to go through thus somewhat sketchily holding the coilover in place.. I was pretty uneasy with this method due to 1) having to cut the bucket and 2) welding sleeves to the top of the paper thin metal of the stock bucket... Now my fabricator does phenominal work and builds sand rails for a living and ide say he did an excellent job on building my 3.5in over custom control arms but when we got to this point he wasnt super thrilled with the outcome either, however it was late, a work night, and we both wanted to get out of there. So he said just to keep an eye on it and if it starts to bend or anything stop driving it and we will fix it but it should hold..should... So I had my doubts and thats exactly what I have been doing is checking those mounts out after every time I wheeled the truck cuz I was pretty sure sooner or later they were going to give me issues. Sure enough they did and this is what I found.

    coil%20bucket3_zps0exl4czs_f5ec185137d8e4a089a187547af35e83142d3140.jpg

    It was basically tearing the top of the bucket open like a tin can...

    coil%20bucket2_zpsurvjhh00_d7e88c8a3dc55e3b9aaaaa67b6707520dc1a1744.jpg

    And so this is where I obviously park the truck and decide what next... Well for the most part I do all of the fabricating and work on my truck myself except when it came to the suspension components that I wanted a professional to do. So now the plan is to do what my gut was telling me to do in the first place, BEEF the living hell out of these things.. So to start I cut out the top of the stock bucket and got rid of the shreaded beer can to make room for whats next..

    coil%20bucket4_zpshnaoivt9_35d4c2af555427958f3270f30026d51af51b15d0.jpg

    Now after searching and searching I couldnt find anybody that makes a reinforcement or boxed kit for the stock buckets. So my plan is to use some thick ass materials at least 1/4in plate for sides and probably going to go even thicker for the top section that supports the coilover and build a fully boxed coil bucket. Then weld it to the remaining portion of the stock bucket. Here is the rough design, I will be picking up materials and hopefully finishing it over the next week as I get time.

    coil%20bucket1_zpsmej4h9js_1a0e50e5960185290d15a64205ce21d0eeec6eea.jpg

    Anybody that has any comments or suggestions feel free, and sorry for the long winded post...:D
     
  2. Jul 16, 2015 at 1:32 PM
    #2
    Canks

    Canks Well-Known Member

    Joined:
    Jul 24, 2012
    Member:
    #83305
    Messages:
    301
    Gender:
    Male
    San Diego
    Vehicle:
    08 DCSB in pieces; 04 Tundra Access cab also in pieces
    I wouldn't waste your time with the stock bucket. Do yourself a favor, cut out the top of the bucket, reinforce/gusset the bucket, and build yourself an actual engine cage to mount your coilover to and tie in the entire front end and prepare the engine cage for a later tie in to your cab cage, and don't forget to plate your lower arm mounts since you are doing all of this work and make your uppers pivot on heims.... This will be the only actual option to minimize damage to your front end and keep it all together so you can go fast.
     
  3. Jul 16, 2015 at 2:51 PM
    #3
    DirtRev.

    DirtRev. [OP] Kick the tires and light the fires...

    Joined:
    Jun 8, 2015
    Member:
    #157030
    Messages:
    66
    Gender:
    Male
    Oregon
    Vehicle:
    95 4x4 LT Tacoma
    Blood, Sweat, and Beers
    I totally agree an engine cage that ties the mounts together is ideal and I definitely plan on doing one in the future, what im doing right now is just to box and reinforce the bucket first so as to start from the ground up. I already have the top of the buckets cut out and the cardbord templates are the design I am using for the boxed/reinforced buckets. I picked up some 1/4in steel plate today and will be cutting out the peices and welding it all together early next week I will post some pictures up as it develops. :thumbsup:
     
  4. Jul 16, 2015 at 2:55 PM
    #4
    jberry813

    jberry813 Professional Fluffer Moderator

    Joined:
    Jan 21, 2011
    Member:
    #49636
    Messages:
    28,471
    Gender:
    Male
    First Name:
    Jason
    Lake Tahoe
    Vehicle:
    2012 DCSB Sport
    ...too much shit to list.
    You already cut the top of the bucket off. Why not just run a shock hoop over it for mounts instead of plate? Stronger, easier, and faster.

    It's well known the buckets are shit in these trucks with spirited driving, especially when you notch the front edge. You'll still fold 1/4" when it's notched like that. Hell I bowed the 1/4" plate and the bucket without a notch.
     
  5. Jul 16, 2015 at 2:56 PM
    #5
    anthony250f

    anthony250f Well-Known Member

    Joined:
    Feb 18, 2012
    Member:
    #73066
    Messages:
    16,544
    Gender:
    Male
    First Name:
    Anthony
    San Diego, CA
    Vehicle:
    2008 dcsb trd offroad 4wd
    Dude that looks insanely sketchy and I can't believe a fabricator would do that..if you used the proper 2.5x8 coil overs then nine of that sketchyness would have had to happen...almost everyone uses 2.5x8 and doesn't have to molest the coil bucket like your fabricator did...maybe should have gone with camburg
     
  6. Jul 16, 2015 at 2:57 PM
    #6
    anthony250f

    anthony250f Well-Known Member

    Joined:
    Feb 18, 2012
    Member:
    #73066
    Messages:
    16,544
    Gender:
    Male
    First Name:
    Anthony
    San Diego, CA
    Vehicle:
    2008 dcsb trd offroad 4wd
    Now that you cut the bucket run a hoop and then one over the motor and be done
     
    FlapJack935 and 12TRDTacoma like this.
  7. Jul 16, 2015 at 2:59 PM
    #7
    jberry813

    jberry813 Professional Fluffer Moderator

    Joined:
    Jan 21, 2011
    Member:
    #49636
    Messages:
    28,471
    Gender:
    Male
    First Name:
    Jason
    Lake Tahoe
    Vehicle:
    2012 DCSB Sport
    ...too much shit to list.
    IIRC that was the old TC design. If you had 4x4 you were supposed to notch the bucket and invert the mount to clear the resi tube. Of course the assumption is you'd run a secondary shock hoop to provide additional strength for the notch. Obviously not done here.

    EDIT: Nevermind. Just realized the shock bolt was welded strait to the top of the bucket. Sketch agreed.
     
  8. Jul 16, 2015 at 3:17 PM
    #8
    12TRDTacoma

    12TRDTacoma Powered by Ford, GM, VW, and Mercedes

    Joined:
    Aug 20, 2012
    Member:
    #85133
    Messages:
    16,546
    Gender:
    Male
    First Name:
    Rob
    Concordia
    Vehicle:
    12 TRD Sport DCLB 4x4 Supercharged
    Boosted
    To the OP.

    54dad19e999c70e0a583573f7766469223048833_b4c297d2925c5ea13fd66b0c137ff6bc5386ceb2.jpg
     
  9. Jul 16, 2015 at 3:34 PM
    #9
    DirtRev.

    DirtRev. [OP] Kick the tires and light the fires...

    Joined:
    Jun 8, 2015
    Member:
    #157030
    Messages:
    66
    Gender:
    Male
    Oregon
    Vehicle:
    95 4x4 LT Tacoma
    Blood, Sweat, and Beers
    @anthony250f the shocks are 2.5x8 and ya it was a bit of a sketchy mount to say the least I would have rather gone a different route from the start but all well I guess... and @jberry813 I cut the top of the bucket off cuz the way he just welded those bushings on there it was tearing it like a tin can and was so damaged I didnt feel comfortable using that part of the bucket anymore. So i just cut out the very top and will rplace it with the 1/4 in plate that will be welded to the pieces of plate that drop along each side to box the bucket in and reinforce it. Then all of that will be welded to the vertical portions of the remaining bucket. Then I would like to run TC's secondary shock hoop to further reinforce the new top hat of the bucket because like @jberry813 stated even 1/4in plate by itself will probably bend.
     
  10. Jul 16, 2015 at 3:36 PM
    #10
    DirtRev.

    DirtRev. [OP] Kick the tires and light the fires...

    Joined:
    Jun 8, 2015
    Member:
    #157030
    Messages:
    66
    Gender:
    Male
    Oregon
    Vehicle:
    95 4x4 LT Tacoma
    Blood, Sweat, and Beers
    Haha Im just trying to fix the problem at hand that was created by somebody else...
     
    12TRDTacoma[QUOTED] likes this.
  11. Jul 16, 2015 at 3:37 PM
    #11
    12TRDTacoma

    12TRDTacoma Powered by Ford, GM, VW, and Mercedes

    Joined:
    Aug 20, 2012
    Member:
    #85133
    Messages:
    16,546
    Gender:
    Male
    First Name:
    Rob
    Concordia
    Vehicle:
    12 TRD Sport DCLB 4x4 Supercharged
    Boosted
    Just helping you find the comedic value behind a bad situation. Thats what I'm here for! :D :thumbsup:
     
  12. Jul 16, 2015 at 3:43 PM
    #12
    DirtRev.

    DirtRev. [OP] Kick the tires and light the fires...

    Joined:
    Jun 8, 2015
    Member:
    #157030
    Messages:
    66
    Gender:
    Male
    Oregon
    Vehicle:
    95 4x4 LT Tacoma
    Blood, Sweat, and Beers
    Well I can appreciate that :rolleyes:...

    It is a bit of a bummer having to go back and fix someones shity work tho. But who all is running the TC secondary shock hoop? How do you like it? Cuz I think that is going to be the best route after I finish all this plating/boxing crap..
     
  13. Jul 16, 2015 at 4:10 PM
    #13
    jberry813

    jberry813 Professional Fluffer Moderator

    Joined:
    Jan 21, 2011
    Member:
    #49636
    Messages:
    28,471
    Gender:
    Male
    First Name:
    Jason
    Lake Tahoe
    Vehicle:
    2012 DCSB Sport
    ...too much shit to list.
    Your truck, your choice. IMO you shouldn't bother with plating the coil bucket again. Just keep it and box it in for the main UCA bolt only and run a tube for a shock mount.

    1/4" plate. Bucket is even worse. And that's with a secondary hoop:

    8BFE5EF7-2DE2-4FE7-94FA-A9F7192373BA-458_0433b5f85ec8716c4bf4d82e877744eca1150cf7.jpg

     
    Last edited: Jul 16, 2015
  14. Jul 16, 2015 at 4:27 PM
    #14
    DirtRev.

    DirtRev. [OP] Kick the tires and light the fires...

    Joined:
    Jun 8, 2015
    Member:
    #157030
    Messages:
    66
    Gender:
    Male
    Oregon
    Vehicle:
    95 4x4 LT Tacoma
    Blood, Sweat, and Beers
    Dam so you would bypass the bucket altogether and just do a shock hoop? even with TC's secondary hoop you still warped that plate? hmmm I dont think I go near as hard as you @jberry813 looking at some of your photos/video on your build page but still :notsure:...
     
  15. Jul 16, 2015 at 4:29 PM
    #15
    jberry813

    jberry813 Professional Fluffer Moderator

    Joined:
    Jan 21, 2011
    Member:
    #49636
    Messages:
    28,471
    Gender:
    Male
    First Name:
    Jason
    Lake Tahoe
    Vehicle:
    2012 DCSB Sport
    ...too much shit to list.
    Yep still bent. Nope. I wouldn't do it over again.
    If I had to do it all over again I would have cut the bucket out from the start and ran my own hoop similar to what @Rock Lobster showed above and run 10" stroke shocks.
     
  16. Jul 16, 2015 at 4:51 PM
    #16
    anthony250f

    anthony250f Well-Known Member

    Joined:
    Feb 18, 2012
    Member:
    #73066
    Messages:
    16,544
    Gender:
    Male
    First Name:
    Anthony
    San Diego, CA
    Vehicle:
    2008 dcsb trd offroad 4wd
    Secondary hoop from the start would have been good lolimage.jpg
     
  17. Jul 16, 2015 at 4:53 PM
    #17
    12TRDTacoma

    12TRDTacoma Powered by Ford, GM, VW, and Mercedes

    Joined:
    Aug 20, 2012
    Member:
    #85133
    Messages:
    16,546
    Gender:
    Male
    First Name:
    Rob
    Concordia
    Vehicle:
    12 TRD Sport DCLB 4x4 Supercharged
    Boosted
    I'm running the TC secondary hoop, but I am still considered mid travel. Even though the difference between me and entry level "LT" is all of like an inch. I like my setup. Works very well for what I do.

    Setup is similar to the ones shown above using the secondary.

    20150411_193813_zpsgf5rfrxk_26e7d270975c10a71fb14f30535821b6f434b600.jpg

    Not quite LT, but you get the idea.
     
  18. Jul 17, 2015 at 9:13 AM
    #18
    DirtRev.

    DirtRev. [OP] Kick the tires and light the fires...

    Joined:
    Jun 8, 2015
    Member:
    #157030
    Messages:
    66
    Gender:
    Male
    Oregon
    Vehicle:
    95 4x4 LT Tacoma
    Blood, Sweat, and Beers
    Dam that is a nice looking setup tho.. I like the secondary shock hoop and with it tied into the engine cage seems like it would be prety stout...

    @12TRDTacoma I really like your setup as well, how do you like running just a 2.5 resi as a secondary? Was it a noticable differance? I have thought about doing this vs. dropping a ton of money on bypasses since right now this is still my DD and dont know that I could justify bypasses at this point..
     
  19. Jul 17, 2015 at 5:56 PM
    #19
    12TRDTacoma

    12TRDTacoma Powered by Ford, GM, VW, and Mercedes

    Joined:
    Aug 20, 2012
    Member:
    #85133
    Messages:
    16,546
    Gender:
    Male
    First Name:
    Rob
    Concordia
    Vehicle:
    12 TRD Sport DCLB 4x4 Supercharged
    Boosted
    You could tune the shit out of a resi setup and make it perform exactly like a bypass setup. You have to know what you are doing though. The advantage to a bypass over a smoothie with resi is purely adjustment on the fly with the bypass over the smoothie with the resi where you have to break it down to tune it. The bypass also has a zone that allows you to tune it to work like a night and day difference going from a single to a dual setup even though the hydro bump was there. It's that much better now. I am going to be doing an partial engine cage (bolt on) in about two weeks and it should tie both sides in together to increase overall frame flex strength and it should make another very noticable difference in the trucks abilities. This MT setup I have lets me keep up with some of the entry level LT's at this moment. I do have to relocate the battery still, however.

    Mine is a DD for the record.
     
    Last edited: Apr 26, 2020
  20. Jul 17, 2015 at 6:31 PM
    #20
    anthony250f

    anthony250f Well-Known Member

    Joined:
    Feb 18, 2012
    Member:
    #73066
    Messages:
    16,544
    Gender:
    Male
    First Name:
    Anthony
    San Diego, CA
    Vehicle:
    2008 dcsb trd offroad 4wd
    I don't think you're mid travel could keep up with me ;) haha looks good tho!
     
    12TRDTacoma likes this.

Products Discussed in

To Top