

-
Welcome to Tacoma World!
You are currently viewing as a guest! To get full-access, you need to register for a FREE account.
As a registered member, you’ll be able to:- Participate in all Tacoma discussion topics
- Communicate privately with other Tacoma owners from around the world
- Post your own photos in our Members Gallery
- Access all special features of the site
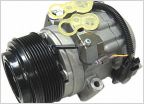 A/C making a Growning/Growling Noise; $2,200?!?
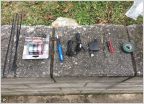 How To: Retractable iPhone 5 Constant Hot Charger
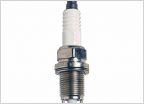 6 Cly losses pwr
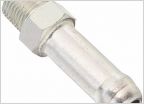 Need Help on the Rear Differential Breather Mod
 How To - Change Spark Plug 1st Gen 95.5-04 2RZ-FE(2.4L)/3RZ-FE(2.7L)
Drum brakes, simple or get 'em done professionally?
Discussion in 'Technical Chat' started by ZMan2k2, Jul 27, 2015.
Page 1 of 2
Page 1 of 2


