1. Welcome to Tacoma World!

    You are currently viewing as a guest! To get full-access, you need to register for a FREE account.

    As a registered member, you’ll be able to:
    • Participate in all Tacoma discussion topics
    • Communicate privately with other Tacoma owners from around the world
    • Post your own photos in our Members Gallery
    • Access all special features of the site

PrInSu Design Studio Roof Racks BS Thread

Discussion in 'PrInSu Design Studio' started by zscott, Feb 26, 2014.

  1. Jul 30, 2015 at 1:19 PM
    #2261
    pruchai

    pruchai KAMA3

    Joined:
    May 8, 2014
    Member:
    #129398
    Messages:
    1,788
    Gender:
    Male
    First Name:
    Igor
    San Diego, CA
    Vehicle:
    '14 TRD TX Baja
    Not enough...

    I've had a bunch of different Thule and Yakima roof boxes, bike and snowboard racks and the best results were with wind deflectors what contoured the top of the cab and had little to no space between the deflector and the cab. See if you can find one of those plastic deflectors on CraigsList and play with it. They usually come with clamps that allow you to change the height and angle with ease.
     
  2. Jul 30, 2015 at 1:41 PM
    #2262
    bcubed

    bcubed Well-Known Member

    Joined:
    Jun 2, 2014
    Member:
    #131097
    Messages:
    203
    Gender:
    Male
    First Name:
    Brent
    Calgary AB
    I'm thinking if I can get the gap between the cab and deflector down, and maybe put something on the inside so you can't see it, will help a bunch... Just hard to do a quick test, and get it up to 100 kmh and back quick enough to do a good test.
     
  3. Jul 30, 2015 at 1:50 PM
    #2263
    pruchai

    pruchai KAMA3

    Joined:
    May 8, 2014
    Member:
    #129398
    Messages:
    1,788
    Gender:
    Male
    First Name:
    Igor
    San Diego, CA
    Vehicle:
    '14 TRD TX Baja
    Not enough...
    Yeah, that one did not look good.... As a quick test you can just use some masking tape to close the gap....
     
  4. Jul 30, 2015 at 1:51 PM
    #2264
    bcubed

    bcubed Well-Known Member

    Joined:
    Jun 2, 2014
    Member:
    #131097
    Messages:
    203
    Gender:
    Male
    First Name:
    Brent
    Calgary AB
    Same thoughts. Thinking if I can hide it on the inside it won't be bad
     
  5. Jul 30, 2015 at 4:35 PM
    #2265
    bcubed

    bcubed Well-Known Member

    Joined:
    Jun 2, 2014
    Member:
    #131097
    Messages:
    203
    Gender:
    Male
    First Name:
    Brent
    Calgary AB
    Should at least mention that I had a guy eye-f**k the hell out of the rack today... Kept asking me about it to the point of annoyance!
     
    Chauncey Bronson likes this.
  6. Jul 30, 2015 at 4:43 PM
    #2266
    geekhouse23

    geekhouse23 The "Liftman" - @DrFunker

    Joined:
    Jul 14, 2013
    Member:
    #108251
    Messages:
    15,470
    Gender:
    Male
    Vehicle:
    2GMGMDCSB4WDTRDFTMFW!! TL;DR
    mostly stock, grocery gettin' Prius
    Zach should have that in the packaging..I know the feels
     
    Chauncey Bronson likes this.
  7. Jul 31, 2015 at 3:54 PM
    #2267
    Chauncey Bronson

    Chauncey Bronson Un-Known Member

    Joined:
    Mar 21, 2011
    Member:
    #53419
    Messages:
    45
    Gender:
    Male
    First Name:
    Chauncey
    Arlington, TN
    Vehicle:
    07' SR5 TRD 4x4 Taco 6" lift 35" tires
    Just thought I'd throw this in there because I'd not heard it mentioned.

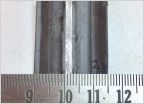
    Depending on how anal retentive you are: if you wish to have holes punched into the rubber strip instead of segmenting it: you'll need a 3/4" punch.

    If you don't have a 3/4" punch (who does) and don't feel like sourcing one and or having to be patient and wait for things to arrive...

    I bought a piece of 3/4" piping over at HD, cut it to about 2-3" and then took a belt sander and a whetstone, and put a cutting angle onto it. I'm very pleased with the results. I used an arbor press, but I'm sure a hammer with a flat hard surface underneath would work just as well. My ends were a little raggety, but at 3/4", the spacer will fit in there so nice and snug. Really snug to be honest, but it makes a great seal and will obviously help watertight integrity. Some might rather go to the next diameter pipe. Kind of ghetto ish/ half assed smart, and I didn't have to justify to myself or the wife why I needed another punch set... Nobody likes them talks even if you get your stuff..... Anyways, still busy, I just wanted to share in case anyone else thinks it's a good idea. I found all types of helpful pre install info in here, and thought I'd put my two cents in on this aspect.
    image.jpg
     
    Blackout14 likes this.
  8. Jul 31, 2015 at 4:23 PM
    #2268
    Chauncey Bronson

    Chauncey Bronson Un-Known Member

    Joined:
    Mar 21, 2011
    Member:
    #53419
    Messages:
    45
    Gender:
    Male
    First Name:
    Chauncey
    Arlington, TN
    Vehicle:
    07' SR5 TRD 4x4 Taco 6" lift 35" tires
    I forget his name, and I'd really like to give him credit because it's brilliant in this application. He/I used a cut mark squares long with the straight edge of the cab towards the outside onto a piece of painters tape. Just line up the center line and mark it, and even you want you can even use the spacer to just circle around so that you have a perimeter to not deviate from whilst centering and placing the punch. I was pleased with this method. I just used a prismacolor pencil, I'm sure ink or whatever you have will work. I was pretty crude with this and prob should have took more time, but it's all working out really great. I think lining the ditch out with the black silicone and especially so around the plusnuts will force it back up into any void between the rubber and the spacer. I think anyways, I'm still in progress on the final seal plan; but this has ended up being a valuable to me component of the project. I'm really freaked out about about leaks etc. but hey man, at first I was freaked about drilling my damned roof and sealing. It's really easy to get overwhelmed initially about the drilling, but that went very well too. I ended up using a yard stick clamped to the rack for marking. And then like NYCO said about his truck; I started from the second rear dimple after the retainer clip; I took the yard stick and was able to accurately (bc of the flex) forecast the next five per side and transcribe those marks for drilling.image.jpg image.jpg image.jpg image.jpg image.jpg image.jpg image.jpg
    image.jpg
     
    Blackout14 and pruchai like this.
  9. Jul 31, 2015 at 4:24 PM
    #2269
    Chauncey Bronson

    Chauncey Bronson Un-Known Member

    Joined:
    Mar 21, 2011
    Member:
    #53419
    Messages:
    45
    Gender:
    Male
    First Name:
    Chauncey
    Arlington, TN
    Vehicle:
    07' SR5 TRD 4x4 Taco 6" lift 35" tires
    My phone messed up photo count and order
     
  10. Jul 31, 2015 at 4:25 PM
    #2270
    pruchai

    pruchai KAMA3

    Joined:
    May 8, 2014
    Member:
    #129398
    Messages:
    1,788
    Gender:
    Male
    First Name:
    Igor
    San Diego, CA
    Vehicle:
    '14 TRD TX Baja
    Not enough...
    Or you could just buy a whole set of them on Amazon for $12 and get 2 day Prime delivery to your door and even comes with a pouch. But then again, I'm a tool hoarder ;)
     
  11. Jul 31, 2015 at 6:29 PM
    #2271
    Spixelz

    Spixelz Well-Known Member

    Joined:
    May 25, 2015
    Member:
    #155987
    Messages:
    586
    Gender:
    Male
    First Name:
    Jesse
    Forest Grove, Oregon
    Vehicle:
    2015 White 6spd DCSB OR
    Icon Stage 4 w/Dakar Leafs
    Does the CabRac require drilling or not?
     
  12. Jul 31, 2015 at 7:11 PM
    #2272
    SixthSnail

    SixthSnail I have no idea what I'm doing

    Joined:
    Oct 3, 2014
    Member:
    #139599
    Messages:
    13,291
    Gender:
    Male
    First Name:
    Matt
    Los Angeles
    Vehicle:
    '14 Tacoma Sport
    See Build in Sig
    @Bman4X5 and I put painters tape over the weather stripping while it was still on the truck, lined up the rack, marked with sharpie, took stripping off and pinched the holes. Really easy and worked great.
     
  13. Jul 31, 2015 at 7:39 PM
    #2273
    pruchai

    pruchai KAMA3

    Joined:
    May 8, 2014
    Member:
    #129398
    Messages:
    1,788
    Gender:
    Male
    First Name:
    Igor
    San Diego, CA
    Vehicle:
    '14 TRD TX Baja
    Not enough...

    Only for access cabs. From what I understand they were never supposed to have OEM racks, so Toyota did not put the nuts in. Double cab has the nuts in there, but they are covered by a little plastic cover which you have to punch through.
     
  14. Jul 31, 2015 at 7:46 PM
    #2274
    SixthSnail

    SixthSnail I have no idea what I'm doing

    Joined:
    Oct 3, 2014
    Member:
    #139599
    Messages:
    13,291
    Gender:
    Male
    First Name:
    Matt
    Los Angeles
    Vehicle:
    '14 Tacoma Sport
    See Build in Sig
    Yeah. No clue why toyota decided that my truck shouldn't have a rack
     
    pruchai[QUOTED] likes this.
  15. Jul 31, 2015 at 7:54 PM
    #2275
    pruchai

    pruchai KAMA3

    Joined:
    May 8, 2014
    Member:
    #129398
    Messages:
    1,788
    Gender:
    Male
    First Name:
    Igor
    San Diego, CA
    Vehicle:
    '14 TRD TX Baja
    Not enough...
    But you guys get to have a long box as a standard ;)
     
  16. Jul 31, 2015 at 7:56 PM
    #2276
    SixthSnail

    SixthSnail I have no idea what I'm doing

    Joined:
    Oct 3, 2014
    Member:
    #139599
    Messages:
    13,291
    Gender:
    Male
    First Name:
    Matt
    Los Angeles
    Vehicle:
    '14 Tacoma Sport
    See Build in Sig
    With the same wheel base! Haha that is the best part. My next taco will be a double cab as it will probably be in a long while when I'm settling down.
     
  17. Jul 31, 2015 at 8:01 PM
    #2277
    Spixelz

    Spixelz Well-Known Member

    Joined:
    May 25, 2015
    Member:
    #155987
    Messages:
    586
    Gender:
    Male
    First Name:
    Jesse
    Forest Grove, Oregon
    Vehicle:
    2015 White 6spd DCSB OR
    Icon Stage 4 w/Dakar Leafs
    Thanks! Just wanted to be sure, my rack arrives Monday and want to make sure I was prepared for drilling holes!
     
  18. Jul 31, 2015 at 8:29 PM
    #2278
    SixthSnail

    SixthSnail I have no idea what I'm doing

    Joined:
    Oct 3, 2014
    Member:
    #139599
    Messages:
    13,291
    Gender:
    Male
    First Name:
    Matt
    Los Angeles
    Vehicle:
    '14 Tacoma Sport
    See Build in Sig
    Get a step bit! So much easier
     
  19. Jul 31, 2015 at 8:34 PM
    #2279
    Spixelz

    Spixelz Well-Known Member

    Joined:
    May 25, 2015
    Member:
    #155987
    Messages:
    586
    Gender:
    Male
    First Name:
    Jesse
    Forest Grove, Oregon
    Vehicle:
    2015 White 6spd DCSB OR
    Icon Stage 4 w/Dakar Leafs
    Won't be drilling since I have a cabrack. But drilling holes in the plastic cover will be done!
     
  20. Jul 31, 2015 at 8:43 PM
    #2280
    pruchai

    pruchai KAMA3

    Joined:
    May 8, 2014
    Member:
    #129398
    Messages:
    1,788
    Gender:
    Male
    First Name:
    Igor
    San Diego, CA
    Vehicle:
    '14 TRD TX Baja
    Not enough...
    Speaking of step bits. My stupid ass never used oil with those so now I have 3 useless $45 bits. Does anyone know where/how to sharpen them again?
     

Products Discussed in

To Top