

-
Welcome to Tacoma World!
You are currently viewing as a guest! To get full-access, you need to register for a FREE account.
As a registered member, you’ll be able to:- Participate in all Tacoma discussion topics
- Communicate privately with other Tacoma owners from around the world
- Post your own photos in our Members Gallery
- Access all special features of the site
 Wiring Kenwood DNX 8120
 Best Aftermarket Short Antenna
 Does a boom mat help?
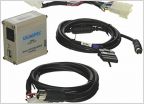 USA SPEC PA15-TOY does not work well with Iphone 3GS
 2006 Double Cab sound upgrade recommendations
 BEST IN-DASH UNDER 250
2003 X-Cab 4x4 Budget Audio Build
Discussion in 'Audio & Video' started by rob feature, Dec 14, 2015.
Page 1 of 5
Page 1 of 5
