

-
Welcome to Tacoma World!
You are currently viewing as a guest! To get full-access, you need to register for a FREE account.
As a registered member, you’ll be able to:- Participate in all Tacoma discussion topics
- Communicate privately with other Tacoma owners from around the world
- Post your own photos in our Members Gallery
- Access all special features of the site
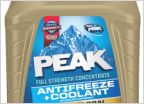 Antifreeze / Coolant - Red, Pink, Green ???
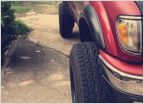 Bilstein 5100,OME 881 w/ a spacer possible ?
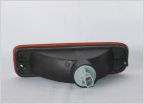 Source for turn signal assemblies?
 Battery cable harness upgrade
 01 Tacoma factory hitch
 Rubber treatment
First Gen Brake Shoe Write Up
Discussion in '1st Gen. Tacomas (1995-2004)' started by waldeeeeen, Mar 8, 2016.


