1. Welcome to Tacoma World!

    You are currently viewing as a guest! To get full-access, you need to register for a FREE account.

    As a registered member, you’ll be able to:
    • Participate in all Tacoma discussion topics
    • Communicate privately with other Tacoma owners from around the world
    • Post your own photos in our Members Gallery
    • Access all special features of the site

Painting Grill Surround - Full write up

Discussion in 'Detailing' started by warehouse32, May 13, 2016.

  1. May 13, 2016 at 8:46 AM
    #1
    warehouse32

    warehouse32 [OP] Well-Known Member

    Joined:
    May 5, 2015
    Member:
    #154614
    Messages:
    80
    Gender:
    Male
    New Jersey
    Vehicle:
    2012 Tacoma SR5 ACLB
    falken wilpeaks at3w 265/75r16, Bilstein 5100 with OME 884, Deaver AAL, painted grill surround,
    So I've been wanting to do this for a while now, I watched some you tube, read some forum threads and figured I'd give it a shot! I did have some trouble finding a clear write up for what I wanted, so hopefully this is helpful to others who want to do the same thing! Feel free to give me some pointers/comments/feedback...I'm by no means a professional!

    All in all I spent about $38 on stuff you can find at any auto parts store. From start to finish this project took about a day and a half (keep in mind, a lot of that time was spent literally waiting for paint to dry...so actual work time was only about 3.5-4 hours.)

    I know some guys go the plasti dip route, but I wasn't too sure of the color match or longevity, never having used it myself. So, this time around I went with the traditional primer/paint/clear combo.
    [​IMG]
    [​IMG]
    [​IMG]
    [​IMG]

    MATERIALS:
    • 200-400 grit sand paper
    • 800 grit scuff pad
    • 2000 grit wet/dry sand paper
    • Dupli Color scratch filler primer
    • Dupli Color Black (specific toyota match)
    • Dupli Color protective clear coat finish
    [​IMG]
    TOOLS:

    • Knife or flathead screwdriver (just something to pry with)
    • Phillips head screwdriver (optional)
    • 10 mm socket w/wrench
    • T20 torx bit driver
    • paper towel or lint free rag
    • soapy water
    • sponge
    • rubbing alcohol
    • gloves (latex or nitrile)
    • crap load of elbow grease
    • beer (optional...but I mean c'mon)
    [​IMG]

    STEP1: REMOVE THE GRILL

    This is pretty straight forward, but I should mention that I've got a 2012 taco, so I can only say for sure that these steps will work for 2nd gen's only. They might work on others, they might not.

    First, remove (2) 10mm bolts from the top of the grill with either the phillips head or the socket.
    [​IMG]

    After that there should be (2) pop up clips next to the headlights, (1) on each side. All you have to do is pry that center circle up with anything flat and the whole clip should come up.
    [​IMG][​IMG]

    Lastly, there should about (8) plastic tabs along the bottom holding the grill in place. There are (2) large ones by the headlights and (6) smaller ones along the center. You should be able to feel them with your fingers and, while gently pulling back on the grill, pop them up and out one at a time until the whole unit is out.
    [​IMG]

    STEP 2: TAKE THE SURROUND AND GRILL APART

    This was a bit more time consuming, but still pretty straight forward. There are (12) torx head screws size T20 to remove.
    [​IMG]

    And then comes the fun part...about 10 metal tabs coming from the surround through the plastic grill that have to be painstakingly pried and pushed back through at the same time. I found that starting on one of the corner tabs helps. You can pry the plastic away from the metal tab while pulling the grill away from the surround until the tab head sinks below. You may want to wedge something in between the grill and the surround to help keep tension on it while you pry the remaining tabs.

    After that, you only have about (6) basic tabs that just have to be depressed lightly and the whole thing should come apart!

    surround and grill separate.jpg

    STEP 3: CLEAN IT UP

    Before you start scuffing or painting you want to clean the surround to get rid of any bugs, sap, grease, dirt or anything that would keep the primer from sticking or would leave a lump in the finish. Just take some soapy water and a sponge and wipe everything down a few times until you've gotten rid of all the imperfections.
    wash surround.jpg

    STEP 4: SCUFF IT UP

    Now that you've gotten the chrome clean enough to eat off of...scratch the crap out of it! I'd go with about 300-400 grit paper and lightly start to scuff up the surface until you can see even scratches covering the whole surface. At this point you should be wearing gloves to keep the dirt and oils from your hands from getting on the metal. Then wipe it down with rubbing alcohol, let it dry, and get it ready for priming!
    after scuffing.jpg

    STEP 5: PRIME TIME!

    Now, I just followed the instructions on the can. It's that simple. I did 4 coats (there were still a few spots after 3 coats, so i waited an hour, scuffed lightly with the 800 grit pad and added another coat), about 8" away in smooth even strokes making sure not to start or stop on the surround itself. It's important not to go for full coverage on the first coat. The key is building an even layer with multiple LIGHT coats...you can always add more!

    After the first coat you can see it's pretty spotty...but a few coats later it's nice and even.
    first coat of primer.jpg
    last coat of primer.jpg

    STEP 6: PAINTING

    This is pretty much a repeat of step 5, except with the paint. Just make sure you wait about 5-10 mins between each coat and at least 30 mins before you apply the clear coat.
    first coat of paint.jpg last coat of paint.jpg

    STEP 7: CLEAR COAT

    Lather. Rinse. Repeat. Same as the priming and the painting, keep the can moving, light coats! It also helps if you clear the spray nozzle after each coat by flipping the can over and spraying until only air comes out.

    STEP 8: WET SANDING (OPTIONAL)

    Unless you have a spray booth and an hvlp system, you're probably gonna end up with a little orange peeliness in your final finish...and i wanted something closer to factory than that. So it's up to you if you want to go through with this step...some of you maybe lucky enough to have a flawless finish right of the bat! Me not so much.

    not the best finish here
    orange peel clear coat.jpg

    So, I let it dry for a few hours and then took some 2000 grit sand paper, sprayed some water on it and gently scrubbed the whole thing. You should see a white slurry start to appear, which is good. That means your smoothing out the finish.
    after wet sanding.jpg

    Do this a few times, wipe it clean with alcohol, let it dry and reapply another coat or two of clear coat. You should notice the finish is much clearer and shinier this time around.
    clear after wet sand.jpg

    STEP 9: REASSEMBLE, REATTACH, STEP BACK AND ENJOY!

    Basically work backwards through the first few steps (carefully!!) and then go brag to all your buddies about how awesome you are!

    AFTERTHOUGHTS:

    Like most first-time-projects, hindsight is always 20/20. So a few things I would've done differently and(or) better:

    1. Scuff the chrome up more thoroughly. I don't think I scuffed it up enough...while priming and painting I noticed a few little spots not sticking to the chrome.
    2. Check EVERY angle for even color distribution. I sprayed this in the sun thinking all that light would give me the best view in case I didn't get enough paint somewhere...turns out everything looks pretty even outside. It wasn't until I brought the piece inside that I noticed some edges and angled parts weren't coated as evenly as I would've liked. Next time, I guess.
    3. If you can, spray the clear coat inside. Just make sure you're in a well ventilated area. I had to carefully pick out bits of dust and bugs and crap before every coat, and that's probably why I had such a rough finish.
    4. It helps to orient the piece you're spraying vertically so that you can keep the can upright. I noticed if I held the spray can horizontally for too long I wouldn't get an even spray and it would start to sputter.
    Well, that's it for the write up! I tried to make this as detailed as possible (sorry if I went a little overboard) so I hope this helps anyone looking to do something similar. If you have any improvements/comments/questions on this process feel free to let me know!
     

    Attached Files:

    Last edited: May 13, 2016
    Climberclimb, 907-Taco, FGITP and 4 others like this.
  2. May 13, 2016 at 8:59 AM
    #2
    WildyTaco13

    WildyTaco13 Member

    Joined:
    Feb 15, 2016
    Member:
    #178267
    Messages:
    14
    Gender:
    Male
    Greer, SC
    Vehicle:
    13 DCSB TRD Off Road
    Awesome, awesome right up...very good info! I am planning on doing this to mine in a few short weeks.
     
  3. May 13, 2016 at 9:01 AM
    #3
    warehouse32

    warehouse32 [OP] Well-Known Member

    Joined:
    May 5, 2015
    Member:
    #154614
    Messages:
    80
    Gender:
    Male
    New Jersey
    Vehicle:
    2012 Tacoma SR5 ACLB
    falken wilpeaks at3w 265/75r16, Bilstein 5100 with OME 884, Deaver AAL, painted grill surround,
    Thanks! make sure to post some pics when you're done!
     
  4. May 13, 2016 at 9:21 AM
    #4
    ACEkraut

    ACEkraut Well-Known Member

    Joined:
    May 11, 2014
    Member:
    #129627
    Messages:
    4,283
    Gender:
    Male
    First Name:
    Aaron
    Topsham, Maine
    Vehicle:
    2014 DCSB TRD Off Road
    Nice work. If you want an even smoother, more brilliant finish add in one more step. Wet sand with 3000 grit sand paper then buff the clear coat. Even with a hand buffing it will come out nice.
     
  5. May 13, 2016 at 9:33 AM
    #5
    warehouse32

    warehouse32 [OP] Well-Known Member

    Joined:
    May 5, 2015
    Member:
    #154614
    Messages:
    80
    Gender:
    Male
    New Jersey
    Vehicle:
    2012 Tacoma SR5 ACLB
    falken wilpeaks at3w 265/75r16, Bilstein 5100 with OME 884, Deaver AAL, painted grill surround,
    Thanks for the tip! What do you recommend using for buffing?
     
  6. May 13, 2016 at 11:32 AM
    #6
    ACEkraut

    ACEkraut Well-Known Member

    Joined:
    May 11, 2014
    Member:
    #129627
    Messages:
    4,283
    Gender:
    Male
    First Name:
    Aaron
    Topsham, Maine
    Vehicle:
    2014 DCSB TRD Off Road
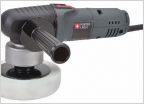
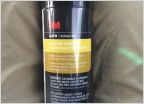
    There are lots of good products out there. I like Menzerna FG-400 and some good microfiber towels. The FG-400 is a bit pricy but you can always use for your truck or other vehicles. It is a bit tedious to buff it out by hand but it is doable and probably not a bad idea considering the physical shape of the grill surround you painted. A random orbital polisher works best but is not absolutely necessary. Although you have a black truck like me so I am sure your paint is showing some age by now. Black paint shows all the imperfections so well.

    https://www.detailersdomain.com/col...ucts/menzerna-fg-400-fast-gloss-compound-pint

    [​IMG]

    Just to give you an idea of what this product can do with a random orbital polisher, this picture is from the blog on the detailersdomain.com web site:

    DSC_3678_zps6842459d_d64ff37ccfba3e87d8a58b12b9212a663989b09f.jpg
     
  7. May 13, 2016 at 11:43 AM
    #7
    warehouse32

    warehouse32 [OP] Well-Known Member

    Joined:
    May 5, 2015
    Member:
    #154614
    Messages:
    80
    Gender:
    Male
    New Jersey
    Vehicle:
    2012 Tacoma SR5 ACLB
    falken wilpeaks at3w 265/75r16, Bilstein 5100 with OME 884, Deaver AAL, painted grill surround,
    Seriously! Mine is only 4 years old and I can see every little scuff and scratch...:(

    wow. that's impressive!
     
  8. May 13, 2016 at 11:44 AM
    #8
    ACEkraut

    ACEkraut Well-Known Member

    Joined:
    May 11, 2014
    Member:
    #129627
    Messages:
    4,283
    Gender:
    Male
    First Name:
    Aaron
    Topsham, Maine
    Vehicle:
    2014 DCSB TRD Off Road
    Check out the web site and the blog especially. The work that shop does will seriously blow you away.
     
  9. May 13, 2016 at 3:01 PM
    #9
    ManBeast

    ManBeast Well Feared Member

    Joined:
    Jun 3, 2015
    Member:
    #156641
    Messages:
    6,239
    Gender:
    Male
    First Name:
    Zach
    Orange Park FL
    Vehicle:
    2015 DCLB:TOTALED-> 2014 4R TRAIL
    20160509_160141.jpg my 2 month old duplicolor paint job. Hose with nozzle took it right off
     
  10. May 13, 2016 at 3:07 PM
    #10
    Wolftaco0503

    Wolftaco0503 Well-Known Member

    Joined:
    Oct 29, 2015
    Member:
    #168040
    Messages:
    16,237
    Gender:
    Male
    First Name:
    Adam
    Chicago
    Vehicle:
    2013 Super White LONG BED TRD SPORT 4x4
    Maglite mod Bottle Opener in bed Weathertech Mats Front & Back
    Thank you for the Write up. Been wanting to get on this asap. Probably gonna plasti dip it.
     
  11. May 13, 2016 at 3:11 PM
    #11
    ManBeast

    ManBeast Well Feared Member

    Joined:
    Jun 3, 2015
    Member:
    #156641
    Messages:
    6,239
    Gender:
    Male
    First Name:
    Zach
    Orange Park FL
    Vehicle:
    2015 DCLB:TOTALED-> 2014 4R TRAIL
    After i get it all to finish chipping away im going to get a vinyl wrap.
     
  12. May 13, 2016 at 3:14 PM
    #12
    Minny Taco

    Minny Taco For the Horde!

    Joined:
    Feb 26, 2016
    Member:
    #179482
    Messages:
    1,952
    Gender:
    Male
    Minnesota
    Vehicle:
    2015 TRD Off Road DCSB
    - Dobinsons shocks and leaf pack - Level 8 MK6 wheels - 265/70/17 Goodyear Wrangler Duratracs load C - SPC UCA - Moog LCA - TRD Pro headlights - Bullet Proof Fab skid plate w/ Line-X - 3M Matte Black roof vinyl - Astrostart remote - Debadged - Black shifter bezel - Front window tint 50% - Color matched grill surround - MESO LED red/white map lights - Osram Super Bright H4 bulbs - Headlight Services upgraded wiring harness - Auxito LED reverse lights - Zulu Nylon Gear MOLLE visor cover - Truxedo Lo Pro QT tonneau - Weathertech floor mats - Weathertech vent visors - Redline Tuning Elite hood struts - OEM bed mat - AJT Design custom shift knob - AJT Design custom climate knobs - Center console organizer - Salex glove box organizer - 1" driver seat spacers - AntennaX 14" antenna - AVS door sill protectors - Trimmed OEM mud flaps - Candyapple red tow hook - Painted pinch weld and radiator frame - Custom radio knobs from Hondo Garage - Xtunes black tail lights - Black LED third brake light - Ruff Tuff Kryptek Typhon seat covers - ACEkraut license plate relocation bracket - Cali Raised Side Shooter ditch lights w/ lo-pro mounts - Subaru tweeters + Rockford Fosgate speakers - Thinkware F800 Pro dash cam - Stickers n shit
    I applaud the effort and it's an awesome write up, but I don't see it lasting. I asked the dealer if they'd paint mine to match and the guy wouldn't touch it. And that's a pro doing it. Just ended up buying a new grill.
     
  13. May 13, 2016 at 3:22 PM
    #13
    gmann1972

    gmann1972 Well-Known Member

    Joined:
    Aug 24, 2015
    Member:
    #162600
    Messages:
    689
    Gender:
    Male
    First Name:
    Greg
    Rhode Island
    Vehicle:
    2013 tacoma SR5 DCSB
    Holding onto this thread, great right up, always wanted to do this, but I am to chicken to try...Looks like with this info i'll give it a try...looks awesome BTW...
     
  14. May 13, 2016 at 8:09 PM
    #14
    warehouse32

    warehouse32 [OP] Well-Known Member

    Joined:
    May 5, 2015
    Member:
    #154614
    Messages:
    80
    Gender:
    Male
    New Jersey
    Vehicle:
    2012 Tacoma SR5 ACLB
    falken wilpeaks at3w 265/75r16, Bilstein 5100 with OME 884, Deaver AAL, painted grill surround,
    I'll definitely give that a look! And thanks for the info!

    Guh that's depressing. Hopefully I'll get some time out of it... If not then maybe I'll try plastidip and see how that compares!

    Thanks! Lemme know how it goes, if be interested to see how the two methods stack up

    Thanks! I'm glad it helped. Be sure to post some pics when it's all done!!
     
  15. May 13, 2016 at 8:29 PM
    #15
    shaneckc

    shaneckc Fyntünd Designs Vendor

    Joined:
    Jun 23, 2010
    Member:
    #39362
    Messages:
    1,305
    Gender:
    Male
    First Name:
    Shane
    Thousand Oaks, CA
    Vehicle:
    2014 SR Package DCLB 4x4
    I have a few recommendations.

    Your coats look a little too light. Your first coat should be light, since it's your tack coat. Further coats should be wetter. You'll get a better chance of a smooth, factory finish with wet coats (not too wet, obviously).

    Sanding after primer before paint to between 600-800 grit will help with a smoother finish.

    I only know of one clear coat that comes out of an aerosol can that does well with wet sanding and buffing for a high gloss, factory grade clear coat finish:
    http://www.spraymax.com/index.php?id=361&L=1

    That stuff is awesome. It's a 2-part clear coat in a can. Once you pop the inner seal, you have 48 hours to use it all, but it's the best stuff you can get without an HVLP setup. SprayMax products are awesome, in general. You can wet sand it and buff it and it'll be nice and glossy.
     
    vssman likes this.
  16. May 14, 2016 at 4:20 AM
    #16
    warehouse32

    warehouse32 [OP] Well-Known Member

    Joined:
    May 5, 2015
    Member:
    #154614
    Messages:
    80
    Gender:
    Male
    New Jersey
    Vehicle:
    2012 Tacoma SR5 ACLB
    falken wilpeaks at3w 265/75r16, Bilstein 5100 with OME 884, Deaver AAL, painted grill surround,
    I agree, I noticed the spots where the paint had gone on thicker ended up looking much better than other areas. The gloss was higher and the clear had more depth.

    I did take an 800 grit sanding pad to the primer and it left a really smooth surface

    Good to know! I have a feeling I'll be repainting this if/when it starts to peel/fade and I'll make sure to use this! Thanks for all the advice, I really appreciate it:thumbsup:
     
  17. May 14, 2016 at 7:59 AM
    #17
    ManBeast

    ManBeast Well Feared Member

    Joined:
    Jun 3, 2015
    Member:
    #156641
    Messages:
    6,239
    Gender:
    Male
    First Name:
    Zach
    Orange Park FL
    Vehicle:
    2015 DCLB:TOTALED-> 2014 4R TRAIL
    Im just going to wrap it i think as far as cost efficiency and ease of cleaning its the best route. Plus i can switch the color between black n white if i want. I hit a big bug and my plastidip peel off in that area, then i had to use wd40 to get the rest off cause it wouldnt peel off. Hell i got the duplicolor off far easier with a hose then i did with countless hours of rubbing the plastidip little by little.
     
  18. May 15, 2016 at 7:16 AM
    #18
    ManBeast

    ManBeast Well Feared Member

    Joined:
    Jun 3, 2015
    Member:
    #156641
    Messages:
    6,239
    Gender:
    Male
    First Name:
    Zach
    Orange Park FL
    Vehicle:
    2015 DCLB:TOTALED-> 2014 4R TRAIL
    It was all fine and dandy when i first did it then it got dingy and is super impossible to take off if its not fresh. Ive had it on almost a year now on the stock rims and its ugly
     
  19. May 15, 2016 at 8:38 AM
    #19
    ManBeast

    ManBeast Well Feared Member

    Joined:
    Jun 3, 2015
    Member:
    #156641
    Messages:
    6,239
    Gender:
    Male
    First Name:
    Zach
    Orange Park FL
    Vehicle:
    2015 DCLB:TOTALED-> 2014 4R TRAIL
    I was tagged in a video on my facebook ill try to find it its funny and about derp
     
  20. May 15, 2016 at 9:06 AM
    #20
    ManBeast

    ManBeast Well Feared Member

    Joined:
    Jun 3, 2015
    Member:
    #156641
    Messages:
    6,239
    Gender:
    Male
    First Name:
    Zach
    Orange Park FL
    Vehicle:
    2015 DCLB:TOTALED-> 2014 4R TRAIL
    Its not on youtube nvm
     

Products Discussed in

To Top