1. Welcome to Tacoma World!

    You are currently viewing as a guest! To get full-access, you need to register for a FREE account.

    As a registered member, you’ll be able to:
    • Participate in all Tacoma discussion topics
    • Communicate privately with other Tacoma owners from around the world
    • Post your own photos in our Members Gallery
    • Access all special features of the site

2016 Access Cab- rear door panel removal?

Discussion in 'Audio & Video' started by Nitori, May 24, 2016.

  1. May 24, 2016 at 7:56 PM
    #1
    Nitori

    Nitori [OP] Well-Known Member

    Joined:
    May 3, 2016
    Member:
    #186058
    Messages:
    4,565
    Maricopa AZ
    Vehicle:
    2021 T4R SR5
    Anyone have a good tutorial or write up on how to get the panels off of the rear suicide doors on the Access cabs for the 2016 Tacos?

    I wanna kill 2 birds with one stone:

    1- I'm curious to see if "Utility Package" trucks come with the wires for the speakers back there, since they remove the rear speakers along with the rear seats. (my guess is yes the wires are still there, and so you can just plug an extra set of speakers in)

    2- There's a creak / rattle noise coming from the driver's side rear door driving me batshit and I know exactly what it is, I just need to open her up to put a little bit of deadening on it.
     
    usmc2msu likes this.
  2. May 24, 2016 at 7:58 PM
    #2
    BKill

    BKill AKA Threadkiller

    Joined:
    Sep 26, 2013
    Member:
    #113325
    Messages:
    1,560
    Gender:
    Male
    First Name:
    Bill
    College Station, TX
    Vehicle:
    2013 Tacoma PreRunner
    Well, unless they changed it on the 3rd gens, there are no speakers in the back doors on any of the access cabs. Do the panels have speaker grills in them?
     
  3. May 24, 2016 at 8:01 PM
    #3
    Nitori

    Nitori [OP] Well-Known Member

    Joined:
    May 3, 2016
    Member:
    #186058
    Messages:
    4,565
    Maricopa AZ
    Vehicle:
    2021 T4R SR5
    Yeah, they have grilles with (in my case) blanking plates.

    Best I can dig up on google image search right now:
    [​IMG]
     
  4. May 24, 2016 at 8:08 PM
    #4
    BKill

    BKill AKA Threadkiller

    Joined:
    Sep 26, 2013
    Member:
    #113325
    Messages:
    1,560
    Gender:
    Male
    First Name:
    Bill
    College Station, TX
    Vehicle:
    2013 Tacoma PreRunner
    My son just bought a new TRD Sport, but to be honest, I've never looked back there. I hope for your sake the wiring is there. On the late 2nd gens, they out these tiny little speakers above the headliner.
     
  5. May 24, 2016 at 8:12 PM
    #5
    Nitori

    Nitori [OP] Well-Known Member

    Joined:
    May 3, 2016
    Member:
    #186058
    Messages:
    4,565
    Maricopa AZ
    Vehicle:
    2021 T4R SR5
    I'm just hoping there is a good how-to out there because I don't want to take the "Pull on it hard and see what keeps it in place, hopefully it doesn't break" method of panel removal.
     
  6. May 25, 2016 at 9:29 PM
    #6
    Nitori

    Nitori [OP] Well-Known Member

    Joined:
    May 3, 2016
    Member:
    #186058
    Messages:
    4,565
    Maricopa AZ
    Vehicle:
    2021 T4R SR5
    Well, I took the panel off today. For the sake of expanding our collective knowledge base I learned 3 things:

    1- Taking off a 3rd gen's access door panel is exactly like taking off a 2nd gen's access door panel. Follow the same tutorials.

    2- Access Cabs with the Utility package are NOT pre wired for sound in the back

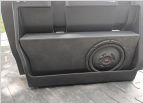
    3- Access Cabs with the Utility package have a speaker blanking grille that is permanently installed:
    [​IMG]

    Also apparently my rattle went away just from taking it apart and reinstalling! I went to test drive it around again to see where the best place to add the deadening material was, and it was gone. I'm cautiously optimistic.
     
    usmc2msu likes this.
  7. May 27, 2016 at 11:19 PM
    #7
    wudbuchr

    wudbuchr Well-Known Member

    Joined:
    Apr 13, 2012
    Member:
    #76881
    Messages:
    393
    Gender:
    Male
    First Name:
    Linnie
    Lexington, TN
    Vehicle:
    2016 (7128A) BBP 4x2 - TRD Sport Access Cab
    * Clear Bra (full front) * BBP (8T0) Side Body Molding * Tinted Windows with AWS window shades * Romik Running Boards * Color matched Undercover Lux bed cap and BedRug bed liner * MobTown Locking bed storage doors, Tailgate skin and cap * Chrome Tailgate Script lettering * G-Tec Fab Door Sill Protectors and OEM Mud Guards * Fumoto Valve * ScanGauge-II * LED Interior, Stop, tail, Bed, OPT7 LED H11 low beam and fog lights * WeatherTech floor mats * Clazzio seat Covers * Removed jump-seats & rear seat-belts * Sound deadened back wall, rear posts, rear doors and front doors with a layer of RAAMmat, a layer of Ensolite, and a layer of EzCool * Insulated the roof with two layers of EzCool * GT series Image Dynamics speakers (6x9 fronts, 6.5 rears) * Audio Control DQ-61 DSP, 5-channel amplifier and sub woofer. * Redline Tuning Quick Lift Elite hood struts * Thinkware F770 (Dual) Dashcam with Cellink Battery B * Lexus SmartKey Transmitter and Emergency Key
    Pulled out the jump seats, seatbelts and shoulder harnesses and rear console (if
    you want to call it that), sound deadened the back wall with a layer of RAAMMAT,
    a layer of Ensolite, a layer of EzCool and reinstalled the PVC-Pet (which was the
    ONLY factory insulation on the back wall) - reinstalled the plastic panel. Took out
    the rear storage compartments and lined the floor with a layer of Ensolite and a
    layer of EzCool. Applied a layer of Ensolite and EzCool to the cab’s rear posts.
    Removed rear door panels and put RAAMmat on outer and inner skins and covered
    the inner RAAMmat with Ensolite and EzCool. Tomorrow I think I will start on the
    front doors and floorboards/firewall. I am thinking about Removing the headliner
    and putting EzCool on the inner roof. Anyone take down a headliner yet?
     
  8. May 30, 2016 at 4:19 PM
    #8
    samsquamch1981

    samsquamch1981 Well-Known Member

    Joined:
    Dec 26, 2013
    Member:
    #119201
    Messages:
    62
    Gender:
    Male
    Vehicle:
    Tacoma

    I have a dent in my door on my '16 and need to take my access cab panel off. I can't figure out how to remove the lower portion of the seatbelt because there aren't any exposed bolts. Did anyone do a write-up yet, or know where there is a step by step diy to removing the access cab panel in a 2016.
     
  9. May 30, 2016 at 8:00 PM
    #9
    wudbuchr

    wudbuchr Well-Known Member

    Joined:
    Apr 13, 2012
    Member:
    #76881
    Messages:
    393
    Gender:
    Male
    First Name:
    Linnie
    Lexington, TN
    Vehicle:
    2016 (7128A) BBP 4x2 - TRD Sport Access Cab
    * Clear Bra (full front) * BBP (8T0) Side Body Molding * Tinted Windows with AWS window shades * Romik Running Boards * Color matched Undercover Lux bed cap and BedRug bed liner * MobTown Locking bed storage doors, Tailgate skin and cap * Chrome Tailgate Script lettering * G-Tec Fab Door Sill Protectors and OEM Mud Guards * Fumoto Valve * ScanGauge-II * LED Interior, Stop, tail, Bed, OPT7 LED H11 low beam and fog lights * WeatherTech floor mats * Clazzio seat Covers * Removed jump-seats & rear seat-belts * Sound deadened back wall, rear posts, rear doors and front doors with a layer of RAAMmat, a layer of Ensolite, and a layer of EzCool * Insulated the roof with two layers of EzCool * GT series Image Dynamics speakers (6x9 fronts, 6.5 rears) * Audio Control DQ-61 DSP, 5-channel amplifier and sub woofer. * Redline Tuning Quick Lift Elite hood struts * Thinkware F770 (Dual) Dashcam with Cellink Battery B * Lexus SmartKey Transmitter and Emergency Key
    Taking the panel off is no big problem. As you look at the open door, where the door meets
    the front door, there is a "push clip" (11 o'clock on the passenger side and 1 o'clock on the driver's side) kinda looks like a little black bulls eye. Simply push the center of that pin in a
    little and gently pull the pin out(you will see a slightly larger ring around the pin you just
    pushed in, that is what you are going to take out. Remember to push the center back out
    when reinstalling it later
    . Next, remove the two screws, one in the grip just below the
    window and the other is behind a little "beauty" patch in the handle you use to open the
    door with (I think you will need a T-25 Torx driver to get them out). That "beauty" patch
    is hinged at the front so you can open it with your fingernail or a small screw driver. At
    the bottom of the door is the lower seatbelt anchor, you will remove that with a 14MM
    socket. If you have any trim tools, here's where they will come into play. If not, simply
    wrap some electrical tape around a narrow putty knife and slide it between the bottom
    of the door panel and the metal door. Work your way along the bottom of the door until
    you meet some resistance, then pull the panel towards you. In the bottom center of the
    panel are two plastic pieces that align in two holes in the metal door. Remember these
    when you put the panel back on the door.
    Once you have the bottom loose, pull the
    forward weatherstripping off the door and set it aside. Before you do anything else, look
    in the gap you just created, using a flashlight. Notice the plastic hooks (they actually look
    like "U"). When you are putting the panel back on, make sure those clips are free (I keep buggering up the one at the handle) and go between the weatherstripping and the metal
    door during reassembly - they are what hold the front of the panel to the door.
    There are
    10 red plastic clips holding the panel in place. When all clips are free, the panel will be
    hanging at the top of the door. Before you remove the panel, study the slide assembly
    for the seatbelt at the top of the door. Note that there is a bolt & nut that fit into that
    slide assembly when things go back together. I did not remove the top seatbelt anchor,
    but chose to let the panel rest on an old blanket on the ground. With the panel on the
    ground, count the round red clips and make sure all ten are in the panel. If not you may
    have one or more still in the door remove them and place them back on the panel. Replacement is fairly easy as the mounts they go into have an opening on one side
    that the clip slides into. In the lower half of the door you will see inner door covered by
    a plastic (PET) panel which easily comes off and on. Reassembly is just as easy as disassembly! Save yourself some time and frustration by cutting squares of painter's
    tape and placing them on the outside of the panel where the clips are - you'll know
    where to pop the panel to reseat the clips. Now simply begin by hanging the panel
    on the top of the door and lining up the two plastic pieces at the bottom with the holes
    at the bottom of the door. STOP! Check the alignment of the seatbelt slide assembly
    at the top of the door. Ensure it works correctly. Remember those U clips along the
    front of the panel? Ensure none are bent or out of alignment (my headache was the
    one at the door handle assembly. When everything lines uop, go back to the bottom
    of the panel and start popping those clips back in place. When the door is back together,
    don't shut it yet. Operate the door handle and ensure there is no resistance and that
    the locking mechanism works, try the seabelt height adjustment and see that it works correctly. Button things up and stick a fork in it, you're done!
     
    usmc2msu, NorrinRadd, Homiec and 6 others like this.
  10. May 30, 2016 at 8:08 PM
    #10
    wudbuchr

    wudbuchr Well-Known Member

    Joined:
    Apr 13, 2012
    Member:
    #76881
    Messages:
    393
    Gender:
    Male
    First Name:
    Linnie
    Lexington, TN
    Vehicle:
    2016 (7128A) BBP 4x2 - TRD Sport Access Cab
    * Clear Bra (full front) * BBP (8T0) Side Body Molding * Tinted Windows with AWS window shades * Romik Running Boards * Color matched Undercover Lux bed cap and BedRug bed liner * MobTown Locking bed storage doors, Tailgate skin and cap * Chrome Tailgate Script lettering * G-Tec Fab Door Sill Protectors and OEM Mud Guards * Fumoto Valve * ScanGauge-II * LED Interior, Stop, tail, Bed, OPT7 LED H11 low beam and fog lights * WeatherTech floor mats * Clazzio seat Covers * Removed jump-seats & rear seat-belts * Sound deadened back wall, rear posts, rear doors and front doors with a layer of RAAMmat, a layer of Ensolite, and a layer of EzCool * Insulated the roof with two layers of EzCool * GT series Image Dynamics speakers (6x9 fronts, 6.5 rears) * Audio Control DQ-61 DSP, 5-channel amplifier and sub woofer. * Redline Tuning Quick Lift Elite hood struts * Thinkware F770 (Dual) Dashcam with Cellink Battery B * Lexus SmartKey Transmitter and Emergency Key
    Sorry Samsquamch1981, but I failed to answer your question. The lower seatbelt
    anchor (14mm bolt) at the front lower edge of the panel, is covered with a plastic
    fascia that simply pulls off and pops back on.
     
  11. May 31, 2016 at 6:39 AM
    #11
    samsquamch1981

    samsquamch1981 Well-Known Member

    Joined:
    Dec 26, 2013
    Member:
    #119201
    Messages:
    62
    Gender:
    Male
    Vehicle:
    Tacoma
    Thank you for the awesome write up. i was poking around looking at the plastic piece this morning and discovered it pops off like you said. I really appreciate your detailed response. Now, I have access to attempt to repair the dent in my new truck. I haven't even made the first payment yet and some a-hole put a small crease dent in my door. Thank you again.
     
  12. Jun 1, 2016 at 6:07 PM
    #12
    wudbuchr

    wudbuchr Well-Known Member

    Joined:
    Apr 13, 2012
    Member:
    #76881
    Messages:
    393
    Gender:
    Male
    First Name:
    Linnie
    Lexington, TN
    Vehicle:
    2016 (7128A) BBP 4x2 - TRD Sport Access Cab
    * Clear Bra (full front) * BBP (8T0) Side Body Molding * Tinted Windows with AWS window shades * Romik Running Boards * Color matched Undercover Lux bed cap and BedRug bed liner * MobTown Locking bed storage doors, Tailgate skin and cap * Chrome Tailgate Script lettering * G-Tec Fab Door Sill Protectors and OEM Mud Guards * Fumoto Valve * ScanGauge-II * LED Interior, Stop, tail, Bed, OPT7 LED H11 low beam and fog lights * WeatherTech floor mats * Clazzio seat Covers * Removed jump-seats & rear seat-belts * Sound deadened back wall, rear posts, rear doors and front doors with a layer of RAAMmat, a layer of Ensolite, and a layer of EzCool * Insulated the roof with two layers of EzCool * GT series Image Dynamics speakers (6x9 fronts, 6.5 rears) * Audio Control DQ-61 DSP, 5-channel amplifier and sub woofer. * Redline Tuning Quick Lift Elite hood struts * Thinkware F770 (Dual) Dashcam with Cellink Battery B * Lexus SmartKey Transmitter and Emergency Key
    Bummer about the dent. Creases are the most difficult dent to remove. Keep us posted on
    your progress. You might want to visit a local body shop while you have the door apart and
    ask for some pointers, or the approx cost of removing the dent. Since you are doing most
    of the disassembly/reassembly work, you should save a lot on the repairs.
     
  13. Jun 2, 2016 at 9:16 AM
    #13
    samsquamch1981

    samsquamch1981 Well-Known Member

    Joined:
    Dec 26, 2013
    Member:
    #119201
    Messages:
    62
    Gender:
    Male
    Vehicle:
    Tacoma
    Thank you. I was unable to get the crease out.....got some, but it's still obviously there. I ended up breaking a few of the red plastic tabs popping the panel off. They make them so cheap...No biggie though. Got the panel back on and will eventually have to have someone fix the dent and see if I take the door apart myself if it will lower the labor cost. Thanks for the idea.
     
  14. Jun 2, 2016 at 9:33 AM
    #14
    wudbuchr

    wudbuchr Well-Known Member

    Joined:
    Apr 13, 2012
    Member:
    #76881
    Messages:
    393
    Gender:
    Male
    First Name:
    Linnie
    Lexington, TN
    Vehicle:
    2016 (7128A) BBP 4x2 - TRD Sport Access Cab
    * Clear Bra (full front) * BBP (8T0) Side Body Molding * Tinted Windows with AWS window shades * Romik Running Boards * Color matched Undercover Lux bed cap and BedRug bed liner * MobTown Locking bed storage doors, Tailgate skin and cap * Chrome Tailgate Script lettering * G-Tec Fab Door Sill Protectors and OEM Mud Guards * Fumoto Valve * ScanGauge-II * LED Interior, Stop, tail, Bed, OPT7 LED H11 low beam and fog lights * WeatherTech floor mats * Clazzio seat Covers * Removed jump-seats & rear seat-belts * Sound deadened back wall, rear posts, rear doors and front doors with a layer of RAAMmat, a layer of Ensolite, and a layer of EzCool * Insulated the roof with two layers of EzCool * GT series Image Dynamics speakers (6x9 fronts, 6.5 rears) * Audio Control DQ-61 DSP, 5-channel amplifier and sub woofer. * Redline Tuning Quick Lift Elite hood struts * Thinkware F770 (Dual) Dashcam with Cellink Battery B * Lexus SmartKey Transmitter and Emergency Key
    Samsquamch1981hHere is a source for all types of fasteners:
    http://www.clipsandfasteners.com/Toyota_Lexus_Clips_And_Fasteners_s/13.htm
    If you are like me, you will be going through quite a few during your Taco's life.
    I picked up 18 at Robinson Toyota in Jackson TN @ $1.95 apiece before I found
    this site. There are several other good Toyota/TRD parts houses online as well.
    Keep breaking those clips, it means you are learning more about your Taco.
     
  15. Jun 2, 2016 at 9:45 AM
    #15
    wudbuchr

    wudbuchr Well-Known Member

    Joined:
    Apr 13, 2012
    Member:
    #76881
    Messages:
    393
    Gender:
    Male
    First Name:
    Linnie
    Lexington, TN
    Vehicle:
    2016 (7128A) BBP 4x2 - TRD Sport Access Cab
    * Clear Bra (full front) * BBP (8T0) Side Body Molding * Tinted Windows with AWS window shades * Romik Running Boards * Color matched Undercover Lux bed cap and BedRug bed liner * MobTown Locking bed storage doors, Tailgate skin and cap * Chrome Tailgate Script lettering * G-Tec Fab Door Sill Protectors and OEM Mud Guards * Fumoto Valve * ScanGauge-II * LED Interior, Stop, tail, Bed, OPT7 LED H11 low beam and fog lights * WeatherTech floor mats * Clazzio seat Covers * Removed jump-seats & rear seat-belts * Sound deadened back wall, rear posts, rear doors and front doors with a layer of RAAMmat, a layer of Ensolite, and a layer of EzCool * Insulated the roof with two layers of EzCool * GT series Image Dynamics speakers (6x9 fronts, 6.5 rears) * Audio Control DQ-61 DSP, 5-channel amplifier and sub woofer. * Redline Tuning Quick Lift Elite hood struts * Thinkware F770 (Dual) Dashcam with Cellink Battery B * Lexus SmartKey Transmitter and Emergency Key
    I think I have about three clips left out of the 18 I bought, after removing all four door
    panels and the rear wall plastic. I sound deadened the truck and it is unbelievably
    quieter.
     
  16. Jun 2, 2016 at 9:48 AM
    #16
    samsquamch1981

    samsquamch1981 Well-Known Member

    Joined:
    Dec 26, 2013
    Member:
    #119201
    Messages:
    62
    Gender:
    Male
    Vehicle:
    Tacoma
    Thanks for the site. I was paying about $2 a piece from all the clips I broke in my '14. I agree with you 100% about breaking clips to learn more about your truck. That site will save me on more clips I know I'm going to break....lol.
     
  17. Jun 2, 2016 at 10:48 AM
    #17
    BKill

    BKill AKA Threadkiller

    Joined:
    Sep 26, 2013
    Member:
    #113325
    Messages:
    1,560
    Gender:
    Male
    First Name:
    Bill
    College Station, TX
    Vehicle:
    2013 Tacoma PreRunner
    Hey, check out paintless dent repair. I have a friend that contracts with all the local auto dealers and does a great job. I've used him a couple of times and you cannot tell where the dent was. Cheaper and quicker than taking it to a body shop.
     
    rsimi72 and Dugg like this.
  18. Dec 18, 2020 at 4:53 PM
    #18
    rsimi72

    rsimi72 Well-Known Member

    Joined:
    Mar 31, 2017
    Member:
    #214965
    Messages:
    587
    Gender:
    Male
    PNW
    Vehicle:
    2020 Tacoma SR5 Access Cab
    Hey guys. I appreciate the pointers for taking the access cab door panel off. I pulled mine off today and there were two clips that were mangled. I am hopeful that they were the source of the rattle I was hearing. Fingers crossed. The problem I'm having now is that I preemptively ordered a few replacement door panel clips from my local Toyota dealer in case I broke some. But, the clips from the factory are red and the clips the dealer gave me are white and a slightly different design. I decided to sacrifice one and popped it into the door without the panel and it fit, but I needed vice grips to get it back out. I worry about reinstalling my door panel using those clips. It may never come back off. I called my dealer and the parts guy said that the white clips they gave me are the only part they have for my door panel. Even used my VIN #. Can any of you confirm if these white "replacement" clips will work or were you able to source clips that matched the red ones from the factory? Thank you!

    I attached an image of the new fastener that was supplied by the dealer. They are different from the red clips installed at the factory.
     

    Attached Files:

    Last edited: Dec 18, 2020
  19. Dec 18, 2020 at 8:55 PM
    #19
    Homiec

    Homiec Well-Known Member

    Joined:
    Dec 13, 2019
    Member:
    #313204
    Messages:
    298
    Vehicle:
    2020 TRD Sport Access Cab 4X4 MT
    Those white clips look like the ones on the front door. For the access doors I used these off of Amazon: https://www.amazon.com/gp/product/B07R1QTSQ1/ref=ppx_yo_dt_b_search_asin_title?ie=UTF8&psc=1
    They look and fit like the OEM ones and also work for the rear wall panels. The OEM red clips break easily so having spares is a must. Not uncommon for them to be damaged from the factory.

    I wish I had seen wudbuchr's post months ago. I ran into the exact same snags he warns about. The FSM doesn't mention them at all.
     
    rsimi72 likes this.
  20. Dec 18, 2020 at 9:49 PM
    #20
    rsimi72

    rsimi72 Well-Known Member

    Joined:
    Mar 31, 2017
    Member:
    #214965
    Messages:
    587
    Gender:
    Male
    PNW
    Vehicle:
    2020 Tacoma SR5 Access Cab
    Wow! Thanks for that link. Just ordered and really appreciate you sharing. Now I gotta figure out what’s causing the rattle and put it all back together. Thanks again.
     

Products Discussed in

To Top