1. Welcome to Tacoma World!

    You are currently viewing as a guest! To get full-access, you need to register for a FREE account.

    As a registered member, you’ll be able to:
    • Participate in all Tacoma discussion topics
    • Communicate privately with other Tacoma owners from around the world
    • Post your own photos in our Members Gallery
    • Access all special features of the site

Cheap and Easy Lube Port Mod for Icon UCA Dust Caps!!

Discussion in 'Suspension' started by Jdosumu, Sep 24, 2016.

  1. Sep 24, 2016 at 7:55 PM
    #1
    Jdosumu

    Jdosumu [OP] Member

    Joined:
    Oct 10, 2015
    Member:
    #166315
    Messages:
    17
    Gender:
    Male
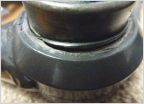
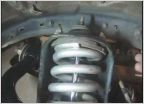
    I installed ICON UCAs on my 1st gen Tacoma about 6 months ago. I absolutely love them for the enhanced handling and wheel travel they provide, but I'm sure I'm preaching to the choir concerning any uniball uca owner when I say that their open, non-booted nature is their only downfall. To avoid this, cleaning and maintaining the uniballs become a ritualistic routine. And while the ICON caps are designed to mitigate the amount of dirt and grime your UCAs are exposed to, they also come with a flaw: the adhesive circles. Every time you take the caps off to clean and lube the top of the ball you have to replace the adhesive strips, so if you want to avoid having squeaky uniballs you have to stock up on a lot of the specific adhesive rings. For that reason, I modified the uca caps with a brass pipe busing and an accompanying plug so that I could lube the top of the ucas without having to remove the caps and waste an adhesive ring every time I did it. This is a write up of how I did this modification.

    Materials:
    2x Brass pipe hex bushings (I used 1/4" MIP x 1/8" FIP because it was the smallest size busing with a plug available.
    2x Brass pipe plugs to accompany the bushings
    Thread Locker
    (I used blue)
    Teflon Lubricant (I have a bottle of Tri-Flow right now)

    Tools:
    Razor Blade
    Drill Press (Or hand drill)
    Vice
    Wrench the size of the bushing's hex head
    NPT Pipe Tap and Die Set
    *optional

    1. Clean the UCA off, and use the razor blade to cut the adhesive ring that holds the cap on:

    IMG_4372.jpg

    2.Clean all of the gunk out of the top of the uniball fully before you lube it:
    IMG_4373.jpg
    IMG_4374.jpg

    3. Clean the cap off. Make sure all of the adhesive is removed:
    IMG_4377.jpg

    4. As you can see in the last picture, there is a dent milled out into the inside part of the cap to leave room for the 12 point bolt that holds the uniball together. Use the circle in the middle of this dent as a target for your drill press or hand drill and drill a hole through the cap. I used a 1/2" bit because the outside of the bushing was 1/2".
    IMG_4378.jpg
    IMG_4379.jpg
    IMG_4380.jpg

    5. Clean the debris out. I even took some sand paper to the top side to smooth down the bur the drill bit left, but that probably isn't necessary. The top should look like the picture below, sorry ICON for defacing your logo, I still love your products :anonymous:.
    IMG_4381.jpg

    6. Next, support the cap in a vice to mount the bushings. I used an NPT (National Pipe Thread) tap because the pipe fittings are threaded to NPT spec which tapers to create a water seal. I got this NPT Tap and Die set from Harbor Freight knowing I would return it right after since I probably wouldn't ever use the tool again:cheers:, but I realized that the tap isn't necessary since the brass is denser than the aluminum. You can just use the pipe bushing to cut its own threads.

    IMG_4382.jpg

    7. Before you thread the bushing in, put the threadlocker on the bushing so that it will lock in there, I figured blue is sufficient.
    IMG_4383.jpg
    IMG_4385.jpg
    IMG_4384.jpg

    IMG_4386.jpg

    8. Put the adhesive ring on the cap:
    IMG_4387.jpg

    9. Mount the cap on the UCA. Before I even put the adhesive ring on the cap I checked the cap's fitment with the bushing in it to make sure it still allowed for the uniball bolt to have clearance. Mine dide without the adhesive ring, and the ring itself adds about 1/8".
    IMG_4389.jpg

    10. Screw the plug into the bushing being sure not to tighten the bushing itself further into the uca cap.
    IMG_4390.jpg

    This was a quick and easy mod that cost me about $8 and will allow me to lube my uniballs and only use 1-2 sets of adhesive rings per year. Let me know what you think, let me know if y'all have any better ideas! Enjoy!
     
    romafern likes this.
  2. Sep 25, 2016 at 10:16 AM
    #2
    0210

    0210 Well-Known Member

    Joined:
    Feb 12, 2016
    Member:
    #178004
    Messages:
    2,564
    Vancouver, BC
    Vehicle:
    2016 TRD Sport Upgrade DCLB
    Good idea. Will do this.
     
  3. Aug 10, 2019 at 12:13 PM
    #3
    romafern

    romafern Hug diz nuts

    Joined:
    Mar 15, 2010
    Member:
    #33279
    Messages:
    827
    Gender:
    Male
    First Name:
    Rob
    80918 Let's meet!
    Vehicle:
    Paid for and saving a shit ton of $$$$$
    Thinking of adding a second battery...
    Very nice! I will have to do this. Can't believe how greedy Icon is by not including this in new kits. piss poor
     

Products Discussed in

To Top