

-
Welcome to Tacoma World!
You are currently viewing as a guest! To get full-access, you need to register for a FREE account.
As a registered member, you’ll be able to:- Participate in all Tacoma discussion topics
- Communicate privately with other Tacoma owners from around the world
- Post your own photos in our Members Gallery
- Access all special features of the site
 DIY Recovery Boards
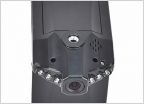 Looking for rearview camera and monitor
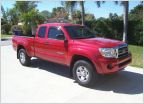 My 2010 Pre-Runner Build – A Collection of Essential Mods for Every New Tacoma
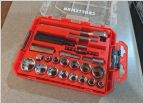 2nd Gen Tool Kit
 Help finding new tailgate and latch assembly
 Anti sieze for spark plugs and LSD additive
How to (sort of) - Adding Dual USB, chargeable flashlight base switch and moving OEM switches.
Discussion in '2nd Gen. Tacomas (2005-2015)' started by override, Feb 6, 2017.


