1. Welcome to Tacoma World!

    You are currently viewing as a guest! To get full-access, you need to register for a FREE account.

    As a registered member, you’ll be able to:
    • Participate in all Tacoma discussion topics
    • Communicate privately with other Tacoma owners from around the world
    • Post your own photos in our Members Gallery
    • Access all special features of the site

Jacksoverland (Jack0928's) Build and Travel Thread - Picture Heavy

Discussion in '2nd Gen. Builds (2005-2015)' started by Jack0928, Apr 27, 2017.

  1. Apr 27, 2017 at 9:32 PM
    #1
    Jack0928

    Jack0928 [OP] Kind of a Well-Known Member

    Joined:
    Aug 27, 2016
    Member:
    #195697
    Messages:
    1,076
    Gender:
    Male
    First Name:
    Jack
    Huntington Beach, CA
    Vehicle:
    2013 MGM DCSB 4x4
    IG: Jacksoverland
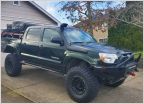
    Well I want to start out with a thank you to all of TacomaWorld for making me realize my stock Tacoma was subpar and that in order to compete I am going to have to spend all of my hard earned money.... With that said this is hopefully going to be a way for me to track the changes made to the truck as well as act as a to do list for future upgrades to come.

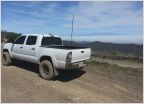
    The Truck as of 6/24/2017:
    [​IMG]

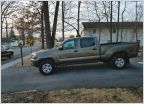
    The Truck as of 4/27/2017:
    [​IMG]
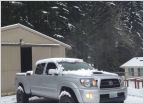
    The Day I bought it August 2016:[​IMG][​IMG]
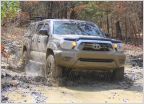
    [​IMG]

    Going for an overland style build to adhere more to my active lifestyle and for on the road travels.
    Grey = Done | Blue = Future Plans​

    BASE OF THE BUILD

    - 2013 Toyota Tacoma SR5
    - Double Cab Short Bed 4x4
    - 4.0L V6 Automatic

    FRONT SUSPENSION:
    - ICON 2.5 RR 650lb Extended Travel Coilovers
    - Total Chaos Fab Upper Control Arm
    - Sway Bar Removed
    - OCTaco Extended Front Brake Lines

    REAR SUSPENSION:
    - ICON 2.0 RR Shocks
    - ICON AAL Expansion Pack
    - OCTaco Extended Rear Brake Lines
    - - WHEELS/TIRES:
    - Method NV's
    - Toyo Open Country A/T 31.5/265
    - Falken Wildpeak M/T 33/285
    - SCS Ray10 Matte Gunmetal

    ARMOR:
    - At the Helm Bed Stiffener
    - Pelfreybilt Steel Front Plate Bumper w/ Center hoop
    - Pelfreybilt Steel Standard Rear Bumper (Undecided on gate)
    - Rock Sliders (Undecided brand)
    - Bushwacker Fender Flares

    ELECTRONICS/LIGHTING:
    - Optimum YellowTop Battery
    - Morimoto xTorch 40" Light Bar
    - Cali Raised Side Projecting LED Pods
    - CB Radio w/ PA system
    - PA Speaker

    EXTERIOR:
    - Snugtop SuperSport
    - FrontRunner SlimLine II Rack - Sold
    - Prinsu Design Studios Cabrack
    - Prinsu Design Studios Toprack
    - Color Matched Grille from Gunny
    - TRD Pro Grille Insert

    INTERIOR:
    - Center Console Organizer
    - Clazzio Leather Seat Covers
    - WeatherTech Floor Mats

    CAMP GEAR:
    - Roof Top Tent (Tepui or CVT)

    RECOVERY GEAR:

    - Maxtrax
    - Winch (Undecided Brand)

    MODS:
    - Blacked out emblems? (Mod?)
    - Raptor Light Mod - Acquired, not completed
    - Fog Light always on
    - Dome Spliced step lights


    Test
    BASE OF THE BUILD
    - 2013 Toyota Tacoma SR5.............................................................$30,000
    - Double Cab Short Bed 4x4
    - 4.0L V6 Automatic

    FRONT SUSPENSION:
    - ICON 2.5 RR 650lb Extended Travel Coilovers................................$1,168
    - Total Chaos Fab Upper Control Arm...................................................$684
    - OCTaco Extended Front Brake Lines....................................................$62
    - Sway Bar Removed

    REAR SUSPENSION:
    - ICON 2.0 RR Shocks..........................................................................$528
    - ICON AAL Expansion Pack.................................................................$214

    - OCTaco Extended Rear Brake Lines.....................................................$62
    - -

    WHEELS/TIRES:
    - Method NV's......................................................................................$500
    - Toyo Open Country A/T 31.5/265 - Replaced
    - Falken Wildpeak M/T 33/285 x 4...................................................$1,168
    - SCS Ray10 Matte Gunmetal

    ARMOR:
    - Pelfreybilt Steel Front Plate Bumper w/ Center hoop
    - Pelfreybilt Steel Standard Rear Bumper (Undecided on gate)
    - Rock Sliders (Undecided brand)
    - Bushwacker Fender Flares
    - Bed Stiffener (Undecided brand)

    ELECTRONICS/LIGHTING:
    - Optimum YellowTop Battery..............................................................$311
    - Morimoto xTorch 40" Light Bar.........................................................$189
    - Cali Raised Side Projecting LED Pods................................................$108
    - CB Radio w/ PA system
    - PA Speaker

    EXTERIOR:
    - Snugtop SuperSport.......................................................................$1,200
    - FrontRunner SlimLine II Rack - Sold
    - Prinsu Design Studios Cabrack..........................................................$595
    - Prinsu Design Studios Toprack..........................................................$545
    - Color Matched Grille from Gunny
    - TRD Pro Grille Insert

    INTERIOR:
    - Center Console Organizer....................................................................$20
    - Clazzio Leather Seat Covers
    - WeatherTech Floor Mats

    CAMP GEAR:
    - Roof Top Tent (Tepui or CVT)

    RECOVERY GEAR:

    - Maxtrax
    - Winch (Undecided Brand)

    MODS:
    - Blacked out emblems? (Mod?)
    - Raptor Light Mod.................................................................................$20
    - Fog Light always on
    - Dome Spliced step lights
    Total: $37,374
     

    Attached Files:

    YDCtaco and ChadsPride like this.
  2. Apr 27, 2017 at 9:32 PM
    #2
    Jack0928

    Jack0928 [OP] Kind of a Well-Known Member

    Joined:
    Aug 27, 2016
    Member:
    #195697
    Messages:
    1,076
    Gender:
    Male
    First Name:
    Jack
    Huntington Beach, CA
    Vehicle:
    2013 MGM DCSB 4x4
    IG: Jacksoverland
    Reserved
     
    ChadsPride likes this.
  3. Apr 27, 2017 at 9:32 PM
    #3
    Jack0928

    Jack0928 [OP] Kind of a Well-Known Member

    Joined:
    Aug 27, 2016
    Member:
    #195697
    Messages:
    1,076
    Gender:
    Male
    First Name:
    Jack
    Huntington Beach, CA
    Vehicle:
    2013 MGM DCSB 4x4
    IG: Jacksoverland
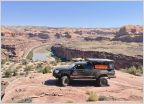
    This trip happened a little over a month ago and I really wanted to document it and I finally made the time to sit down and recap an awesome trip.

    Excuse the novel length of the following few posts, had difficulty condensing this trip. If you read it all, I commend you. For formatting reasons and to make it easier on me the posts will be broken up into days.


    Las Vegas strip and Wallmart Parking lot 3/12/17:
    I've always been big on the outdoors and exploring however in the recent years I haven't had much of an opportunity to get out and see things outside of a 100 mile radius of where I live, Huntington Beach. With that said my buddy and I took a chance and asked work if they would give us time off during our spring break (Where I work its a rarity to get an extended period of time off, 2+ days) and surprisingly we got the go ahead and started planning. We are both into landscape photography so we came up with the idea to travel up through Arizona and Utah and do a tour of some of the more iconic national parks those states have to offer.

    We are both broke college students so money was a huge factor when planning this trip. We weren't going to bring a tent as it wouldn't be practical to pop it up and take it down at every short stop we made through the night and a hotel wasn't an option due to restriction of funds, so we came up with the only logical option... sleep out of my truck. The backseats would be housing the cooler and our bags and would restrict the seats from laying back so the truck bed was the only option. Luckily I had just picked up a shell two weeks before which would provide us with a protected space to sleep in. However we quickly realized that two 6 foot individuals just could not sleep comfortably in a 5 foot bed in between the wheel wells. I quickly whipped up a sleeping platform for just under $80 and it was better but I think we both just came to the conclusion that it was going to be a rough couple of nights. For an extra layer of comfort I took the cushions off of two lounging chairs I have in my backyard and placed them on top of the platform so we wouldn't be totally miserable. It was a huge plus in the end due to the added storage underneath the platform for the rest of our gear.

    (Skateboards were not present during this trip)
    [​IMG]

    With the sleeping arrangements situated (kind of), we packed a cooler full of hard boiled eggs, materials for PB&Js and a few packs of dry food and were ready to go. We left Sunday night at 9PM right after we got off of work and headed on the road. Our travel plans were very up in the air, we had 5 days to travel 2000+ miles and both came to the conclusion that we wanted to get at least halfway to our first destination before calling it a night and grabbing a few hours of sleep. Three and a half hours later we were in Las Vegas and wanted to stretch our legs and I wanted to play around with my new camera that I had just got the day before. We wondered around the strip for about an hour and I got some time to mess around with my camera before we decided to drive one more hour before calling it. Found a spot on the side of the road and got in the shell to catch some shuteye to find that the light from the street was blinding and there was no way I would be able to sleep without some curtains. Needless to say we ended up at a Wal-Mart down the street in which we picked up a black bed sheet for $10 and some Velcro strips for $2. Quick and dirty but it did the job, and we now had curtains. With that all said and done we called it a night in some sketchy Wal-Mart parking lot just outside of Vegas around 3AM.

    (Some of the shots from that night)
    [​IMG]

    [​IMG]
     
    Last edited: May 12, 2017
  4. Apr 27, 2017 at 9:33 PM
    #4
    Pirhett

    Pirhett Instagram @pirhett_ship

    Joined:
    Jan 29, 2015
    Member:
    #147498
    Messages:
    5,219
    Gender:
    Male
    First Name:
    Rhett
    San Diego
    Vehicle:
    2014 TRD Sport 4x4 DCLB MGM
    Stock...
    Woot! Looking good so far!
     
    ChadsPride and Jack0928[OP] like this.
  5. Apr 27, 2017 at 9:34 PM
    #5
    Jack0928

    Jack0928 [OP] Kind of a Well-Known Member

    Joined:
    Aug 27, 2016
    Member:
    #195697
    Messages:
    1,076
    Gender:
    Male
    First Name:
    Jack
    Huntington Beach, CA
    Vehicle:
    2013 MGM DCSB 4x4
    IG: Jacksoverland
    Thanks brother! Hoping to get it as built as your truck in the next coming months :thumbsup:
     
    ChadsPride likes this.
  6. Apr 27, 2017 at 9:35 PM
    #6
    Pirhett

    Pirhett Instagram @pirhett_ship

    Joined:
    Jan 29, 2015
    Member:
    #147498
    Messages:
    5,219
    Gender:
    Male
    First Name:
    Rhett
    San Diego
    Vehicle:
    2014 TRD Sport 4x4 DCLB MGM
    Stock...
    haha hope you got some deep pockets!
     
  7. May 12, 2017 at 4:26 PM
    #7
    Jack0928

    Jack0928 [OP] Kind of a Well-Known Member

    Joined:
    Aug 27, 2016
    Member:
    #195697
    Messages:
    1,076
    Gender:
    Male
    First Name:
    Jack
    Huntington Beach, CA
    Vehicle:
    2013 MGM DCSB 4x4
    IG: Jacksoverland
    Hope you’re not afraid of Heights, Zion 3/13/17:
    Two hours after we went to sleep, at 5AM the alarm went off and it was time to get going as we wanted to make it to Zion National park by 10AM. Ate a few hard boiled eggs, pulled down the Velcro curtains and continued the journey. Upon arriving at the front gate we were surprised by a line of 50+ cars awaiting entrance to Zion, apparently everyone else had the idea to head to Zion for spring break... What felt like an hour later we made it to the gate to find that all of the camping spots were already reserved for the night, this was the first of many mistakes we made on the trip, not thinking to reserve camping spots ahead of time. We took the bad news with a grain of salt and entered the park, hopped on the shuttle and headed to our first hike, Angels Landing. For those of you who are unfamiliar with this hike it is arguably one of the more dangerous trails in Zion, in the span of 4 miles your climb 2,600 feet, the last mile or so takes place on the spine of mountain, in which you walk on a pathway that is two feet wide with 1,000+ foot drop-offs on both sides. Your only safeguard is chains that line parts of the pathway to aid you in some of the more difficult parts. It is easily the best hike I have ever completed, nothing but adrenaline and an amazing view for the last mile. Once you get to the top/end of the hike you are struck with a view of a massive canyon surrounded by thousand foot mountain faces. Not for those who have a fear of heights but if you can get past that obstacle I highly recommend it.

    (Angels Landing)
    [​IMG]
    View of the spine from the end of the hike

    [​IMG]
    Shot of the pathway

    [​IMG]
    Shot from above ~1,200 foot drop

    [​IMG]
    Panorama of the canyon ​

    Once we made it back down it was almost 4PM, we spent a few hours up there exploring and eating lunch. We made a judgment call and decided that due to the time and the fact that we are running off of two hours of sleep in the past 36 hours that it was best to just call it a day and figure out arrangements for that night. The initial plan was to stay in Zion for a whole day and leave for Moab after doing some more hikes the next morning. However with the recent weather conditions at that time the water level at the Subway hike was too high to safely traverse through. We grabbed a bit to eat to discuss our plans and made a judgement call to just leave Zion that night and make our way to Moab.

    After taking some pictures of the sunset in Zion we packed up and before we knew it we were back on the road to Moab around 9PM. The stretch from Zion to Moab is about a 6 hour drive. We were both beat from a long day of hiking and being in the sun and only made it to Richfield, about 3 hours away from Moab before deciding to call it a night. Luckily there was another Wal-Mart nearby (nothing special but gets the job done) at which we picked up more ice for the cooler and went to sleep.
     
    Last edited: May 14, 2017
  8. May 14, 2017 at 12:21 AM
    #8
    Jack0928

    Jack0928 [OP] Kind of a Well-Known Member

    Joined:
    Aug 27, 2016
    Member:
    #195697
    Messages:
    1,076
    Gender:
    Male
    First Name:
    Jack
    Huntington Beach, CA
    Vehicle:
    2013 MGM DCSB 4x4
    IG: Jacksoverland
    Arches, Canyonlands and Moab 3/14/17:
    Alarms went off at 6AM and another early morning the road had commenced. After stopping for gas and a small break we were in Moab just around 10AM. After exploring the tiny town and getting some ideas as to how we wanted to spend out day we headed straight over to Arches National Park. Arches blew my mind… Upon entering the park you are immediately confronted with a massive canyon with a plethora of rock structures and formations. We made our way to each point of interest on the main road and would stop for a few minutes to grab pictures at each (around noon is not the best time to take pictures of red rock, the light washed everything out but it was still an amazing sight). The plethora of rock structures were rad but we finally made it to what we were most excited about, the arches. Once we arrived at Window Arches we got out and started exploring. Unfortunately this is one of the more popular sights at the park and it was almost impossible to take a photo without having some random kid run into frame of the picture. It took some creative framing but we were able to get a few pictures without the interference of anyone. I have always wanted to get a picture of the sun setting underneath an arch an unfortunately during this trip that wouldn’t happen this trip due to the park being under maintenance and closing at 6.
    (Arches National Park)
    [​IMG]
    Window Arch

    [​IMG]

    We didn’t let that hold us back though, around 4PM we headed over Canyonlands National Park. After experiencing the incredible views at Arches I didn’t think much could top that, man was I wrong. To this day Canyonlands National Park is my favorite national park that I have visited. Not only do you have the incredible rock structures and vast canyons but Canyonlands is essentially on a plateau surrounded by Canyons on every side. If you ever get the opportunity to visit Moab, make Canyonlands a priority! The first stop was at the famous Mesa arch, well known in the photography world as the arch is right on the edge of a canyon and if you get there an sunrise you can get an amazing array of light shooting through the arch and opening up into the canyon (unfortunately I didn’t have the opportunity to shoot here during sunset). After shooting a few pictures we then headed over to one of the more interesting sights in the park, a meteor site (told you, they have it all). I parked the truck in the parking lot closest to the site and we made our way to the trailhead. The trail we hiked is called “Island in the sky”, it’s a short hike but in order to make it to the furthest peak you need to stray from the trail for a few miles. After around 30 minutes we made it to the peak to see the view of a massive green crater at the meteor’s epicenter. Shortly after the sun began to set, realizing that we have no flashlights on hand and we have a pretty treacherous trek back we raced the sunset back to the car and made it with just minutes to spare. Once we recon back at the truck we cooked up our dry food on the camp stove and packed our gear to head back to town. This entire trip the moon was full and for the most part it ruined any chance to take pictures of the night sky. Seeing as Canyonlands is a plateau amongst canyons it allowed for perfect conditions for just a short amount of time to take pictures before the moon rose above the canyon walls.

    (Canyonlands National Park)
    [​IMG]
    Plains covered with roaming cows

    [​IMG]
    Mesa Arch

    [​IMG]
    Meteor Crater

    [​IMG]
    Attempt at some nighttime photography​

    Seeing as we were taking a few hundred pictures a day on the road our camera batteries were shot by night 2 and we desperately needed to find a place to charge up for the remainder of the trip. At this point it was 11 PM and the only place that we could find that was open were hotels, so we found a nice Best Western and convinced the front desk manager to allow us to hang out in the lobby and charge up our devices. At 3 AM everything was charged and the front office manager told us he was closing the lobby so we packed up and made our way to the truck. Conveniently the hotel parking lot was crowded and allowed for significant coverage, so without hesitation we got in the truck bed and passed out.
     
  9. May 14, 2017 at 12:34 AM
    #9
    Jack0928

    Jack0928 [OP] Kind of a Well-Known Member

    Joined:
    Aug 27, 2016
    Member:
    #195697
    Messages:
    1,076
    Gender:
    Male
    First Name:
    Jack
    Huntington Beach, CA
    Vehicle:
    2013 MGM DCSB 4x4
    IG: Jacksoverland
    Continental Breakfast 3/15/17:
    The next morning came around and we were sick of eating eggs and also needed a place to post up on Wi-Fi so we could edit some photos, so why not just go back to the lobby. Oh and did I mention during these hours the free continental breakfast was taking place for hotel guests, we walked in like we were guests and propped up at a table grabbed some food and edited away. After feeling energized again from having some good food other than eggs for the first time in a few days we were ready to set out on the agenda for the day.

    The previous night while we were charging in the lobby I sparked up a conversation with a local firefighter and he gave us the low down on how we should spend our last day in Moab. My buddy has a fascination for fossils and I personally have never seen fossils not in a museum, so when he told us that we could go look at fossils and hieroglyphs preserved in rock we were sold. That was the first stop of the day, it was unreal to see all of the ancient hieroglyphs that we etched into the rock however the coolest part was the dino tracks that were imprinted into the rock slab.

    [​IMG]
    Dino Tracks
    As soon as we had seen it all we got back in the truck and drove 5 minutes to the next location, Corona Arch. Of the 10+ arches we had already seen on the trip this one blew them all out of the water. Spanning about 70 feet into the sky it is no joke, the trek there is quite miniscule and along the way you encounter a cool skylight arch called Bowtie Arch as well as an interesting rock face that literally looks like a face (see below). While we were exploring behind the arch I found a rock face that looked pretty navigable with tie ins for rock climbers. I didn’t have rope or the appropriate gear but I thought it might be interesting to see if I could get on top of the arch. About half way up I immediately regretted this decision, the holds were sketchy and the incline was steep, not to mention 5 feet away from the base there is a cliff drop off about 200 or so feet. There was no turning back at that point and after a few minutes of navigating this wall I was able to make it to the face, just a short walk on the ridge and there was a clear pathway to the top of the arch. Posted up for a few photos and very slowly made my way down the face I navigated earlier, without any issues.

    (Corona Arch and surroundings)
    [​IMG]
    View of Corona Arch from a distance

    [​IMG]
    Bowtie Arch

    [​IMG] [​IMG]
    [​IMG]
    Moab had a lot to offer and looking back I wish we had just planned the entire trip around this area due to the never-ending list of places to explore there, but we had a few more places on the agenda and 20 hours more to drive so we had move on with the trip. We filled up the tank and got on the road. The next destination was Page, AZ, home of the famous slot canyons, in particular Antelope canyon. It was another 5 hour drive to get there from Moab but we took a few pit stops on the way due to recommendations that our firefighter friend from the previous night gave us. The first location was Church Rock, which unfortunately was gated off for the day so we could only view from afar. Then we headed back into Canyonlands from the West Entrance (about 2 hours away from when we were last in Canyonlands) and headed to Newspaper Rock. Newspaper rock was another Native American hieroglyphs monument, as much as I like to look at rocks, looking back I wish we hadn’t gone on the hour detour to get there and just kept on route. With all that said and done we made it to Page around 8PM, splurged and went out to buy BBQ food, found a nice parking spot to call home for the night in a hotel parking lot and went to sleep.

    (Southern End of Canyonlands)
    [​IMG]
    Newspaper Rock

    [​IMG]
    On our way out​
     
    Last edited: May 15, 2017
  10. May 15, 2017 at 4:48 PM
    #10
    Jack0928

    Jack0928 [OP] Kind of a Well-Known Member

    Joined:
    Aug 27, 2016
    Member:
    #195697
    Messages:
    1,076
    Gender:
    Male
    First Name:
    Jack
    Huntington Beach, CA
    Vehicle:
    2013 MGM DCSB 4x4
    IG: Jacksoverland
    Secondary Air Injection Filter:
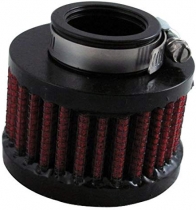
    Considering that I have a 2013 Tacoma there is a risk of the secondary air injection pump failing due to the lack of a proper filter. Granted its not nearly as likely to happen on a 2013 model as it is on a 2011/2012 model, but I'm definitely not in the clear either. So for a whopping total of $12 (amazon), I decided I would rather do some preventative maintenance then take my chance at an expensive repair. If you want to read in detail a little more as to why this happens click here.

    Now to preface, this is easily one of the quickest mods you will ever do so prepare yourself. First remove the cap covering the secondary air injection pump, exposing the POS OEM filter.

    (OEM filter)
    [​IMG]
    Then gently pry off the filter by propping up the tabs (or not shits going in the trash anyways). Once the filter has been removed grab your new filter and slide it back onto the pump. Tighten the hose clamp, put the secondary air injection pump's cap back on and your all set.

    (New filter installed)
    [​IMG]

    (Finished Product)
    [​IMG]
     
  11. May 18, 2017 at 4:48 PM
    #11
    Jack0928

    Jack0928 [OP] Kind of a Well-Known Member

    Joined:
    Aug 27, 2016
    Member:
    #195697
    Messages:
    1,076
    Gender:
    Male
    First Name:
    Jack
    Huntington Beach, CA
    Vehicle:
    2013 MGM DCSB 4x4
    IG: Jacksoverland
    Day of disappointment 3/16/17:
    I mentioned earlier that we made a lot of mistakes on the trip, our fourth day was no exception. Alarms went off at 5:30AM and we immediately got up and made our way to Horseshoe Bend just 10 minutes outside of Page. This was one of the most touristy locations we had yet to visit, there were at least 5 tour busses full of tourists anxious to snap a photo. We ran to location and propped up on the edge to claim our spot, sun came up right around 6 and that was the prime time to snap a photo before the sun overexposed everything. Grabbed a few photos we were pleased with and headed to a small coffee shop to connect to the Wi-Fi and try to book a photo tour of Lower antelope canyon.

    (Horseshoe Bend)
    [​IMG]

    Give the tour companies a call to find that they discontinued the photo tour for a few months... and only existing ticket holders can partake in a photo tour. We then asked if we could buy tickets for the basic tour and they were entirely sold out. So there goes that idea. Yes I know we should have booked the tickets ahead of time, but this whole trip was very spontaneous and last minute so we were in no way organized. So with that news we no longer had any business left in Page. At this point we were just going to call it a day and head back towards home. Luckily we chatted it up with a girl at the coffee shop who gave us an awesome idea for our drive back, Vermillion Cliffs. Vermillion Cliffs is another one of those iconic places that photographers dream about and It was on the way to Las Vegas so why not. So I figured that Vermillion Cliffs is a pretty notable location and that the location would probably be marked in maps, searched it up and was able to find it. The route had us take interstate 89a and we turned off on House Rock Road. This road was pretty rough and we followed it for about 15 miles and this is when the problems started. At this point the map was already routed but we no longer had service so the location services were off completely as well as the satellite image was no longer present. We were left at just looking at the map and attempting to try to follow it based on the curvature of the maps route without any underlying satellite image to help us see our way. So what we had thought was the correct path ended up being entirely the wrong path. We found an offroad trail posting, clearly stated 4x4 only no towing, we figured it had to be the trial to get to the destination as it appeared to be heading in the right direction according to maps. This trial was no joke, it was before I had my suspension lift on, running 265s and hardly had any clearance. We followed it for 5 miles or so and it took us about an hour to navigate all of the rock step ups and deep sand pits along the trial. It wasn’t until we had to open the third gate in a fence that we realized we might be headed the wrong direction. Due to the intensity of the trail and being very unprepared for any sort of incident (no recovery gear, no spare, and no reception… Stupid I know) we finally found an area in which we could turn around. The entire trail up until this point was the width of my truck (scratched the hell out of my paint) so this was the first opportunity we had to turn around and we didn’t want to take our chances and try our luck with the rest of the trial. I have scoured the web attempting to find the trail we ended up on but could not find it anywhere, regardless we didn’t end up making it to Vermillion cliffs. What a dud of a day. Took us about an hour and a half after turning around to make it back to the main road… we cut our losses and started to drive home.

    We were passing through Las Vegas around 6 and the sun had not yet set. Seeing as nothing had gone as planned today we wanted to take the opportunity to grab some pictures. With a little research we found that there is actually a national/state park just outside of Vegas, Red Rock Canyon. Made it there with 15 mins all sunset to spare and hiked up a rock formation to stage our cameras. Grabbed a couple of cool shots during sunset and then we hopped back in the car to head home. It took about 5 more hours of driving before we made it back to Huntington Beach around 1:30 AM.

    (Red Rock Canyon National Park)
    [​IMG]
    [​IMG]
    Seeing this was my first trip living out of my truck I learned a lot. Unfortunately I made a lot of mistakes throughout this trip and a lot of our plans fell through but it was a valuable learning experience for me. Next time I will know to pack lighter, be more prepared in the event of an accident, and plan the stops accordingly.
     
    Last edited: Jun 17, 2017
  12. May 18, 2017 at 4:52 PM
    #12
    Jack0928

    Jack0928 [OP] Kind of a Well-Known Member

    Joined:
    Aug 27, 2016
    Member:
    #195697
    Messages:
    1,076
    Gender:
    Male
    First Name:
    Jack
    Huntington Beach, CA
    Vehicle:
    2013 MGM DCSB 4x4
    IG: Jacksoverland
    New Tires:
    Came home today to find these babies on my door step. Man are they beefy, glad I chose to go with the M/T. Decided to go with Falken, I have heard nothing but good things about their A/T, hoping the same goes for the M/T. 285/70/17. Have an appointment to get them mounted tomorrow afternoon!


    [​IMG] [​IMG]
     
  13. May 30, 2017 at 2:20 PM
    #13
    Jack0928

    Jack0928 [OP] Kind of a Well-Known Member

    Joined:
    Aug 27, 2016
    Member:
    #195697
    Messages:
    1,076
    Gender:
    Male
    First Name:
    Jack
    Huntington Beach, CA
    Vehicle:
    2013 MGM DCSB 4x4
    IG: Jacksoverland
    Tire Dilemma:
    The day I got my tires delivered to my doorstep I called a local tire shop and made an appointment for the next day for them to be mounted and balanced. The next day I loaded the tires up in the truck bed and drove to the shop to drop the truck off. Less than an hour later I got a call letting me know that it was all good to go, paid the bill and grabbed the keys.

    [​IMG]
    My first impression was god damn do those look mean, completely changed the look of my rig. After my brief admiration I checked out the clearance and there were no immediate issues, rotated the wheel to full lock in both positions and they just barely rub on the corner of the fender flares. Since installing my coilovers I have been meaning to adjust the ride height and haven’t been able to due to not having purchased the spanner wrench that they suggest using when adjusting height. As it sat before adjustment, center cap to fender was about 23 ¼ inches, the back sat at 24 inches even. So I had always planned on leveling the front with the back and luckily @Airdog allowed me to borrow his (will return soon :thumbsup:).

    [​IMG]
    Drove it home and everything appeared to be smooth, only noticed rubbing when turning at speeds upwards of 20 MPH. Cranked it up with my floor jack, and started to crank the shit out of the coils. I was surprised just how many full rotations it required to lift the coils ¾ of an inch. Once it was level I tested the clearance at full lock again and it was much better, about a half inch from the fender flares on both front and back.

    [​IMG]

    The days following I drove the truck short distances (nothing requiring the freeway) and everything seemed great, surprisingly smooth. I knew that since I had adjusting my coilovers that I would likely need an alignment but I was going to put it off for a while considering how well it was driving. It wasn’t until a few days later when I had to drive on the freeway that I noticed an issue. When going highway speeds and above (65MPH in SoCal) I noticed that the ride got extremely bumpy. The faster I went the rougher it continued to get. The only way I can describe how it felt was imagine if tires were the shape of an egg… bumpy. I reached out to a few people to see if this was normal, they are M/T so I expected the ride to be rough, but not this bad. Everyone said that wasn’t normal. So I figured well maybe its my alignment, I adjusted the coilovers so maybe that’s what the problem is. Got my truck aligned, and tested it out… Same issues. After speaking to a few people on the forums everyone seemed to think it was a balancing issue. Called up the shop and told them I was having problems and they told me to come back in so they could fix it. Dropped it off and an hour later they told me they scrapped the old weights, rebalanced it and it should be good to go. Tested it out… Same issue.

    Have plans to drop it off at the dealer sometime this week to have them look at it. If it’s a balancing issue I will be sure to request a refund at the previous shop. Tires look mean but man this experience has been a headache.


    Will update everyone once I hear what Toyota has to say.
     
    Last edited: Jun 1, 2017
  14. May 30, 2017 at 2:23 PM
    #14
    IronPeak

    IronPeak PermaLurker

    Joined:
    Mar 9, 2016
    Member:
    #180799
    Messages:
    3,232
    Gender:
    Male
    First Name:
    AuggieX
    Back to Back
    Vehicle:
    2007 sr5 4x4 DCLB/2015 TRD sport 4x4 DCLB sold
    Bigger Taller Slower
    Vibration issues on tires that manifest themselves at highway speeds are balance probs.
     
  15. May 30, 2017 at 2:25 PM
    #15
    Jack0928

    Jack0928 [OP] Kind of a Well-Known Member

    Joined:
    Aug 27, 2016
    Member:
    #195697
    Messages:
    1,076
    Gender:
    Male
    First Name:
    Jack
    Huntington Beach, CA
    Vehicle:
    2013 MGM DCSB 4x4
    IG: Jacksoverland
    That's what I'm hoping for, but considering that the shop I took it to balanced them twice has me concerned I might have a problem tire or the shop is just incapable of balancing larger tires (They tend to advertise towards the performance market). Just hoping I can get it worked out.
     
    ChadsPride likes this.
  16. May 30, 2017 at 2:32 PM
    #16
    Jack0928

    Jack0928 [OP] Kind of a Well-Known Member

    Joined:
    Aug 27, 2016
    Member:
    #195697
    Messages:
    1,076
    Gender:
    Male
    First Name:
    Jack
    Huntington Beach, CA
    Vehicle:
    2013 MGM DCSB 4x4
    IG: Jacksoverland
    Tires Issues Resolved:
    Very relieved to finally have the whole tire dilemma resolved. I have never been a huge advocate of dealerships, typically feel as if I am getting ripped off or constantly being pressed to purchase a service of some sorts. However its safe to say that after the experience I just had at Toyota of Huntington Beach my opinion may have changed a little. I expressed to them the experience I have had with these tires and the Service Manager Mike allowed me to come in that day after work and a Technician and him stayed after-hours to make sure my truck was taken care of. As soon as I got it there they took it right into the back and got my truck up on a lift to examine it. They scrapped the weights entirely and started fresh. I opted to wait at the dealer while they took care of it and they gave me a tour of the facility and I got to look at some of the cool projects the guys were working on, including a few FJ40s.

    Needless to say they were able to figure out what the issue was. It turns out the tire on the passenger rear was defective. All the other tires required 3oz of weights to balance and the problem tire was asking for 12+oz for balance. They provided the 12oz for a temporary balance while the replacement got shipped to me so I could drive normally. Once the tire came in I brought it right back and they got it mounted and balanced without any issues. To top things off the guys there didn't charge me for any of it (was happy to pay), they just wanted to do the right thing. Very appreciative with the experience I had a Toyota HB and will definitely go to them first for any service.

    Parts Update:
    Took advantage of the 15% off memorial day sale TheRetrofitSource was offering over memorial day weekend and ordered a 40' Light bar with amber covers to fit the Prinsu rack cutout off of a recommendation from @SixthSnail.

    About to hit the 4 week mark on my Prinsu rack. Got an update from Zach last week that the rack should be done with powder coat and should ship out either today or tomorrow. Hoping it sticks to this timeline so I can get the lightbar and rack installed for my trip that I have planned at the end of June.
     
    Last edited: Jun 16, 2017
  17. May 30, 2017 at 10:25 PM
    #17
    jg805

    jg805 Well-Known Member

    Joined:
    Feb 16, 2016
    Member:
    #178431
    Messages:
    117
    Sweet rig. You've got some great looking nature pics on here as well!
     
    ChadsPride and Jack0928[OP] like this.
  18. May 31, 2017 at 9:21 AM
    #18
    Jack0928

    Jack0928 [OP] Kind of a Well-Known Member

    Joined:
    Aug 27, 2016
    Member:
    #195697
    Messages:
    1,076
    Gender:
    Male
    First Name:
    Jack
    Huntington Beach, CA
    Vehicle:
    2013 MGM DCSB 4x4
    IG: Jacksoverland
    Thank you sir, appreciate the kind words :thumbsup:
     
    ChadsPride likes this.
  19. Jun 12, 2017 at 6:37 PM
    #19
    RBfastback

    RBfastback It's Got Electrolytes

    Joined:
    Jul 26, 2016
    Member:
    #193004
    Messages:
    401
    Gender:
    Male
    First Name:
    mike
    FL
    Vehicle:
    16 mgm TRD off road
    i've got the same prinsu rack and 40" xtorch bar, still haven't installed it.

    noticed ill have to run the wire down the driver side, not a big deal i could care less.

    but there is one annoyance, the light bar power wire is about 10" (guessing) then there's a connection to attach the longer section of wire that attaches to everything else.

    i'm ocd and the connection point will be on the windshield somewhere in view since i don't wann drill into the roof, just won't look clean.
     
    ChadsPride and Jack0928[OP] like this.
  20. Jun 12, 2017 at 7:28 PM
    #20
    Jack0928

    Jack0928 [OP] Kind of a Well-Known Member

    Joined:
    Aug 27, 2016
    Member:
    #195697
    Messages:
    1,076
    Gender:
    Male
    First Name:
    Jack
    Huntington Beach, CA
    Vehicle:
    2013 MGM DCSB 4x4
    IG: Jacksoverland
    Funny you said this, I have been racking my brain on the same issue. I'm very OCD as well and was planning on running it along the drivers side a pillar, but after making the same discovery you did I have to rethink. I think the move is to stick the wire before the connector to be back of the windshield so it's out of sight and clean from the side profile, then from the connection point down run that down.

    Just a thought, I'll have to get all the materials first before I can really put the prices together
     

Products Discussed in

To Top