

-
Welcome to Tacoma World!
You are currently viewing as a guest! To get full-access, you need to register for a FREE account.
As a registered member, you’ll be able to:- Participate in all Tacoma discussion topics
- Communicate privately with other Tacoma owners from around the world
- Post your own photos in our Members Gallery
- Access all special features of the site
 OBDII Scanners for 2015-2020
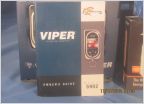 HELP Viper Alarm Systems 500-600 retail but 200-300 on amazon
 OBDII location
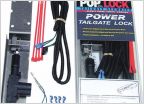 Which Pop & Lock?
 Center bearing and U joints
DIY Bedsides Reinforcement Brackets
Discussion in 'Technical Chat' started by totmacher, Apr 9, 2017.

