1. Welcome to Tacoma World!

    You are currently viewing as a guest! To get full-access, you need to register for a FREE account.

    As a registered member, you’ll be able to:
    • Participate in all Tacoma discussion topics
    • Communicate privately with other Tacoma owners from around the world
    • Post your own photos in our Members Gallery
    • Access all special features of the site

CAZ's Standard Cab Build

Discussion in '1st Gen. Builds (1995-2004)' started by cazinpa, Aug 25, 2017.

  1. Aug 25, 2017 at 2:43 PM
    #1
    cazinpa

    cazinpa [OP] Well-Known Member

    Joined:
    Dec 5, 2016
    Member:
    #204074
    Messages:
    429
    Gender:
    Male
    First Name:
    Andy
    Lancaster, PA
    Vehicle:
    '96 Tacoma
    A few tweaks
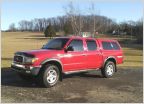
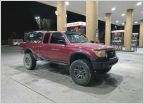
    I bought my red, 1996 standard cab Tacoma in May of 2016.

    After looking at 5 or 6 trucks, I found this gem on Craigslist near Gettysburg, PA with 273k miles. I can't explain how this truck was so well preserved coming from PA, but it was a no-brainer once I crawled under the truck (with a flashlight at night)!

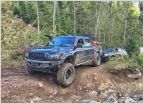
    My goal has been to build it to be street-able enough to drive anywhere, but also to be able to hit some good trails with my club (Keystone Cruisers).

    I drive it pretty often from March to November (when the roads are not salty), I take it wheeling a few times a year, and I use it as a pickup regularly. It is just an all-around great truck!

    Most current pictures:

    20180624_150029.jpg

    20180624_145630.jpg

    Before Pictures:

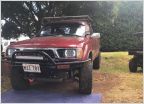
    Here is the truck when I bought it.

    IMG_7912.jpg IMG_7599.jpg

    Current projects:

    9/9/19

    • Dual cases:
    I refreshed my transmission and transfer case. I had to pull them for a clutch job, so I decided to check them out and to clean them up and re-seal them

    While I was at it, I decided to check off an item on my bucket list - I have added dual transfer cases for double low range gearing!

    20190516_205811.jpg
    • New exhaust:
    Installed a completely new exhaust from the manifold to the tail pipe using a later model tubular manifold.

    20190413_135756.jpg
    • New Seats:
    After nearly 300k miles my seats were a basket case! I scored these beauties which are exactly like the originals from Craigslist!

    20190908_214640.jpg

    Factory Specs:
    1996 Standard Cab 4x4
    2.7L 5 speed
    Manual hubs
    Manual windows, door locks
    No cruise
    No AC
    No intermittent wipers
    You get the point...


    Modifications:
    Lift: OME 881 front and Toytec AAL rear
    Tires: 285-75x16 Tread Wright tires
    Wheels: 16x8 Pro Comp 7069 rims - 4" backset
    Front Bumper: Addicted Off-road plate bumper
    Winch: Smittybilt 97495 XRC Winch
    Sliders: Allpro sliders
    Skid Plate: Custom skid plate
    Turn signals in marker lights

    Rebuilt elocker axle swap with welded drain plug & Barnes plate diff cover (Toyota elocker wiring info)
    Trail Gear dual case adapter
    2wd radiator - flush with bottom of frame rails
    Relocated windshield washer bottle
    Added factory A.C.
    Craigslist toolbox with Hilift and Powertank mounted to it
    Bed wheel well rust repaired
    OEM stripes removed because they were peeling
    Poly rack bushings and upgraded rack guide
    A set of perfect factory seats with an interesting Craigslist story
    Lots and lots of maintenance items addressed

    I've been a Toyota guy for many, many years. This truck reminds me a lot of my first Toyota - the one I took to college over 25 years ago. Nice shorts dude!

    040.jpg
     
    Last edited: Nov 27, 2023
  2. Aug 25, 2017 at 3:17 PM
    #2
    cazinpa

    cazinpa [OP] Well-Known Member

    Joined:
    Dec 5, 2016
    Member:
    #204074
    Messages:
    429
    Gender:
    Male
    First Name:
    Andy
    Lancaster, PA
    Vehicle:
    '96 Tacoma
    A few tweaks
    A few days into it I found this -

    IMG_20160423_123712.jpg


    I thought it may be a head gasket, but it turned out to be just really crusty coolant!

    I replaced the water pump, thermostat, hoses and radiator. This is kind of my standard practice when I buy an old Toyota and it has always given me piece of mind.

    I was not happy with how the original radiator stuck down below the frame rails and sought a solution. I settled on this 2wd radiator from Performance - 18-11/16" tall. I also purchased this fan shroud from Rock Auto. It is pretty much even with the bottom of the frame rails.

    IMG_0421.jpg


    First things first... when I bought it there was not even a radio! Need my bluetooth!


    image2.jpg


    I got rid of a few PO mods that I didn't like -

    IMG_0238.jpg


    It wasn't long until parts started to arrive!

    IMG_0245.jpg


    Got the lift on and removed the chrome around the fenders

    IMG_0312.jpg


    I contemplated tire size - tried on the 285-75x16s from my LX450.

    IMG_0287.jpg


    In the end, I went with Tread Wright 285s and a set of 4" backset Pro Comp 7069 wheels.

    I am still loving these tires. It is my first time trying them. It was recommended that I not get the Kludge grip stuff and I did not. They are pretty loud, but the are wearing pretty well and they perform nicely on the trails.

    IMG_0400.jpg
    IMG_0382.jpg
     
    Last edited: Oct 17, 2017
  3. Aug 25, 2017 at 4:56 PM
    #3
    cazinpa

    cazinpa [OP] Well-Known Member

    Joined:
    Dec 5, 2016
    Member:
    #204074
    Messages:
    429
    Gender:
    Male
    First Name:
    Andy
    Lancaster, PA
    Vehicle:
    '96 Tacoma
    A few tweaks
    About 7 weeks after I ordered it, my Addicted Offroad bumper arrived! For some reason I didn't actually realize I needed to weld a crossmember on until it arrived....

    20160610_113148.jpg


    A buddy from the club is a better welder than me

    20160625_100759.jpg
    20160625_190327.jpg

    The powder coat place I use turned it around in a day for $80!

    I took the opportunity to paint behind the bumper before I installed it. It is now nice and black.

    Still wasn't sure what I would do for turn signals at this point...


    20160701_164116.jpg
    20160703_125629.jpg


    Looking good! Still no turn signals, no skid plate either....

    20160703_153525.jpg 20160703_153456.jpg


    I decided to put my turn signals in the marker lights.

    The original turn signal bulbs were huge and didn't look like they would fit into the housing.

    After digging through my old Toyota parts, I discovered that 1985 ish 4runner/pickup marker lights looked like a good option.

    I drilled a 0.600 hole in the back of my corner lights and cut the slots with a utility knife.

    I used 921 bulbs to get them to blink at the correct speed.

    20160711_182820.jpg

    20160711_204445.jpg

    https://youtu.be/mWaMDcQgswQ


    I couldn't find anyone who offered the skid plate I envisioned - I didn't want a big skid made for the original low-hanging radiator. I came up with this design which uses front axle mounting bolts as the skid plate mount. I blew holes in the skid plate and welded the washers to the top.

    20160711_120510.jpg
    20160708_102020.jpg
    20160708_114405.jpg


    The power steering cooler hose looked vulnerable with this setup, so I flipped the mount to raise it.

    20160711_095150.jpg


    Clearance below the bumper

    IMG_3429.jpg
    IMG_3432.jpg


    Did some trimming and pounded the inner fender seam flat. I haven't had to do much more than trim the plastic a few additional times after it got caught on the tire. Also trimmed the exhaust to the down turn just after the muffler and completely removed the sway bar.

    20160710_130526.jpg
    20160711_101947.jpg


    I found a toolbox on Craigslist for $20. It worked out well enough even though not the prettiest thing around. I mounted my Hilift to it with some misc hardware store items and mounted my Powertank inside of it.


    20160710_115956.jpg

    Nearly ready for the 300,000+ decal!

    20161117_163338.jpg


    At this point I had owned the truck about 2-1/2 months. It took it's first wheeling trip to Rausch Creek for the Coal Mine Cruiser Classic and did well for the size and budget so far! I did wish it had a locker.

    20160917_110701_zpsa5wvjaaw.jpg
     
    Last edited: Feb 17, 2019
  4. Aug 25, 2017 at 6:28 PM
    #4
    cazinpa

    cazinpa [OP] Well-Known Member

    Joined:
    Dec 5, 2016
    Member:
    #204074
    Messages:
    429
    Gender:
    Male
    First Name:
    Andy
    Lancaster, PA
    Vehicle:
    '96 Tacoma
    A few tweaks
    After 10 weeks, WAY longer than it should have taken, my sliders finally arrived. It wasn't until about 4 months later that I got them installed and painted.

    20161105_161424.jpg
    20161107_140245.jpg 20161107_140258.jpg


    Visited Rausch Creek for a snow run!

    https://youtu.be/xdYFDrqcwRY

    IMG_2938.jpg

    andy dec 30.jpg


    I think it was on another snow run in January that I slid into a tree. Managed to pop it out... some....

    20170321_133616.jpg


    This spring I decided I could no longer live without air conditioning. I installed AC that I purchased from a guy on Craigslist. It was a very simple install, and it didn't take more than 2 hours total. The only real hitch was that I purchased a new dryer and should have bought one from the year truck I got the AC off of. The lines on the newer truck were a little different, so I ended up buying a new dryer line. The AC is now installed/charged and freezing cold in my little standard cab!

    I bought a manifold and a vacuum pump and charged it myself as I also needed to do some AC work to one of my other vehicles.

    20160709_103243.jpg


    Anthracite Outdoor Adventure Area this spring. Pulling a dead 80 off of a rock. Rock had jammed the exhaust upward and shorted the o2 sensor on the body - blowing the EFI fuse. It took us a few minutes to figure that one out!

    Same day the FJ60 that was with us pulled a SPRING HANGER out of his frame!

    It was a rough, wet day....

    20170513_101345.jpg

    20170513_105149.jpg

    20170513_090353.jpg


    The washer reservoir hung low after installing the bumper and it bothered me. One day on TacomaWorld I found this little gem.

    It arrived in a few days and only took about 15 minutes to remove the old reservoir and install the new. No wiring or plumbing necessary - it is purely a bolt-on item. I think this item is unique to working on trucks without Cruise.

    20170824_163424.jpg

    20170824_165802.jpg

    20170824_165733.jpg

    20170824_171701.jpg


    I bought another truck a little while back. I wasn't exactly sure what I would do with it but the price was right. It is a 2001 extra cab with elocker - wrecked in the front. I plan to swap my rear axle with the elocker and re-sell the truck for what I paid for it. The frame was Toyota swapped and is pretty nice.

    I'll need to rebuild this axle. The housing is really crusty - actually hoping that the diff cover isn't rusted through once sand blasted! It will need new backing plates because of rust.

    20170525_163323.jpg

    Tried two of the flares on mine. I decided I didn't like it....

    20170526_154635.jpg

    Here is the elocker axle swap in-process. This brings us up to 8/31/17.

    20170823_213829.jpg
     
    Last edited: Jan 29, 2019
    This site contains affiliate links for which the site may be compensated.
    #4
  5. Aug 28, 2017 at 5:20 PM
    #5
    cazinpa

    cazinpa [OP] Well-Known Member

    Joined:
    Dec 5, 2016
    Member:
    #204074
    Messages:
    429
    Gender:
    Male
    First Name:
    Andy
    Lancaster, PA
    Vehicle:
    '96 Tacoma
    A few tweaks
    The parts truck left for its new home today. Now I have room to whip the elocker axle into shape.

    Got the elocker actuator off and the 3rd cleaned up some. Amazing the scaly stuff that flaked off of there. Hoping it is still structurally sound!
     
    Last edited: Aug 28, 2017
  6. Aug 30, 2017 at 6:23 PM
    #6
    Dwill817

    Dwill817 Well-Known Member

    Joined:
    Jul 26, 2011
    Member:
    #60590
    Messages:
    1,150
    Gender:
    Male
    First Name:
    Drew
    Alabama
    Vehicle:
    1981 Toyota Pickup 4x4
    Good looking truck. Keep it up!
     
  7. Aug 31, 2017 at 5:59 AM
    #7
    Ritchie

    Ritchie Well-Known Member

    Joined:
    Dec 24, 2012
    Member:
    #93649
    Messages:
    1,931
    Gender:
    Male
    San Diego (North County)
    Vehicle:
    RC Step side Pre-runner
    2.7 w/auto, 4WU 3 link, F & R Diamonds, ARB's F/R w/ Yukon 5.29's, Inchworm 4.7 Lefty, Deavers, ARB OBA, Schrockworks up front.
    Nice truck... keep up the good work.
     
  8. Aug 31, 2017 at 6:02 AM
    #8
    ChadsPride

    ChadsPride Tacoma Owner & Enthusiast

    Joined:
    Nov 26, 2014
    Member:
    #143119
    Messages:
    127,315
    Vehicle:
    Sponsored by TacomaWorld.com
    Sweet lil truck, loving that bumper.​
     
    jaytrd02 likes this.
  9. Sep 1, 2017 at 4:49 AM
    #9
    cazinpa

    cazinpa [OP] Well-Known Member

    Joined:
    Dec 5, 2016
    Member:
    #204074
    Messages:
    429
    Gender:
    Male
    First Name:
    Andy
    Lancaster, PA
    Vehicle:
    '96 Tacoma
    A few tweaks
    Thanks all.
     
  10. Sep 4, 2017 at 9:56 AM
    #10
    cazinpa

    cazinpa [OP] Well-Known Member

    Joined:
    Dec 5, 2016
    Member:
    #204074
    Messages:
    429
    Gender:
    Male
    First Name:
    Andy
    Lancaster, PA
    Vehicle:
    '96 Tacoma
    A few tweaks
    Made some progress this weekend - as usual with my projects I ended up making it a slightly larger project.....

    This axle is a train wreck - glad the e-locker diff is still good!! It makes me sad - my old axle still had the paint on the rust-free backing plates. Well, here's to progress!

    20170904_123039.jpg


    The rear diff cover looked to me like it had some pin holes and was weeping when it was on the truck.
    I don't want to do this twice, so I ordered this -

    [​IMG]


    I cut off the flimsy stock cover today, so I hope the lead time is not too long!

    Like a can opener!

    20170904_101458.jpg


    Cover off and ground smooth (5 cut off wheels and a flap disk later) -

    20170904_112015.jpg


    Amazing what a little elbow grease, simple green and a pressure washer will do! Once the new diff cover is on I will take the housing to be sand blasted and powder coated.

    20170904_123235.jpg

    I am also planning to do a u-bolt flip. In order to mount my shocks I need to weld a bracket to the axle. I ordered THESE from Ruff Stuff.

    [​IMG]
     
    Last edited: Sep 4, 2017
  11. Sep 5, 2017 at 9:29 PM
    #11
    Jiveydude

    Jiveydude Well-Known Member

    Joined:
    Oct 22, 2013
    Member:
    #115035
    Messages:
    1,318
    Gender:
    Male
    First Name:
    Micah
    OH
    Vehicle:
    04Taco
    stuff and things that make it better
    Looking good :thumbsup:
     
  12. Sep 15, 2017 at 3:55 AM
    #12
    cazinpa

    cazinpa [OP] Well-Known Member

    Joined:
    Dec 5, 2016
    Member:
    #204074
    Messages:
    429
    Gender:
    Male
    First Name:
    Andy
    Lancaster, PA
    Vehicle:
    '96 Tacoma
    A few tweaks
    Slow going, and spending too much....

    Most parts are here - still waiting on wheel bearings. New backing plates and all new brake parts including ebrake bell cranks and wheel cylinders.

    20170914_195523.jpg

    The diff cover is here and tacked in place. I don't trust my welding skills enough to make it leak-proof. I had to grind a bunch out of the inside because it hit the back of the diff at 2 bolts on the sides.

    20170915_072020.jpg


    Found this elocker diff on Craigslist for free! It was replaced because of a bearing noise. Going to use the motor from this one as mine is pretty crusty.

    20170914_195504.jpg

    Looking for a rear axle housing I can cut up to make a tool to press out the axle shafts.
     
    Last edited: Feb 6, 2019
  13. Sep 26, 2017 at 1:29 PM
    #13
    cazinpa

    cazinpa [OP] Well-Known Member

    Joined:
    Dec 5, 2016
    Member:
    #204074
    Messages:
    429
    Gender:
    Male
    First Name:
    Andy
    Lancaster, PA
    Vehicle:
    '96 Tacoma
    A few tweaks
    This was way more work than I bargained for, but getting there! The truck looks like a part of the garage now, with things stacked all over it and a coating of dust....

    I borrowed a fixture to press out the shafts from a fellow club member and I bought a HF shop press. I don't know how I could possibly have done this without either!!

    I can't imagine anyone has actually done this with the "beat it in the ground" method. You have to press it for a good 3 inches!

    Housing should be back from powder coat any day - just need to get the rings on the axles for the axle seals and pop it all back together.

    20170925_171759 (1).jpg
     
    Last edited: Jan 29, 2019
  14. Sep 26, 2017 at 2:58 PM
    #14
    hammertime4005

    hammertime4005 Well-Known Member

    Joined:
    Jun 22, 2016
    Member:
    #190244
    Messages:
    54
    Gender:
    Male
    First Name:
    Mike
    South Florida
    Vehicle:
    2018 DCSB 6MT Sport
    None
    Loving the single cab, love your build!!
     
    cazinpa[OP] likes this.
  15. Oct 6, 2017 at 12:23 PM
    #15
    cazinpa

    cazinpa [OP] Well-Known Member

    Joined:
    Dec 5, 2016
    Member:
    #204074
    Messages:
    429
    Gender:
    Male
    First Name:
    Andy
    Lancaster, PA
    Vehicle:
    '96 Tacoma
    A few tweaks
    Well, just shy of a month and a half and the truck is back on the road....

    I need to cut off the ubolts and wire up the locker. I know the locker works fine as it was engaged when I took it for a test drive. I had to pull the motor and unlock it manually.

    I didn't do a ubolt flip as one of the brackets I bought from Ruff Stuff was defective. They took care of me, but I opted to just take the housing for sand blast and powder coat without the shock mounts.

    No one but me will ever see all of the work I did here, but it makes me feel good to know it is all fresh and not rusty!


    New Brakes

    20171005_163249.jpg


    All buttoned up

    IMG_3418.jpg


    My welded and ground drain plug

    20171006_100626.jpg
     
    Last edited: Jan 29, 2019
    ChadsPride, Ritchie and Jiveydude like this.
  16. Oct 13, 2017 at 9:46 AM
    #16
    cazinpa

    cazinpa [OP] Well-Known Member

    Joined:
    Dec 5, 2016
    Member:
    #204074
    Messages:
    429
    Gender:
    Male
    First Name:
    Andy
    Lancaster, PA
    Vehicle:
    '96 Tacoma
    A few tweaks
    l, in the time that it took me to get the rear axle finished, my inspection expired. It failed the first time because the inspection station said the inner tie rod was bad.

    I knew the play was there, but it is play in the rack. I replaced the inner and outer tie rods on both sides and it passed. I think they just looked at it and saw that I had replaced the parts.

    While I was in there I realized my rack is worse than I thought. It has about 1/8" up and down play on the driver's side. In researching it on Tacomaworld, it seems that later 1st gen Tacos had a design improvement to the guide and you can swap in the better style if your rack is otherwise ok. I am thinking I will try to replace the guide rather than go for a reman rack.

    Any thoughts or experiences on this?

    Here is the difference. The roller guide is the old style mine has.

    [​IMG]
     
    Last edited: Jan 29, 2019
    Speedytech7 and ChadsPride like this.
  17. Oct 15, 2017 at 4:20 AM
    #17
    cazinpa

    cazinpa [OP] Well-Known Member

    Joined:
    Dec 5, 2016
    Member:
    #204074
    Messages:
    429
    Gender:
    Male
    First Name:
    Andy
    Lancaster, PA
    Vehicle:
    '96 Tacoma
    A few tweaks
    Info on part numbers for updated rack guide stolen from elsewhere and posted here for my own reference and to help anyone else who stumbles by here...

    From Toyota:
    Guide sub/assembly - 45504-35031
    Spring - 90501-26074
    Cap - 45524-37010
    Nut - 90179-48003

    5/8th inch threaded rod connector (Home Depot)
    24mm socket and ratchet
     
    Last edited: Oct 16, 2017
  18. Oct 15, 2017 at 1:15 PM
    #18
    cazinpa

    cazinpa [OP] Well-Known Member

    Joined:
    Dec 5, 2016
    Member:
    #204074
    Messages:
    429
    Gender:
    Male
    First Name:
    Andy
    Lancaster, PA
    Vehicle:
    '96 Tacoma
    A few tweaks
    Sometimes working on your own cars just stinks! It is especially bad when you have a time constraint.

    Driving the Taco this week because my wife's car is in the body shop.

    I had put my stock wheels and tires on before I took the truck for inspection.

    I took a few minutes today to swap them back. I was on the last wheel and this happened....

    20171015_145358.jpg

    When I tried to remove the lug nut, my wheel stud twisted right off!

    I looked at my inspection sticker and sure enough it was a corner that the shop pulled to check the brakes.... Grrrrrrrrr.....

    The nice thing about Toyota is that they rarely change things. I had a box of the right studs from projects of years gone by. 15 minutes later I was good to go.

    My make shift fixture to pull the stud back in. Greased the threads & the bottom of both nuts and it spun right in.

    20171015_151000.jpg


    Amazing what a difference a set of wheels makes in how a truck looks. Here is the roller skate! I can't stand these wheels.

    20171013_103948.jpg
     
    Last edited: Oct 17, 2017
    Winkle99 likes this.
  19. Oct 16, 2017 at 12:59 PM
    #19
    cazinpa

    cazinpa [OP] Well-Known Member

    Joined:
    Dec 5, 2016
    Member:
    #204074
    Messages:
    429
    Gender:
    Male
    First Name:
    Andy
    Lancaster, PA
    Vehicle:
    '96 Tacoma
    A few tweaks
    Just for fun, some of my old trucks:

    '85 runner with Supra straight 6, dual cases, 35s. Trail is Pick Your Poison @ Paragon

    PYP_CAZ1 (1).jpg


    Same '85 4runner painted black on lower #2 @ Tellico

    lowertwo1.jpg


    Trail 11 @ Tellico

    eleven2 (1).jpg


    '84 extra cab on standard cab frame - double bobbed bed, Supra inline 6, dual cases, etc. Trail is Voodoo at Paragon

    az23 (1).jpg


    An '86 daily driver I had - SAS using factory spring hangers (before kits were popular). Pretty stock otherwise with a really pretty 22RE and 33s.

    86_frontside_500 (1).jpg
    DCP01074 (1).jpg


    Another of my daily drivers - '95 4runner with 3.4 swap. I wrote an article on this swap back in the day that was heavily referenced for quite a few years.

    100_1214.jpg


    My 10 year FJ40 project. Selling this financed my current Taco build and significant life changes. I miss it, but I never wanted to beat it up! I do have a lot more fun in the woods now!

    IMG_7426.jpg


    Our family car up until a year ago - '96 LX450

    IMG_3968.jpg


    Our current family car - '04 GX470

    20190506_101501.jpg
     
    Last edited: Aug 27, 2019
    dk_crew, MY50cal, lukester78 and 7 others like this.
  20. Oct 16, 2017 at 1:38 PM
    #20
    ChadsPride

    ChadsPride Tacoma Owner & Enthusiast

    Joined:
    Nov 26, 2014
    Member:
    #143119
    Messages:
    127,315
    Vehicle:
    Sponsored by TacomaWorld.com
    Yotas on Yotas!!! I love seeing them all, thank you for sharing!

    :cheers:
     

Products Discussed in

To Top