

-
Welcome to Tacoma World!
You are currently viewing as a guest! To get full-access, you need to register for a FREE account.
As a registered member, you’ll be able to:- Participate in all Tacoma discussion topics
- Communicate privately with other Tacoma owners from around the world
- Post your own photos in our Members Gallery
- Access all special features of the site
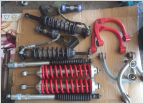 Suspension opinion
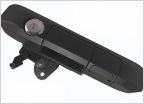 Back up camera info needed
 How to keep your Toyota Tacoma tailgate from being stolen
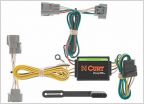 Trailer wiring harness, 2014 Taco.
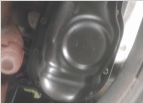 Oil change problems - popping sound
 Tom Wood's Driveshaft Slip Yoke Greasing
Wires Through The Firewall - The Right Way!
Discussion in '2nd Gen. Tacomas (2005-2015)' started by gunn_runner, Feb 1, 2018.
Page 1 of 3
Page 1 of 3

