1. Welcome to Tacoma World!

    You are currently viewing as a guest! To get full-access, you need to register for a FREE account.

    As a registered member, you’ll be able to:
    • Participate in all Tacoma discussion topics
    • Communicate privately with other Tacoma owners from around the world
    • Post your own photos in our Members Gallery
    • Access all special features of the site

gwolff's Cargo Trailer Camper Conversion

Discussion in 'Other Builds' started by gwolff, Dec 9, 2017.

  1. Feb 6, 2018 at 9:08 AM
    #81
    jmanscotch

    jmanscotch Well-Known Member

    Joined:
    Jul 12, 2016
    Member:
    #191851
    Messages:
    859
    Gender:
    Male
    First Name:
    Jake
    Colorado Springs
    Vehicle:
    2021 TRD OR DCLB
    Perfect, so they have it but it's just not listed on their website, I can work with that. Thanks for the info, sir.

    Yeah the trailer we're getting is essentially the same you got, but the economy "Patriot" versus your higher end LoadRunner. I plan to do the full length 2.5" square tube (much like my last off road trailer build) then add addition cross bracing in the main trailer frame that will tie the center tongue into the sides of the trailer frame rails, in between the factory floor supports/cross braces. I'd think that'd strengthen it up quit a bit and add some load dispersion for tongue strength.

    Should be buying our 5x8 this week and will start a build thread for it, but it'll be primarily planning and parts accumulation until spring time (no garage of my own either).

    Jake
     
    gwolff[OP] likes this.
  2. Feb 6, 2018 at 9:09 AM
    #82
    gwolff

    gwolff [OP] Well-Known Member

    Joined:
    Nov 10, 2017
    Member:
    #235676
    Messages:
    152
    Awesome, I can't wait to see another 5x8 build!
     
    jmanscotch likes this.
  3. Feb 7, 2018 at 8:21 PM
    #83
    gwolff

    gwolff [OP] Well-Known Member

    Joined:
    Nov 10, 2017
    Member:
    #235676
    Messages:
    152
    Howdy Yall. Here's an update photo! No video yet. The front cubbies are not screwed in place yet, just resting there for the picture. Making progress little by little! The walls are filthy but they'll look great once they're cleaned up

    [​IMG]
     
  4. Feb 7, 2018 at 9:17 PM
    #84
    horstuff

    horstuff Re-member

    Joined:
    Jul 8, 2015
    Member:
    #159045
    Messages:
    4,327
    Gender:
    Male
    PNW
    Vehicle:
    2015 Base 2.7 Access Cab 4x4 5 sp
    This gives me dare I say a major boner.
     
    gwolff[OP] likes this.
  5. Feb 8, 2018 at 3:17 AM
    #85
    POOLGUY

    POOLGUY Well-Known Member

    Joined:
    Feb 19, 2013
    Member:
    #97958
    Messages:
    7,978
    Gender:
    Male
    First Name:
    JEFF
    ALABAMA
    Vehicle:
    08 TRD SPORT 6 SPEED
    Dobinsons suspension
    X's 2
     
  6. Feb 9, 2018 at 1:47 PM
    #86
    dynamicweight

    dynamicweight Well-Known Member

    Joined:
    Feb 28, 2017
    Member:
    #211981
    Messages:
    332
    Gender:
    Male
    Lookin good! :thumbsup:

    Very inspiring.
     
  7. Feb 15, 2018 at 8:26 PM
    #87
    gwolff

    gwolff [OP] Well-Known Member

    Joined:
    Nov 10, 2017
    Member:
    #235676
    Messages:
    152
    crazy joker, POOLGUY and Drainbung like this.
  8. Feb 15, 2018 at 9:37 PM
    #88
    Drainbung

    Drainbung Somedays you are the show....

    Joined:
    Sep 2, 2010
    Member:
    #42629
    Messages:
    9,123
    Gender:
    Male
    First Name:
    Bob
    Fallabama, NV
    Vehicle:
    10 DCLB
    TRD Fleshlight
    Enjoying the build, looks great. Could you please spell out the name of the Acra.... lining that you put on the walls and ceiling? Thanks!
     
  9. Feb 15, 2018 at 9:52 PM
    #89
    gwolff

    gwolff [OP] Well-Known Member

    Joined:
    Nov 10, 2017
    Member:
    #235676
    Messages:
    152

    It's spelled Acrovyn. I don't know if it would be a good material for the typical DIYer because I have been told it's expensive. I got some left over stuff. I think it's something like $100 per 4x8 sheet. At that price it would have been around $500 worth of Acrovyn to do the trailer. Plus adhesive, don't know the cost on that. It's really nice stuff, the pictures don't do it justice. It's extremely durable so it's really perfect for the trailer.

    I'm sure there are more cost effective alternatives for those who don't have connections on leftover building materials or have bigger projects that require more than "leftovers." I doubt many people have friends with Acrovyn lying around haha.
     
    Last edited: Feb 15, 2018
    Drainbung[QUOTED] likes this.
  10. Feb 16, 2018 at 11:07 PM
    #90
    gwolff

    gwolff [OP] Well-Known Member

    Joined:
    Nov 10, 2017
    Member:
    #235676
    Messages:
    152
    Its up there secure now.. this was actually as we were putting it up. We started at the front and had to work our way to the rear with supports to pin it against the ceiling. Now that the adhesive is on there, I don't think it will ever come off.
     
    Drainbung likes this.
  11. Feb 18, 2018 at 9:20 PM
    #91
    gwolff

    gwolff [OP] Well-Known Member

    Joined:
    Nov 10, 2017
    Member:
    #235676
    Messages:
    152
    Alright time for another big update post with lots of photos!

    One of the first things I did today was mount the shore power plug on the exterior of the trailer. I ran the romex through the divider wall over to where I am putting the electrical cabinet. Pics below

    [​IMG]
    [​IMG]

    [​IMG]

    Don't worry, the wall where the shore power plug is protruding will be completely covered so it won't look so ugly.

    I insulated the divider wall in preparation for it to be closed. Then my dad and I used some spare reclaimed lumber to start building cubbies. We built the top cubbies first. We kinda went in a weird order here but I think we were just excited to build some cubbies and use the wood. They came out awesome!

    [​IMG]
    [​IMG]

    We actually covered all of the ceiling back there with it so you can't see the end of the acrovyn but I didn't take a close up picture after we did that.

    Then we closed the rest of the wall and I put down some flooring. Pics belowwww.

    [​IMG]

    It looks so good!

    At this point, we wanted to start building the countertop/cabinets for the bottom half. I didn't know how much room I would want exactly for the electrical cabinet so I just started mounting things where I wanted them to see how much room I'd need.

    [​IMG]

    In this pic, the AC is wired for the most part. Obviously no DC has been run. If you have any questions about my plans for the electrical, please ask. I love electrical/electronics.

    Now we knew about how wide and tall this cabinet would need to be. We also needed the countertop to be high enough for the sink to drain properly. We went ahead and installed the base of the counter.

    [​IMG]

    Andddd the finishing touch of the evening... The overhead light for the galley! Here is my dad holding the stripped wire to the battery for my photo haha.

    [​IMG]


    Here is an update video if that is more your thing (Warning this one is particularly long and its me just blabbing for 7 minutes): https://youtu.be/RJwpmFw-RIM
     
  12. Feb 19, 2018 at 3:18 AM
    #92
    POOLGUY

    POOLGUY Well-Known Member

    Joined:
    Feb 19, 2013
    Member:
    #97958
    Messages:
    7,978
    Gender:
    Male
    First Name:
    JEFF
    ALABAMA
    Vehicle:
    08 TRD SPORT 6 SPEED
    Dobinsons suspension
    It's coming long, looking good.
     
    gwolff[OP] likes this.
  13. Feb 20, 2018 at 9:02 AM
    #93
    dynamicweight

    dynamicweight Well-Known Member

    Joined:
    Feb 28, 2017
    Member:
    #211981
    Messages:
    332
    Gender:
    Male
    What a smart idea for the kitchen! Are you planning on adding a solar panel or just plugging in to charge?
     
    P. Steve and gwolff[QUOTED][OP] like this.
  14. Feb 20, 2018 at 9:12 AM
    #94
    gwolff

    gwolff [OP] Well-Known Member

    Joined:
    Nov 10, 2017
    Member:
    #235676
    Messages:
    152
    Thank you! I do want to add solar some day, it won't be too much hassle to add. For now I will just be plugging in to charge. I'll probably get a little generator some day too
     
    dynamicweight[QUOTED] likes this.
  15. Feb 21, 2018 at 8:08 PM
    #95
    gwolff

    gwolff [OP] Well-Known Member

    Joined:
    Nov 10, 2017
    Member:
    #235676
    Messages:
    152
    Update! The kitchen is coming along. Put more reclaimed wood for the backsplash, installed a sink and a countertop! In the pic below you can see the backsplash and the left wall, the sink temped in and the countertop. You can also see the light bar underneath the cubbies... I didn't think it fit with the style of the kitchen, you'll see I hid it later on.

    [​IMG]

    Here's the sink in for real. The counter top is vinyl flooring.. lol. Looks good! Durable! Easy to clean! What's not to love? The sink is a marine sink.

    [​IMG]

    In this pic you can kinda see the pump. The sink works! You can also see the right wall is now covered and you can see the jbox in that wall that will have a light switch and receptacle. You may notice that the light bar is no longer visible. I covered it with a piece of anodized L metal. It has a brown tint so it's perfect to go with the kitchen.

    [​IMG]

    Pumping it out! I want to take it out for Easter so I have a real deadline now.
     
    Last edited: Feb 21, 2018
  16. Feb 21, 2018 at 8:10 PM
    #96
    horstuff

    horstuff Re-member

    Joined:
    Jul 8, 2015
    Member:
    #159045
    Messages:
    4,327
    Gender:
    Male
    PNW
    Vehicle:
    2015 Base 2.7 Access Cab 4x4 5 sp
    This is epic.
     
  17. Feb 23, 2018 at 9:10 AM
    #97
    jmanscotch

    jmanscotch Well-Known Member

    Joined:
    Jul 12, 2016
    Member:
    #191851
    Messages:
    859
    Gender:
    Male
    First Name:
    Jake
    Colorado Springs
    Vehicle:
    2021 TRD OR DCLB
    Nice work on the galley sir, liking how it's coming together!

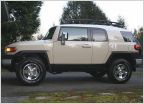
    I also just realized I got the same wheels as you :cool:

    [​IMG]
     
    stealthmode and gwolff[OP] like this.
  18. Feb 26, 2018 at 7:47 AM
    #98
    gwolff

    gwolff [OP] Well-Known Member

    Joined:
    Nov 10, 2017
    Member:
    #235676
    Messages:
    152
    Dude, twinsies! Are you in the process of building this now?
     
  19. Feb 26, 2018 at 9:36 AM
    #99
    jmanscotch

    jmanscotch Well-Known Member

    Joined:
    Jul 12, 2016
    Member:
    #191851
    Messages:
    859
    Gender:
    Male
    First Name:
    Jake
    Colorado Springs
    Vehicle:
    2021 TRD OR DCLB
    Right, the girlfriend says it looks obnoxious...which it may right now.

    I'm in the very early stages, planning still mostly, acquiring some parts. Need to buy a welder before I dive in also. Watching your build, which definitely shares some of the same basic goals as we're aiming for, has been a great inspiration thus far! So keep it up sir!

    Once I have enough going to justify a build thread, I'll start one here.
     
  20. Feb 26, 2018 at 11:21 AM
    #100
    gwolff

    gwolff [OP] Well-Known Member

    Joined:
    Nov 10, 2017
    Member:
    #235676
    Messages:
    152
    An epic journey lies ahead!
     
    jmanscotch likes this.

Products Discussed in

To Top