

-
Welcome to Tacoma World!
You are currently viewing as a guest! To get full-access, you need to register for a FREE account.
As a registered member, you’ll be able to:- Participate in all Tacoma discussion topics
- Communicate privately with other Tacoma owners from around the world
- Post your own photos in our Members Gallery
- Access all special features of the site
 DIY fix for 2GR-FKS timing cover leaks?
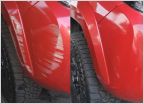 Meguiars scratch remover saved me!
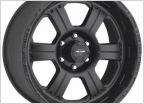 Will this wheel fit stock tires
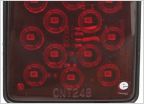 LED reverse trailer hitch light inside hitch?
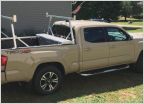 Any sort of back rack available
 Roof Rack
S2 BAJA DESIGNS FACTORY BUMPER
Discussion in '3rd Gen. Tacomas (2016-2023)' started by PB FAB, Mar 16, 2018.

