1. Welcome to Tacoma World!

    You are currently viewing as a guest! To get full-access, you need to register for a FREE account.

    As a registered member, you’ll be able to:
    • Participate in all Tacoma discussion topics
    • Communicate privately with other Tacoma owners from around the world
    • Post your own photos in our Members Gallery
    • Access all special features of the site

2017 Double Cab Long Bed Offroad Build

Discussion in '3rd Gen. Builds (2016-2023)' started by Metallikatz3, Sep 14, 2016.

  1. Sep 28, 2017 at 7:28 PM
    #41
    Metallikatz3

    Metallikatz3 [OP] Well-Known Member

    Joined:
    Sep 10, 2008
    Member:
    #9124
    Messages:
    1,745
    SLC, UT
    Vehicle:
    2017 DCLB OR
    Always in process
    Since these are crappy pics in a dark garage let's call these teasers..

    Icon Omega S2
    Icon Omega RXT (stock shock for comparison)
    And CBI bedrack

    20170928_202449.jpg
    20170928_202438.jpg
    20170928_200843.jpg
     
  2. Oct 1, 2017 at 9:50 AM
    #42
    FlapJack935

    FlapJack935 i member

    Joined:
    Nov 25, 2013
    Member:
    #117294
    Messages:
    3,151
    Gender:
    Male
    First Name:
    Jack
    Abq New Mexico
    Vehicle:
    Wannabe Trophy Truck
    Sick Gnar Trophy Truck Tacoma and King Ranch Raptor Killer
    have a better picture with the bars behind the grill?
     
  3. Oct 2, 2017 at 8:33 AM
    #43
    Metallikatz3

    Metallikatz3 [OP] Well-Known Member

    Joined:
    Sep 10, 2008
    Member:
    #9124
    Messages:
    1,745
    SLC, UT
    Vehicle:
    2017 DCLB OR
    Always in process
    Got the RXTs installed over the weekend as well! So for those curious the RXT shock has a max extended length of 26" (from center of eyelet to the bottom of the shock mount surface). 10.25" of exposed shaft. So my set-up of Dakar springs and Icon hydro bumps (without the 5/8" spacer installed) pairs with these about perfectly.

    The shocks limit my downtravel by about 1" and I have about a 1/2" safety margin at full compression. S

    RXT 1.jpg
    RXT 2.jpg
     
    KenLyns likes this.
  4. Oct 5, 2017 at 10:11 PM
    #44
    KenLyns

    KenLyns 8.75" Third Member

    Joined:
    May 23, 2010
    Member:
    #37674
    Messages:
    29,365
    Gender:
    Male
    Belly of the Beast
    Vehicle:
    4x4 TRD Off-Road Full-Auto
    LED Headlights, Volant CAI, 32" Duratracs
    It will be interesting to see how well the RXT shocks hold up. The side-mount eyelet means the shock shaft is in bending. In theory it may hasten seal wear, causing leaks, etc.
     
  5. Oct 6, 2017 at 8:02 AM
    #45
    Metallikatz3

    Metallikatz3 [OP] Well-Known Member

    Joined:
    Sep 10, 2008
    Member:
    #9124
    Messages:
    1,745
    SLC, UT
    Vehicle:
    2017 DCLB OR
    Always in process
    I can see what you mean - There is a uniball style spacer in the bottom eyelet that allows it to pivot on the lower mounting bolt.

    So I think the additional bending would only be due to the the increased distance (lever arm) from the center of the rear axle to the center of the shock shaft. But oh well - we shall see how well it lasts!

    Icon has been doing an offset upper mount for their Raptor RXT shocks for a little while now, there isn't much info out there on these either so I'm kinda taking a gamble with a new technology but I'm totally happy with them so far! A huge improvement over the 2.0" rear shocks and these allow me to use the full travel of my springs.
     
  6. Oct 6, 2017 at 8:12 AM
    #46
    JerryTaco

    JerryTaco Well-Known Member

    Joined:
    Jan 28, 2013
    Member:
    #96315
    Messages:
    6,862
    Truck is looking great man!! How are you liking the S2? I can't wait to get mine on the truck.
     
  7. Oct 6, 2017 at 9:03 AM
    #47
    Metallikatz3

    Metallikatz3 [OP] Well-Known Member

    Joined:
    Sep 10, 2008
    Member:
    #9124
    Messages:
    1,745
    SLC, UT
    Vehicle:
    2017 DCLB OR
    Always in process
    Thanks man!! The S2s definitely smooth things out and the front doesn't feel nearly as bouncy now that I can control the rebound. I haven't done any serious offroading with them yet, just a couple dirt roads and they make things so much smoother. Even on road there is a noticeable improvement

    I'm glad I scooped them up from @SixthSnail
     
  8. Oct 6, 2017 at 9:09 AM
    #48
    JerryTaco

    JerryTaco Well-Known Member

    Joined:
    Jan 28, 2013
    Member:
    #96315
    Messages:
    6,862
    Nice, good to hear. And yeah, that was a killer deal. I've got my S2 sitting down at the shop, just gotta pick it up and install it.
     
  9. Oct 6, 2017 at 9:11 AM
    #49
    Metallikatz3

    Metallikatz3 [OP] Well-Known Member

    Joined:
    Sep 10, 2008
    Member:
    #9124
    Messages:
    1,745
    SLC, UT
    Vehicle:
    2017 DCLB OR
    Always in process
    Did you end up getting bypass S2s?
     
  10. Oct 6, 2017 at 9:13 AM
    #50
    JerryTaco

    JerryTaco Well-Known Member

    Joined:
    Jan 28, 2013
    Member:
    #96315
    Messages:
    6,862
    yep. Pretty excited for another level of adjustability. Gonna be a lot happening at once here pretty soon. S2, new wheels, new tent, compressors and a few other things.
     
  11. Oct 14, 2017 at 10:40 PM
    #51
    Metallikatz3

    Metallikatz3 [OP] Well-Known Member

    Joined:
    Sep 10, 2008
    Member:
    #9124
    Messages:
    1,745
    SLC, UT
    Vehicle:
    2017 DCLB OR
    Always in process
    Someone asked how i installed the tonneau with the CBI rack so here it is!

    I bolted the side rails of the cover direct to the rack. Also removed the foam backing from the cover and sealed it to the rack with silicone.

    20171014_232533.jpg
     
    KCTaco77 likes this.
  12. Nov 2, 2017 at 12:59 PM
    #52
    Metallikatz3

    Metallikatz3 [OP] Well-Known Member

    Joined:
    Sep 10, 2008
    Member:
    #9124
    Messages:
    1,745
    SLC, UT
    Vehicle:
    2017 DCLB OR
    Always in process
    Swapped out my Pelfreybilt fuse plate in favor of the new SDHQ one for mounting my SwitchPro 8100. I did have to modify their plate a little bit to make it work the Redline hood struts. If it wasn't for the hood struts i it would fit perfectly. Unfortunately this modification involved cutting off the SDHQ's nicely etched logo.

    SDHQ fuse plate.jpg
     
  13. Nov 12, 2017 at 12:57 AM
    #53
    Clay7160

    Clay7160 Well-Known Member

    Joined:
    Aug 15, 2016
    Member:
    #194623
    Messages:
    1,273
    Gender:
    Male
    Vehicle:
    2018 MGM TRDOR DCLB 4x4
    GYEON ceramic coating
    Your dakar springs look like they are going into a negative arch, do you have allot of weight on them ?
     
  14. Nov 12, 2017 at 9:28 AM
    #54
    Metallikatz3

    Metallikatz3 [OP] Well-Known Member

    Joined:
    Sep 10, 2008
    Member:
    #9124
    Messages:
    1,745
    SLC, UT
    Vehicle:
    2017 DCLB OR
    Always in process
    Not at all. Usually about 200 lbs of stuff in the bed. Those pics are at full droop too with no weight on the suspension
     
    Clay7160[QUOTED] likes this.
  15. Mar 29, 2018 at 2:08 PM
    #55
    Metallikatz3

    Metallikatz3 [OP] Well-Known Member

    Joined:
    Sep 10, 2008
    Member:
    #9124
    Messages:
    1,745
    SLC, UT
    Vehicle:
    2017 DCLB OR
    Always in process
    New updates on the way...

    Hardshell RTT
    CBI Front and rear bumpers
    Misc. lighting and camping toys

    Possibly a dual battery?
     
  16. Mar 29, 2018 at 2:16 PM
    #56
    Metallikatz3

    Metallikatz3 [OP] Well-Known Member

    Joined:
    Sep 10, 2008
    Member:
    #9124
    Messages:
    1,745
    SLC, UT
    Vehicle:
    2017 DCLB OR
    Always in process
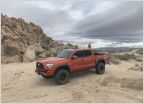
    Some pics of the truck from a trip down to San Rafel Swell. In the wash just past Ding and Dang Trailhead for those who know the area :)

    20180224_153653.jpg
    20180224_153605.jpg
    20180224_153524.jpg
    20180224_154401.jpg
     
  17. Mar 31, 2018 at 11:47 AM
    #57
    GAHLizard

    GAHLizard Member

    Joined:
    Mar 28, 2018
    Member:
    #248736
    Messages:
    16
    Gender:
    Male
    First Name:
    Greg
    NW Montana
    Vehicle:
    2019 DCLBOR
    2" ADS lift, Off Grid Dual Battery Kit, Twin ARB Compressor, Snomaster Fridge, Truck Vault, 23 Zero Byron RTT, Sliders, Bumpers, Winch, 33s, 5.29 Nitro Gears
    Can you give some additional information regarding your onboard hot water system. I am currently gathering parts up for something very similar to build up a 2018 DCLBOR and think that some hot water would be the ticket for keeping the wife smiling on multi day trips. Thanks again!
     
  18. Apr 17, 2018 at 10:21 PM
    #58
    mdiprimio

    mdiprimio Well-Known Member

    Joined:
    Apr 10, 2018
    Member:
    #250022
    Messages:
    93
    Gender:
    Male
    First Name:
    Matt
    Vehicle:
    2018 TRD OR 6MT Quicksand
    Blacked out grill / emblems Black lettering Color matched bumper caps BakFlip cover Subaru tweeters
    goals.
    Basically exactly where mine needs to be :D
    Nicely done.
     
  19. Apr 24, 2018 at 8:11 AM
    #59
    Metallikatz3

    Metallikatz3 [OP] Well-Known Member

    Joined:
    Sep 10, 2008
    Member:
    #9124
    Messages:
    1,745
    SLC, UT
    Vehicle:
    2017 DCLB OR
    Always in process
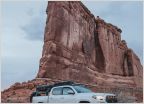
    Made a trip up to CBI this weekend to pick up a T3 front and rear bumper for my truck. I placed an order for the rear on 3/13 then added the front on 3/30 and I got a call on 4/13 that both were ready!! So I hit the road and spent the weekend camping up that way. Photo is from Birch Creek BLM area.

    Great guys up there and helped me cram all this in to my truck along with my camping gear for the weekend. As soon as I got back I got to work on the rear. Pulling the old bumper and bolting the new one on was super simple - took me about 45 min in total and the CBI lined up great and slid right on with a little help from a jack as I was working by myself.

    The only issue was the the latch was not in the box of parts I picked up so a quick call to CBI and they got me one out UPS overnight! Also they emailed me instructions for the swing arms which helped out a bit to confirm how everything went together.

    The wiring for the trailer harness does need to be extended as well.

    Also I got my bike rack attached to my CBI bed rack

    Next step - Finish up the swing arms and wiring then tackle the front!

    20180422_190537[1].jpg
    20180408_101350[1].jpg
    20180422_072925[1].jpg
     
    _gray_knight_, dskakie and JerryTaco like this.
  20. Apr 24, 2018 at 8:38 AM
    #60
    JerryTaco

    JerryTaco Well-Known Member

    Joined:
    Jan 28, 2013
    Member:
    #96315
    Messages:
    6,862
    very nice dude!!
     

Products Discussed in

To Top