

-
Welcome to Tacoma World!
You are currently viewing as a guest! To get full-access, you need to register for a FREE account.
As a registered member, you’ll be able to:- Participate in all Tacoma discussion topics
- Communicate privately with other Tacoma owners from around the world
- Post your own photos in our Members Gallery
- Access all special features of the site
Quick Links: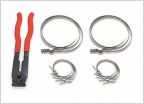 Inner steering bellows clamps Mix 'high mileage Mobil 1' with regular mobil 1, both fully synthetic
 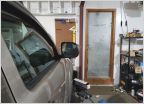 Surround View Cameras (or adding multiple cameras)
 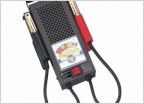 Slow cranking, multiple tries to start engine
 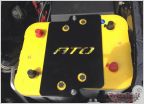 Dual Battery Setups! Let's see them! Multiple Batteries Thread!
  Single battery v. Dual battery (Off grid side by side)
2nd Gen rear diff pinion seal replacement DIY
Discussion in 'Technical Chat' started by Jon G, Apr 18, 2018.


