

-
Welcome to Tacoma World!
You are currently viewing as a guest! To get full-access, you need to register for a FREE account.
As a registered member, you’ll be able to:- Participate in all Tacoma discussion topics
- Communicate privately with other Tacoma owners from around the world
- Post your own photos in our Members Gallery
- Access all special features of the site
 P0430 Code: Catalyst System Efficiency Below Threshold (Bank 2)
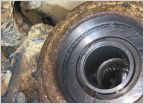 Tips on cleaning CV Axle seal mating surface
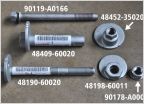 2nd Gen Alignment Cams Packaged Price
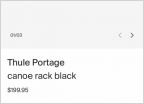 Tacoma Double Cab Roof Rack
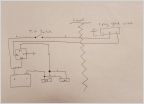 Double switched engine bay lights
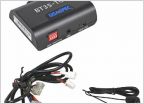 Who makes the best AUX port system for iPhone listening?
3" Bilstein 5100/Toytec AAL Suspension lift Guide
Discussion in '2nd Gen. Tacomas (2005-2015)' started by reidkm, Jun 30, 2018.
Page 1 of 3
Page 1 of 3
