1. Welcome to Tacoma World!

    You are currently viewing as a guest! To get full-access, you need to register for a FREE account.

    As a registered member, you’ll be able to:
    • Participate in all Tacoma discussion topics
    • Communicate privately with other Tacoma owners from around the world
    • Post your own photos in our Members Gallery
    • Access all special features of the site

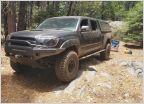
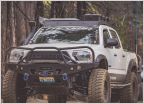
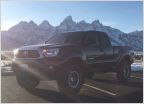
Deekyn’s build of Kevin the 2015 TRD Off Road Tacoma

Discussion in '2nd Gen. Builds (2005-2015)' started by deekyn, Apr 8, 2018.

  1. Apr 8, 2018 at 11:26 AM
    #1
    deekyn

    deekyn [OP] Well-Known Member

    Joined:
    Dec 23, 2015
    Member:
    #172953
    Messages:
    1,758
    Gender:
    Male
    First Name:
    Dustin
    Land of Enchantment
    Vehicle:
    2015 Black Tacoma TRD Off Road
    How she sits now:


    2017 July 22 - Fresh of the Lot:


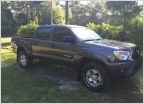
    I sold my last unmodded and beat to hell 2001 Tacoma with ~350k miles and then briefly owned a Prius (killed a little bit of my soul owning that car). Found this Tacoma in a dealership in Denver on Autotrader and bought it the day they listed it. Bought her (her name is Kevin) certified used in July 2017 with 21k miles. Time to start the mods.

    Have driven her up and down both coasts and across 35 states since July 2017.

    This will (hopefully) be a fairly thorough build thread with lots of pics and links.


    2015 TRD Off Road Access Cab

    Exterior
    • Leitner ACS Forged bed rack (hi lift mount, dual pod, water pod, max trax mount)
    • Decked Drawer System
    • Leer camper shell
    • Front Runner Slimline II roof rack for camper shell 1255x1560 and with Pelfreybilt mount for access cab {here}
    • Fender flares removed with OEM clips cut/sanded/painted. {here}
    • Trimmed front fenders 1 1/2” {here}
    Interior
    • Dynamat extreme and dynaliner on the roof {here}, dynamat, closed cell foam, mass loaded vinyl suicide doors {here}, back wall and floor {here}
    • replaced interior cab surround weather stripping {here}

    Armor
    • Mobtown Off-Road bolt on sliders {here}
    • At the Helm single hoop steel plate front bumper {here} and sandblasting/repainting {here}, and repainting again... (2/2021)
    • RCI steel full skid plate setup (engine, transmission, transfer case)
    • Mobtown Offroad rear HC bumper steel {here}

    Front Suspension
    • Total Chaos UCA {here}, uniballs and bushings replaced {here}
    • King 2.5” ext travel coilover w/ adj 700 springs {here}, rebuilt 6/2020, replaced spherical bearings, spacer, and clips on COs and rear shocks {here}, revalved and rebuilt by Accutune 1/2021
    • TC spindle gussets courtesy of glorifiedwelder {here}
    • Replaced LCA and cam sleeves 9/3/20
    Rear Suspension
    • Archive Garage Hammer Hangers and cross bar by Glorified Welder {here}
    • Archive Garage shock relocate kit
    • King 2.5 12” smoothies with reservoir
    • Deaver u402 Stage III leaf packs
    • Wheeler’s Off-road extended rear brake lines {here}, plus 1” spacer at axel
    • Timbren U-bolt flip kit with bumpstops {here}
    • All-Pro Expo leaf Pack {here}**** replaced a rusted cracked set with new free replacement from TG/AP {here} GONE
    • King 2.5" remote reservoir rear shocks w/ adjuster, custom length 26.7 ext length (KING 25001-121A D/S) {here} GONE

    Tires and Wheels
    • BFG AT KO2 295/75/16
    • SCS F5 matte gunmetal 16x8 3.5” bs wheels {here}
    • Cleaned/sanded/painted rear axle center cap for SCS F5s
    • Bed mounted spare {here}
    Recovery ish
    Lights and electronics
    • X2POWER premium group 27 AGM battery {here} with an HKB Electric voltage booster {here}
    • Cali Raised 20” Slim Single Row LED light bar
    • Baja Designs Squadron Pro Wide cornering fog lights
    • Mintuning Quick Charge usb a, usb c, voltmeter in factory lighter hole
    • SPOD {here}
    • Center console switches added
    • Blue Sea 4366 Accessory Panel Installed in the bed cubby
    • KENWOOD DMX9707S head unit with wireless CarPlay and JL Audio W3v3 powered subwoofer (250 watts) bolt to the floor behind the drivers seat {here}
    Glamping Mods
    • Dometic CFX3 55IM fridge
    • Overland Vehicle Systems Nomadic Awning 270 Cover, Passenger Side {here}
    • CVT Mt. Hood double channel RTT on Leitner rack
    Misc
    • Trimmed ears off the spare tire carrier for 295/75r16 full size spare
    • Total Chaos bed stiffener
    • diff breather mod
    • Exhaust reroute and tailpipe chop {here}
    • Energy Suspension radiator support poly bushings {here}
    • Cowl induction snorkel mod {here}
    • Replaced ujoints and carrier bearing, {Part 1}
    • Replaced my steering rack {here}

    Planned/Wants
    • Full sound dampening (roof ✅, access doors ✅, floor ✅, back wall ✅, doors)
    • Winch
    • Bed drawer system? Some sort of camping organization. The last trip was messy and cluttery
    • Archive Garage shock relocate and king 2.5 12” smoothies.
    • JD fab steering, LCA Pivots, inner fenders, long travel kit...
    • gears
    • 35s?
    • High clearance front bumper
    • Roof top tent
    2022 Maintenance needed
    • Fix the damn air conditioner that only works on high
    • Replace lower spherical bearings on coilovers
    • Sound deaden the front doors
    • Weld cracks in radiator core support
     
    Last edited: Sep 4, 2022
  2. Apr 8, 2018 at 11:43 AM
    #2
    deekyn

    deekyn [OP] Well-Known Member

    Joined:
    Dec 23, 2015
    Member:
    #172953
    Messages:
    1,758
    Gender:
    Male
    First Name:
    Dustin
    Land of Enchantment
    Vehicle:
    2015 Black Tacoma TRD Off Road
    Off-roading Trips

    As I have been getting more into harder rock crawling/ off-roading, I’d like to keep a running list of the moderate and harder trails I’ve run.

    I will include the trail name, location, date, and rating. Ratings will be based on the 1-10 standard jeeper scale from Trails Off-road and the Red Rocks 4-Wheelers Easter Jeep Safari. 1-2 easy, 3-4 moderate, 5-6 hard, 7-8 severe, 9-10 extreme.


    5-6 difficult

    Johnny Park Rd, 5, Estes Park CO, 9/2017
    Hells Revenge (lite), 6, Moab UT, 2019
    Pipeline Trail, 5, Suring, WI, 2019
    Black Bear Pass, 6, Telluride CO, 2020, 8/2021
    Assorted obstacles, 5, Rio Puerco NM, 2021
    Poison Spider Mesa, 6, Moab UT, 4/2021
    Pearl Pass, 5, Breckenridge CO, 7/2021
    Birdseye Gulch, 5, Leadville CO, 8/2021
    Red Cone, 5, Breckenridge CO , 8/2021
    Radical Hill, 5, Breckenridge CO, 8/2021
    Middle Fork Swan River (optional obstacles) 5, Breckenridge CO, 8/2021
    Top of the World, 6, Moab UT, 10/21
    Napoleon Pass, 5, Tin Cup, CO, 6/22
    Day Canyon Point, 5, Moab, UT, 9/22


    3-4 Moderate
    Pierson Road South, 3, Estes Park CO, 7/2017
    Pole Hill, 4, Estes Park CO, 8/2017
    Chain Lake Rd, 3, Idaho Springs CO, 9/2017
    Hagerman Pass, 3, Leadville CO, 9/2017
    Pennsylvania Gulch, 4 ,Nederland CO, 9/2017
    First Notch, 3, Pagosa Springs CO, 2017
    Cinnamon Pass, 3, Silverton CO, 10/2017
    Mineral Creek, 4, Ouray CO, 10/2017
    Engineer Pass, 4, Ouray, CO, 10/2017
    Elwood Pass, 4, Pagosa Springs, CO, 2017
    Imogene Pass, 4, Telluride CO, 9/2020
    Assorted Obstacles, 4, Rio Puerco Albuquerque NM, 2021
    Caja Del Rio, 3, Sante Fe NM, 2/2021
    Warm Springs Bay, 3, Lake Powel UT, 3/2021
    Crystal River, 3, Marble CO, 7/2021
    Schofield Pass, 4, Marble CO, 7/2021
    CorkScrew Gulch 3, Silverton CO, 8/2021
    Hurricane Peak, 3, Silverton, CO, 8/2021
    Poughkeepsie Gulch (sans “the wall”), 4, Ouray, CO, 8/2021
    Stony Pass, 4, Silverton CO, 8/2021
    North Fork Swan River, 4, Breckenridge CO, 8/2021
    Mosquito Pass, 3, Leadville CO, 8/2021
    Saints John, 3, Breckenridge CO, 8/2021
    FS 12, 4, Cedro Peak, Albuquerque NM, 09/21
    FS 13, 4, Cedro Peak, Albuquerque NM, 09/21
    FS 452, 4, Cedro Peak, Albuquerque NM, 09/21
    Arroyo de la Parida, Gordy’s Hills OHV Area, Socorro NM, 9/2021
    ATV Pass, 4, Gordy’s Hills OHV Area, Socorro NM, 9/2021
    Kokopelli Trail, 4, Fruita to Dewey Bridge, 10/21
    Ophir Pass, 3, Silverton, CO, 6/22
    Hayden Pass, 4, Saguache, CO 6/22
    Dead Horse Gulch, 4+, salida, CO, 6/22
    Bald Mountain Gulch, 3, Salida, CO, 6/22
    Tin cup Pass, 4, Buena Vista, CO, 6/22
    Kendal gulch, 3, Silverton, CO, 7/22
    La Sal Pass, 4, Moab, UT, 9/22


    Last edited: Sep 4, 2022
    dpf88101, boston23, essjay and 2 others like this.
  3. Apr 28, 2018 at 8:48 PM
    #3
    deekyn

    deekyn [OP] Well-Known Member

    Joined:
    Dec 23, 2015
    Member:
    #172953
    Messages:
    1,758
    Gender:
    Male
    First Name:
    Dustin
    Land of Enchantment
    Vehicle:
    2015 Black Tacoma TRD Off Road
    Reserved
     
    Last edited: Oct 8, 2021
    BassAckwards and ChadsPride like this.
  4. May 1, 2018 at 8:46 PM
    #4
    deekyn

    deekyn [OP] Well-Known Member

    Joined:
    Dec 23, 2015
    Member:
    #172953
    Messages:
    1,758
    Gender:
    Male
    First Name:
    Dustin
    Land of Enchantment
    Vehicle:
    2015 Black Tacoma TRD Off Road
    Rear diff breather mod

    While I’m waiting for the rest of my suspension, I figured I could start on some easier work on the truck. Did the diff breather mod today. Really fast and super easy. It took longer to jack up the truck and take off the driver’s side rear wheel and the spare.


    I follwed the awesome and very thorough write up from @Neubs, which was super helpful. Of course my tacoma doesn’t have the cubby to remove to make it easier to drill into the gas cap area. So I mounted it in the cavity of the driver’s side taillight. I wonder if this is a little less protective that the gas cap cavity. I may reroute it later when I clearance for 35’s :cool: ...


    Note the beer. It’s critical for all mods and installs.


    Missing from the pic: 14mm wrench, Teflon tape, drill and 1/8” bit, nut and bolt for mounting the pclamp to the truck.


    Extended break lines and speed bleeders

    In anticipation of my lift, I added my Wheeler’s Off-road extended brake lines. While I was at it, seemed like a good time to add the speed bleeders.

    As per the usual it was all thanks to TW, this forum is so damn helpful.

    For the extended break lines:
    I followed this TW post using these For the speed bleeders:
    I used this really great TW post


    Changing the brake lines really wasn’t bad. I took maybe 2 hours to swap them out and bleed the brakes because I had never done it before and took my my time.

    Tips:
    • put the rear on jack stands and take the rear driver side wheel and he spare off so you have more room to move around
    • Clean everything with wire/nylon brushes and break parts cleaner before to keep the funk from getting in the brake system
    • It’s helpful to take off the brackets holding the brake lines from frame and from the axel. It allows a little play since the hard lines are at odd angles. You need a 12mm end wrench and 12mm socket. I loosened all the hard line brackets at the axel to give it all more play.
    Pic shows upper bracket held to the frame with 12mm bolts and the 10mm nut that you loosen to separate the hard and soft lines.

    Next pic shows the axle brake line bracket
    • Hold the now unattached bracket with a vice grip while you work the 10mm flare wrench to loosen the nut
    • Have extra rags/paper towels, and little rubber caps to cover the open hard line at the frame when the you remove the nut. An easy answer would be to use the rubber cap from your brake bleeder temporarily (I used the rubber caps from my speed bleeders). The lines don’t spew fluid, they just sort of dribble it out. No matter what break fluid will be spilled.
    Pic shows the rubber caps on the hard lines after the nuts were pulled.

    The lower hard lines did not drip at all...
    • Take the top nuts off, cover the hard lines, take the bottom nuts off, swap the lines somewhere more comfortable. There will be fluid in these lines! I used vice grip to pull the metal clips that hold the soft lines to the brackets and a soft blow hammer to pound them back in with the new lines
    • Reattach in reverse order
    • Bleed your brakes. I have a TRD off road with brake system pump and bought speed bleeders. It made the bleeding an easy 30 min process by myself.
     
    Last edited: Sep 19, 2021
  5. May 3, 2018 at 8:41 PM
    #5
    deekyn

    deekyn [OP] Well-Known Member

    Joined:
    Dec 23, 2015
    Member:
    #172953
    Messages:
    1,758
    Gender:
    Male
    First Name:
    Dustin
    Land of Enchantment
    Vehicle:
    2015 Black Tacoma TRD Off Road
    Front Runner Slimline II Roof Rack

    1255x1560 for the leer camper shell
    1255x954 for access cab from Pelfreybilt


    Put together and installed my Front Runner slimline ii roof rack for canopy/cap/trailers, it’s the 1255x1560 size.

    It was really easy to put the rack together. Mounting the tracks to the curved camper shell took quite a while. It took a lot of measuring on curves to get them as even as possible and mounting the bolts/lock nuts was a bit tedious with an Allen wrench and vice grips. Also getting the rack to sit square on the feet took some time. Maybe 4 hours all told.

    Also this video was quite helpful...
    https://m.youtube.com/watch?v=hxUjpyU6kRo


    The Pelfreybilt access cab Front Runner roof rack was more involved. Putting the rack together was the same as the cap and only took a few minutes. The mounting rails from Pelfreybilt took more time.

    A few tips:
    • I installed the rack using rivnuts instead of having to take apart the headliner completely.
    • To keep the rubber rain gutter mostly intact, I trimmed the underside using diagonal wire cutters (to cut the wire that runs through it) then punched a hole in the top using a 3/4” heavy duty leather punch.
    • You only need to loosen the rear of the headliner to remove the shark fin antenna to trim it.
    • Shark fin antenna trimming how-to

    Tools for the job.


    Marking and setting rivnuts in the roof gutter:


    Making holes in the rubber gutter cover:


    Last edited: May 20, 2018
    ChadsPride and Possum Fat like this.
  6. May 11, 2018 at 3:33 PM
    #6
    deekyn

    deekyn [OP] Well-Known Member

    Joined:
    Dec 23, 2015
    Member:
    #172953
    Messages:
    1,758
    Gender:
    Male
    First Name:
    Dustin
    Land of Enchantment
    Vehicle:
    2015 Black Tacoma TRD Off Road
    Exhaust crossover reroute and tailpipe chop
    Took the truck into a local ABQ shop and had my exhaust rerouted. Why the hell is the exhaust crossover the lowest point in the truck?! Also had them chop the tail pipe for the HC bumper I have on order :cool:. The sound is no louder, but slightly different since the tailpipe doesn’t exit on he passenger side anymore. I hear it more with the rear window open.

    From this:


    To this:


    I added this Thermo-Tex 1’x4” clamp on pipe shield to protect the transfer case and the drive shaft.


    And this:
     
    Last edited: May 20, 2018
    Lynntropy and ChadsPride like this.
  7. May 20, 2018 at 9:28 PM
    #7
    deekyn

    deekyn [OP] Well-Known Member

    Joined:
    Dec 23, 2015
    Member:
    #172953
    Messages:
    1,758
    Gender:
    Male
    First Name:
    Dustin
    Land of Enchantment
    Vehicle:
    2015 Black Tacoma TRD Off Road
    Pinch Weld flatten and *Cab Mount Chop

    In preparation of my lift and 33’s I flattened the pinch weld and began my CMC.

    For the pinch weld I followed this link: https://www.tacomaworld.com/threads...lat-with-a-sledge-hammer-lets-discuss.425850/

    And watched this awesome video from Total Chaos

    I spaced out and flattened my pinch weld in instead of out. Several people swear by more clearance if the weld is beaten outwards instead. Oh well.

    Marked the CM/fender well liner/flaresfor trimming:

    Beat the pinch weld flat toward the inside of the truck. The top is thin and easy, the bottom takes some effort. I cut into the pinch weld with a Cut off wheel the make it easier.


    Though the weld looks ok, I wanted to make sure there was no potential for leaks. So I first stripped the paint and seam seal from the area:

    Used self etching primer:

    The a very messy 3M dynatron seam sealer:

    And the just as messy 3M rubberized under coating:


    Cab mount chop *edit!


    For the cab mount chop I used a paper template of the TC CMC places to trace the shape needed to cut on my CM. I used an angle grinder with cut off wheel and 60 grit flap wheel. Also a dremel to finesse it. I don’t weld and will need someone to do that for me. I also may just chop it more to eventually get 35’s


    It’s cute to think my little cab mount chop below was going to be enough for the 295/75r16s on 3.5” bs.

    Went from this:


    To this:


    Also trimmed the flares and the sheet metal to give more room.
     
    Last edited: May 1, 2019
    smw62891, Tibetan Nomad and JKU3000 like this.
  8. Jul 21, 2018 at 6:56 AM
    #8
    deekyn

    deekyn [OP] Well-Known Member

    Joined:
    Dec 23, 2015
    Member:
    #172953
    Messages:
    1,758
    Gender:
    Male
    First Name:
    Dustin
    Land of Enchantment
    Vehicle:
    2015 Black Tacoma TRD Off Road
    King 2.5” ext travel coil overs with adjusters and 700# springs
    *there is a decided lack of pics because I had two days to install my full front and rear suspension before I drove across the country for grad school. It was a crazy two days.

    Shout out to @Wheeler's Off-Road Inc for working with me on ordering this king set up. Those guys were super helpful great to work with.

    The install in the front was pretty straight forward and could have taken just a few hours, if it weren’t for the UCA bolts and me forgetting to lube all the washers on one UCA. Dumbass :rolleyes:.

    Basically I followed the really great video by TC on YouTube . The only difference is that in their Tacoma he said just take a big set of channel locks and bend the sheet metal out of the way to slide the UCA bolt out. Not on my 2015 TRD off road that’s for damn sure. I bent and bent and bent and it did not fit. Took some tin snips and cut that shit up. :sawzall:Seriously a PITA. The passenger side was worse some how. The drivers side needed a little less cutting but with all the shit in the engine compartment around it was still a hassle. Those long bolts were easily the hardest part of the install. Oh and me putting one UCA on, but not lubing it and having to take it off and lube it and reinstall it.


    All stock front suspension


    The disconnecting the sway bars links was easy, sliding them out of the way was fine, until somehow I punctured the boot on the drivers side and leaked grease all over. Now I need to have that replaced.


    Freeing the joint on the stock UCA with a handy dandy hammer


    Taking the coilovers out was quite easy. Unbolt and pull


    This is the ugly ass hole I made cutting up the sheet metal forward of the ICA bolt. I’ll be damned if I could bend it enough to pull that bolt, so fuck it. I cut it. It ain’t pretty but it will work.


    All freshly installed. Took probably 6 hours because of some user error and problem solving for the UCA bolts. Should have taken 3 hours. Or 14 minutes like the Total Chaos video :rolleyes:
     
    Last edited: Jul 23, 2018
  9. Jul 26, 2018 at 5:40 AM
    #9
    deekyn

    deekyn [OP] Well-Known Member

    Joined:
    Dec 23, 2015
    Member:
    #172953
    Messages:
    1,758
    Gender:
    Male
    First Name:
    Dustin
    Land of Enchantment
    Vehicle:
    2015 Black Tacoma TRD Off Road
    All Pro Expo leaf pack and custom length King shocks
    Replacing the leaf pack and installing the new shocks was pretty easy. Took maybe 3 hours total. It was helpful to keep on side completely hooked up while the other side was replaced. That way the axel stays mostly in line and mostly at the right angle.

    Stock Billies


    I will say they the rear lower shock mount was a little tight and had to be ground down a little with an angle grinder. Perhaps it was the angle of the axle?


    Last edited: Jul 1, 2019
    smw62891 and ChadsPride like this.
  10. Jul 26, 2018 at 5:42 AM
    #10
    deekyn

    deekyn [OP] Well-Known Member

    Joined:
    Dec 23, 2015
    Member:
    #172953
    Messages:
    1,758
    Gender:
    Male
    First Name:
    Dustin
    Land of Enchantment
    Vehicle:
    2015 Black Tacoma TRD Off Road
    Scs F5 rims 16x8 3.5BS and BFG AT KO2 295/75/16
    She looks amazing! So different. So much tire. What a change from my baldass stock tires and wheels.

    Also needed to cut a lot more from my cab mount. See post above.

    From this:

    To this:


    Last edited: May 24, 2019
    ramnj, dpf88101 and ChadsPride like this.
  11. Jul 30, 2018 at 5:50 PM
    #11
    BraskaTaco

    BraskaTaco Well-Known Member

    Joined:
    Jan 11, 2016
    Member:
    #174711
    Messages:
    2,069
    Gender:
    Male
    Midwest
    Vehicle:
    2013 Tacoma TRD OR
    Awesome build! I might jump from 285 to 295 next
     
    ChadsPride likes this.
  12. Jul 30, 2018 at 10:32 PM
    #12
    deekyn

    deekyn [OP] Well-Known Member

    Joined:
    Dec 23, 2015
    Member:
    #172953
    Messages:
    1,758
    Gender:
    Male
    First Name:
    Dustin
    Land of Enchantment
    Vehicle:
    2015 Black Tacoma TRD Off Road
    Thanks! It’s coming along. My sliders and bumper have been stalled out for a while. I feel like those will really pull it all together. Although I already find myself quietly ogling her in parking lots. The wheels/tires made a huge difference. It’s been great doing this all myself and learning my truck and tools. This forum has taught me so much (and cost me so much -“ yes honey I did need that expensive gun case to store my recovery shit and tools”, “yes honey I did need to buy bigger tires.” “Of course we need $3000+ in bumpers”, and so on)

    :spending:

    295s... I’m still fanagling the fit. I jumped from stock whatever’s 265? To these and I need more trimming every time I turn around! I need to preload my King coilovers to level it out and that will give me a little more clearance, but more trimming of the fender flares and sheet metal will help. Getting my front bumper will allow me to possibly push the castor to get the tires further forward. But that is a ways off. Until then it’s trim a little here, grind a little there.

    By the way, I took a cross country photography road trip a few months ago and a couple of my favorite pics are from your neck of the woods.

    Cheers!:hattip:
     
  13. Jul 30, 2018 at 10:38 PM
    #13
    deekyn

    deekyn [OP] Well-Known Member

    Joined:
    Dec 23, 2015
    Member:
    #172953
    Messages:
    1,758
    Gender:
    Male
    First Name:
    Dustin
    Land of Enchantment
    Vehicle:
    2015 Black Tacoma TRD Off Road
    While I await my Pelfreybilt rear swingout bumper, fitting the 33 spare under the truck seemed important. That thing takes up so much space in the bed and I can’t park in the garage with my spare on the roof rack. So...

    Chopped the ears off of the spare tire mount under the bed, sanded and painted. That 296/75/16 barely fits down there. I rubbed on the rear diff on the way up and I had to knock the rubber hanger off my unused tail pipe mount (see exhaust rerout above)


    Stock:

    Ears chopped out with a grinder:

    Sanded, primed and rattle can painted:
     
    ChadsPride likes this.
  14. Jul 30, 2018 at 10:41 PM
    #14
    deekyn

    deekyn [OP] Well-Known Member

    Joined:
    Dec 23, 2015
    Member:
    #172953
    Messages:
    1,758
    Gender:
    Male
    First Name:
    Dustin
    Land of Enchantment
    Vehicle:
    2015 Black Tacoma TRD Off Road
    Since my SCS F5 16x8 3.5”BS wheels have no center cap, I had to do something about the rusty rear dust caps (? Or lack there of?) the fronts are scratched but okay and look fine the rear on the other hand....

    From this:
    To this:
     
    JKU3000 and ChadsPride like this.
  15. Jul 31, 2018 at 5:28 AM
    #15
    BraskaTaco

    BraskaTaco Well-Known Member

    Joined:
    Jan 11, 2016
    Member:
    #174711
    Messages:
    2,069
    Gender:
    Male
    Midwest
    Vehicle:
    2013 Tacoma TRD OR
    Sweet! Whereabouts?
     
    ChadsPride likes this.
  16. Aug 4, 2018 at 6:45 PM
    #16
    deekyn

    deekyn [OP] Well-Known Member

    Joined:
    Dec 23, 2015
    Member:
    #172953
    Messages:
    1,758
    Gender:
    Male
    First Name:
    Dustin
    Land of Enchantment
    Vehicle:
    2015 Black Tacoma TRD Off Road
    Total Chaos Bed stiffener

    It was an easy install once I bought the huge torx head needed to undo the bed bolts. o_O. I don’t know if this will help or not, but considering the cap with it’s frontrunner roof rack lives on the truck permanently and it’s often loaded or I’m standing in it. Seems like a reasonable insurance policy against any bed separation from all the weight. I did take the time to paint inside the holes I drilled in the bedside when mounting this as I get more and more nervous about my first Midwest winter and the obscene amount of salt they lay down up here.

     
    ChadsPride and BraskaTaco like this.
  17. Sep 9, 2018 at 9:13 AM
    #17
    BraskaTaco

    BraskaTaco Well-Known Member

    Joined:
    Jan 11, 2016
    Member:
    #174711
    Messages:
    2,069
    Gender:
    Male
    Midwest
    Vehicle:
    2013 Tacoma TRD OR
    Man I’m sorry to hear about how the PB trainwreck panned out. I hope you get every penny of your money back :mad:
     
    ChadsPride likes this.
  18. Sep 9, 2018 at 9:52 AM
    #18
    deekyn

    deekyn [OP] Well-Known Member

    Joined:
    Dec 23, 2015
    Member:
    #172953
    Messages:
    1,758
    Gender:
    Male
    First Name:
    Dustin
    Land of Enchantment
    Vehicle:
    2015 Black Tacoma TRD Off Road
    We will see. I’m fucking pissed. My wife’s like that sucks honey. Don’t worry about the money we will just buy you new bumpers later. She’s amazing to be sure. And it is only money, but fucking hell. I filed a claim with the CC company. But it was after the chapter 7 filing so I suspect it’s too late. Point is. I don’t like being screwed. Point is I wanted my fucking bumpers. The loss won’t kill us. I’m luckier than others in this shitshow. But it’s the principal that gets me.

    As a side note, while driving across the US for the 6th time this year I passed through NE again. Next time I’ll look you up before hand and we can grab a beer.
     
    JKU3000 and ChadsPride like this.
  19. Sep 9, 2018 at 4:48 PM
    #19
    BraskaTaco

    BraskaTaco Well-Known Member

    Joined:
    Jan 11, 2016
    Member:
    #174711
    Messages:
    2,069
    Gender:
    Male
    Midwest
    Vehicle:
    2013 Tacoma TRD OR
    Hey, if your wife is understanding and isn’t too mad, that’s all that matters! :) Good to hear you guys can pull through if a refund doesn’t materialize.

    But ya, let me know if you are ever planning to pass through Lincoln :cheers:
     
  20. Sep 16, 2018 at 5:55 PM
    #20
    BraskaTaco

    BraskaTaco Well-Known Member

    Joined:
    Jan 11, 2016
    Member:
    #174711
    Messages:
    2,069
    Gender:
    Male
    Midwest
    Vehicle:
    2013 Tacoma TRD OR
    ChadsPride likes this.
To Top