1. Welcome to Tacoma World!

    You are currently viewing as a guest! To get full-access, you need to register for a FREE account.

    As a registered member, you’ll be able to:
    • Participate in all Tacoma discussion topics
    • Communicate privately with other Tacoma owners from around the world
    • Post your own photos in our Members Gallery
    • Access all special features of the site

DIY Soft Topper Ver2

Discussion in 'Tonneau Covers, Caps and Shells' started by wildfyr3, Aug 1, 2018.

  1. Aug 1, 2018 at 5:12 PM
    #1
    wildfyr3

    wildfyr3 [OP] KEØGLC

    Joined:
    Aug 6, 2015
    Member:
    #161155
    Messages:
    376
    Gender:
    Male
    First Name:
    Forrest
    Eagan, MN
    Vehicle:
    2000 xtracab 2.7L manual
    DR coilovers Dakar Leaves Icon rear shocks BFG 33x10.5x15 KM2 Trail Gear front bumper Relentless fab rear bumper DIY sliders
    Here we go! Long promised (like 1.5 years ago) write-up of my 2nd topper build, I'll do everything in my power to keep is succinct but still provide useful information. In part, I didn't want to share some of this info in case I really wanted to start making these as a side business, but wth, I'm feeling nice and I don't think I've come up with anything incredibly innovative in this design. I have more ideas better suited for a private venture. ;)

    Here's a link to the sewing thread with more BS and general info on soft good mfg.
    https://www.tacomaworld.com/threads/sewing-show-tell-thread.428166/

    Let me start off with a before and after. A reminder of what my first go around was like, a hot soggy mess. Maybe a good lesson of "we all start somewhere" or that experience is the best teacher.

    [​IMG]


    Topper Material is Weathermax material sourced locally for something in the $10-12 per yard range. It's lightweight, waterproof, did okay with UV but inevitably faded, and it lets light through, which is helpful on a soft topper with solid sides. The tonneau cover I had before didn't breathe at all and waking up was like coming out of hibernation due to being pitch black.

    http://www.safetycomponents.com/WeatherMAX/FAQ/index.html

    All the zippers are #10 YKK coil zippers. Bug netting was another find at my local industrial/auto fabric store, it has a coarser mesh so it may still let gnats in, but mosquitoes cant get through it (they find other ways in).

    The basic construction method was to make the side panels with the dual solid & mesh flap and sew those into the oversized top.

    [​IMG]

    [​IMG]

    [​IMG]


    [​IMG]


    The mesh panel is slightly oversized and zips into a 2nd set of zippers hidden behind the first. This lets me open the solid panel while camping in the back and let some fresh air blow through. The zippers have storm flaps to keep water out. The screened panel is bordered by more fabric to provide a better substrate for the zipper and a nicer finish on the bottom edge. I had most of this drawn up in Autocad to get all my panel sizes but in areas I was uncertain/flying bythe seat of my pants I left a hefty amount of contingency, like where the sides & top panels intersect the front & back.

    One thought I never implmented was adding grommets/holes for using a rod like RTTs use for the rain fly. Using those I could prop the windows up, get airflow, but not let rain in. I haven't needed this because I feel the topper breathes well enough and I am almost never camping in the rain.


    After the left and right sides were sewn/zipped together they were mocked up onto the bedrack with wood clamps and I used chalk to mark where I wanted my seams. I picked a edge on the tubing and use it to scribe the inside of each panel, I did the same thing on the front and rear panels trying to keep the same edge. Sewing them together was a matter of matching up the lines and sewing down them and trimming the seam allowance after the fact.


    [​IMG]

    [​IMG]

    [​IMG]

    [​IMG]

    [​IMG]


    This is where a heavy duty machine would have come in handy, my janome hd1000 did make it through it, sacrificing more than a few needles. The seam between the side and the top got pretty thick too where it had to sew through around 4 or 5 layers of weathermax, a zipper, and a screen. Most of the seams or semi-flat felled for added strength.


    The front panel is solid, the back panel has 2x #10 zippers on each side. There's a ~3" border on the sides and top primarily because with my method of construction I needed to have a complete panel made to fit into the back of the topper, I couldn't piece it together (at least not with the train of thought I had at the time). I only did a solid rear flap to simplify it, and I didn't see a need for a mesh rear flap if I already had mesh side flaps.

    The final major detail, the most critical by far, is tension of the fabric. I had made it a tight slip fit over the frame so there wasn't much flapping fabric to start with, but everything needs to be held under tension. Softtopper uses material stretch, flex of their lighter duty frame, some cinch straps to the frame, and really tight snaps to keep theirs taught. I remember installing a friends at night in some colder weather and it was a B****. Canback i'm less familiar with but I recall they use some cinch straps that loop around their tubular frame and back to the topper. I went with a cheaper bungee method, the australian style bungees which can be purchased from sailrite means material costs for tensioning ALONE would be in the +$200 range.

    I used generic 1" webbing, grommets, and shock cord on the topper side with a 1.5" steel flange welded to the rack and some sealing tek screws (because they have a built in washer) as anchor points. Each of the grommets is bartacked on both sides through 2 layers of fabric to provide a solid substrate and try to distribute the tension. This tensioning method probably cost me ~$60 as opposed to $200-300. I was very happy with it at first, after the shock cord wore out from UV/cold it lost some of its pull but is easy enough to replace.

    [​IMG]

    [​IMG]

    [​IMG]

    Each flap & adjoining panel has a start/finish bungee detail which is the narrower loop of shock cord (seen in the australian videos) to make sure each maintains tension irregardless of the other panels, allowing it to stay tensioned while you open a side flap. To start diving into the details I WISH I had worked out in terms of tension:
    • The front edge of the frame is whacky/non-flat and made it difficult to make tension nicely, it has velcro on the front edge to hold it to the rack.
    • Some of the tension of the fabric ends up routing through the zippers which makes closing them difficult, this is partially due to fabric shrinkage, so avoid tensioning things against a zipper, keep it parallel
    • The rear panel has no tension of its own, especially now that the velcro fell off. If you could tension the fixed portion of the back panel it would make zipping much easier
    • I would like to put some canback style tensioning in the rear of the top because currently it's all held in place ONLY when the flap is zipped down, making sure the top is tensioned on its own would help greatly


    Here's some other general woulda/coulda/shouldas now that I'm 2 years into using this topper. The picture below is of the rack w/o a topper for reference on the 1st point.

    • The rack has a flat roof and 2 open rectangular sections creating a good place for water to pool. I'd fix this either by making the top non-flat, decrease the span distance, or use a sheet of plastic/thin plywood to provide structure. My first topper could hold like a good 5 gallons of water and it was embarrassing to start driving after work if it rained and dump it all when you turned/accelerated.
    • The weathermax material shrunk over time, it fit on the rack really well at first, but has slowly shrank, likely due to UV exposure. Trying to quantify shrinkage from memory it's somewhere around the .010 in/in or 1% mark, for every 100" linear, it shrunk 1" over time.
    • The bed rack was made prior to knowing what I was going to do, so after the fact I put window panels right over the intersection on the sides. Ideally I would have cut that out, I'm far enough down the rabbit trail I am not going to bother with framing it out to provide a full opening. I found even the limited access it provides with tubing int he way, having a way to get into the front of the bed without going through the back is INSANELY helpful.
    • I didn't integrate straps to roll up and retain the side/back flaps into my final design, I did play around with using webbing & a sewn in magnet. I have had good success with the magnet, but it needs to be larger.

    [​IMG]


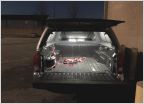
    Whew, well that was fun. I'd be absolutely amazed if anyone actually reads through the details. To provide a bit of levity here's a couple truck shots featuring the topper.


    [​IMG]


    [​IMG]

    [​IMG]


    IA DIY, YotaBro, LG888 and 12 others like this.
  2. Aug 2, 2018 at 10:53 AM
    #2
    chyknees

    chyknees nomadic wanderer

    Joined:
    Dec 22, 2008
    Member:
    #11801
    Messages:
    386
    Gender:
    Male
    So Cal
    Vehicle:
    05 Tacoma TRD 4x4
    TRD, Total Chaos, Fox, Volk, BFHoodrich
    WOW! Great job on the soft topper!!
     
    wildfyr3[OP] likes this.
  3. Aug 2, 2018 at 10:56 AM
    #3
    Wolftaco0503

    Wolftaco0503 Well-Known Member

    Joined:
    Oct 29, 2015
    Member:
    #168040
    Messages:
    16,236
    Gender:
    Male
    First Name:
    Adam
    Chicago
    Vehicle:
    2013 Super White LONG BED TRD SPORT 4x4
    Maglite mod Bottle Opener in bed Weathertech Mats Front & Back
    Is it collapsible?
     
    wildfyr3[OP] likes this.
  4. Aug 2, 2018 at 11:47 AM
    #4
    wildfyr3

    wildfyr3 [OP] KEØGLC

    Joined:
    Aug 6, 2015
    Member:
    #161155
    Messages:
    376
    Gender:
    Male
    First Name:
    Forrest
    Eagan, MN
    Vehicle:
    2000 xtracab 2.7L manual
    DR coilovers Dakar Leaves Icon rear shocks BFG 33x10.5x15 KM2 Trail Gear front bumper Relentless fab rear bumper DIY sliders
    Nope, it's a solid welded frame. I like having the frame cause I don't have to worry about smashing it into trees and you can mount stuff on it. It is a pretty big pain to take on and off. It's not the slickest solution. I think ideally it'd be something like 1" or 1-1/4" tubing and make it bolt together.

    Thanks! I really have enjoyed using it, was a fun project.
     
    Blucuss likes this.
  5. Aug 2, 2018 at 6:22 PM
    #5
    deog

    deog Well-Known Member

    Joined:
    Aug 28, 2013
    Member:
    #111403
    Messages:
    733
    Gender:
    Male
    First Name:
    snicklefritz
    Las Vegas. As far west as you can go.
    Vehicle:
    work in progress
    gucci interior and chandelier.
    nice job
     
  6. Aug 6, 2018 at 9:30 AM
    #6
    AZ4x4Taco

    AZ4x4Taco Well-Known Member

    Joined:
    May 20, 2015
    Member:
    #155681
    Messages:
    299
    Gender:
    Male
    First Name:
    Jeremy
    Tucson AZ
    Vehicle:
    01 4x4 TRD
    Cheap spacers and blocks, 33's, poor man upgrades.
    Great job! I have one of the rare stepside 1st gens and always wanted a topper. But they cost more then coilovers due to bed size and rarety. You should just make me one....
     
  7. Jun 3, 2021 at 12:58 PM
    #7
    tomwild92

    tomwild92 New Member

    Joined:
    Jan 17, 2021
    Member:
    #353109
    Messages:
    1
    Gender:
    Male
    First Name:
    Tom
    Vehicle:
    2018 Taco TRD OR
    Anyone ever done this underneath a mid height bed rack??
     
  8. Mar 15, 2022 at 4:01 PM
    #8
    d110pickup

    d110pickup Well-Known Member

    Joined:
    Jan 10, 2014
    Member:
    #120360
    Messages:
    72
    Gender:
    Male
    First Name:
    Mike
    Canton,Ga
    I just read all the details, freak'n great!
    I'm looking to build something similar and I'm happy to learn from what you did.
    Thanks
     
  9. Apr 23, 2022 at 7:31 PM
    #9
    Clay Jeezy

    Clay Jeezy Well-Known Member

    Joined:
    Jul 25, 2021
    Member:
    #372211
    Messages:
    81
    Gender:
    Male
    First Name:
    Clay
    Vehicle:
    2021 Red TRD OR
    None yet.
    Super impressive! Whatta project! I want to DIY a soft topper underneath my bed rack… this is insightful. Nicely done and much appreciated.
     

Products Discussed in

To Top