1. Welcome to Tacoma World!

    You are currently viewing as a guest! To get full-access, you need to register for a FREE account.

    As a registered member, you’ll be able to:
    • Participate in all Tacoma discussion topics
    • Communicate privately with other Tacoma owners from around the world
    • Post your own photos in our Members Gallery
    • Access all special features of the site

360joules' Off Road Build

Discussion in '3rd Gen. Builds (2016-2023)' started by 360joules, Jun 20, 2018.

  1. Jun 20, 2018 at 3:45 PM
    #1
    360joules

    360joules [OP] FWC Stalker

    Joined:
    May 8, 2018
    Member:
    #252951
    Messages:
    584
    First Name:
    Troy
    Portland Oregon
    Vehicle:
    SOLD
    I love the independence that comes from owning a truck and rigging it to be largely self-sufficient. These modern truck builds convert them to being part covered wagon and part modern day glamper. That's where this is headed. I'm more of a fan of practical upgrades versus luxury ones, but in both cases I intend the mods to improve functionality.

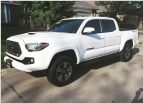
    Starting over, I might have made some different choices in my base pickup, but as it is, I'm starting things out with a brand new 2018 TRD OR DCSB in Super White. I think that this truck can become very well-rounded woods-capable road-tripper, but it's going to take a bit of upgrades.

    I wasn't sure I was going to create a build thread because 1) I live in an apartment complex so I'll be paying someone else to perform the actual work as I don't have a shop and 2) even when I did have a shop, I don't fabricate my own parts; most of what I'm doing is going to be plug-and-play. Ultimately, I didn't feel that I'd have a unique enough story to tell.

    Well, as I continue to make choices for my build, I decided that I'm starting to put some things together that I'm not seeing elsewhere. And people like to look at pictures, right? Oh, and I'm also preparing for a nearly two-week long drive in the northwestern states that I wanted to document somewhere, so here we go...

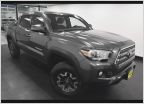
    The starting point (Odometer: 6 miles):

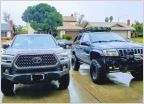
    [​IMG]

    [​IMG]


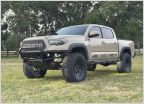
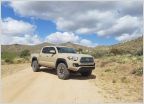
    Here's a recent pic:

    [​IMG]

    Thanks for reading.
     

    Attached Files:

    Last edited: Jan 15, 2020
    prest14 likes this.
  2. Jun 20, 2018 at 3:47 PM
    #2
    acomatatoyot

    acomatatoyot Well-Known Member

    Joined:
    Jul 17, 2011
    Member:
    #60068
    Messages:
    96
    Gender:
    Male
    First Name:
    Dillon
    Hernando, MS
    Vehicle:
    2018 DCSB TRDOR
    What different choices would you have made? I have the exact truck and also had 6 miles when purchased and I couldn't be happier!
     
  3. Jun 20, 2018 at 3:56 PM
    #3
    360joules

    360joules [OP] FWC Stalker

    Joined:
    May 8, 2018
    Member:
    #252951
    Messages:
    584
    First Name:
    Troy
    Portland Oregon
    Vehicle:
    SOLD
    I might have gone back another year or two to get a slightly older model. I have an affinity for the 4.0L engine and would rather not have the new Toyota Safety Sense features complicating things (granted, there are situations where I may appreciate having TSS, but hopefully I can avoid those moments).

    It's also possible that I would have gone back to 2nd gen. I'm not keen on the looks of the clown-smile front bumper - its goofiness sits in stark contrast to a pretty fantastic grill.

    That said, those are pretty minor issues. Overall, I'm happy with this truck so far, but I say that knowing that I'm planning upgrades in many, many areas.
     
    Last edited: Jun 20, 2018
  4. Jun 20, 2018 at 4:23 PM
    #4
    360joules

    360joules [OP] FWC Stalker

    Joined:
    May 8, 2018
    Member:
    #252951
    Messages:
    584
    First Name:
    Troy
    Portland Oregon
    Vehicle:
    SOLD
    I've seen other people do this and found it helpful. So, the next couple of posts will contain the outline of changes, additions and misc details by system.


    Tires, Wheels, Drivetrain, Suspension:
    • BFGoodrich KO2 265/75r16 then 285/75r16 now 265/75r16
    • Stock wheels
    • ECGS bushing
    • Steel braided brake lines - regular length front and extended back
    • Toytec 2.5" front coilovers, non-reservoir (removed)
    • Total Chaos upper control arms (removed)
    • Wheeler's front Superbump bump stops (removed)
    • Toytec 2.5" rear shocks, non-reservoir (removed)
    • OME Dakar heavy leaf pack (removed)
    • Firestone Riderite Air Bags
    • Daystar Air Bag Cradles (removed)
    • Air bag mount support plate (removed)
    • Cab mount chop

    Performance:

    • TSB 00062-18 - Stumble Fix, ECU Update
    • Orange Virus Tune 1.04r 91 then 1.05, now 2.0
    • OEM Toyota TRD Pro Performance Exhaust (removed)
    • OEM Toyota TRD Performance Air Intake (removed)

    Exterior:
    • OEM Toyota Tri-fold Tonneau Cover
    • KB Voodoo Hi Rise Crossbars
    • Cascadia Vehicle Tents Mt Shasta Summit CVTree Camo
    • Custom Car Grills steel grill with painted bezel
    • Lund Bugflector II
    • removed TRD sticker, emblems are next
    • RCI 5 degree sliders with top plates (removed)
    • RCI steel front skid plate (removed)
    • RCI steel mid skid plate (removed)
    • RCI aluminum fuel tank skid plate (removed)

    Cargo Areas:
    • OEM Toyota Bed Mat
    • Relentless Fabrication Dual Quick Fist Mounts (2)
    • Relentless Fabrication Hi Lift Jack Mount (removed)
    • Relentless Fabrication Bed Rail Accessory Mounts (2)
    • Total Chaos Bed Stiffeners

    Interior:
    • OEM Toyota All Weather Floor Mats
    • Vehicle OCD Glove Box Organizer
    • Vehicle OCD Console Tray
    • ARB 50 qt Fridge
    • Weathertech Techshade
    • Subaru Tweeters
    • Tacoweide Radio Knobs
    • Xcel Nano Ceramic Window Tint - 20% front, 50% rear
    • Gentex Rear View Mirror with Homelink
    • Dashtop Multi Mount by The Taco Garage
    • Blue Ridge Overland Gear Attic (removed)
    • Mesojdm Switch Pro cubby mount (removed)

    Electrical/Wiring:
    • ARB Fridge Power Port
    • Northstar Group 31M AGM Battery
    • Pelfreybilt Stainless Battery Tray
    • Baja Designs amber fog light kit
    • Switch Pro 9100 (removed)
    • ARB dual compressor (removed)
    • CBI compressor mount (removed)
     
    Last edited: Sep 13, 2020
    rando451 likes this.
  5. Jun 20, 2018 at 4:32 PM
    #5
    360joules

    360joules [OP] FWC Stalker

    Joined:
    May 8, 2018
    Member:
    #252951
    Messages:
    584
    First Name:
    Troy
    Portland Oregon
    Vehicle:
    SOLD
    Recovery Gear/Traction:
    • Les Schwab Link Fit Snow Chains

    Comfortable Living:
    • Alps Mountaineering Leisure Chair (2)
    • Kinbor 10x10 Folding Canopy
    • Werner Aluminum Work Platform
    • CVT Portable Shower/Changing Room
    • Luggable Loo with 5-gallon bucket and Double Doodie liners
    • Trasharoo Spare Tire Trash Bag
    • Waterport Pressurizing Water Tank, hitch mount

    Backcountry Gear:
    • Mid-size Bow Saw
    • Mid-size Shovel

    Misc:
    • NOCO Genius Boost Plus Lithium Jump Starter

    Travels:
     
    Last edited: Apr 25, 2019
  6. Jun 20, 2018 at 5:54 PM
    #6
    360joules

    360joules [OP] FWC Stalker

    Joined:
    May 8, 2018
    Member:
    #252951
    Messages:
    584
    First Name:
    Troy
    Portland Oregon
    Vehicle:
    SOLD
    These first few posts are retrospective. I mentioned my delay in starting this thread, but feel I need to catch up with some of the big things (to me). :)

    I'll start by saying that the timing of some of my purchases may seem odd to others, but the first thing I decided that I needed to do once I had signed the paperwork was buy a full set of four Link-Fit Snow Chains from Les Schwab. It was mid-May.

    Snow chains. The beginning of summer. Take my money.

    I owe this compulsion to a previous trauma involving a fairly new Subaru crossover and a rather steep cliff in the Columbia River Gorge. It happens that I do also work at the top of a very large hill with cliffs off a winding road and don't have the luxury of staying home when it's icy out. I've made it work for the past few years, but I don't like not feeling confident in my traction.

    These chains give me confidence as they are heavy duty and have a very secure system for locking in to place.

    83fe90fb4c1d1489c4483a3f570f4370_8c6f10487494a71f789b8c43638462362e835795.jpg

    I went straight from there back to the dealership where I also picked up a full set of All Weather Floor Mats and a Bed Liner. Priorities met. :thumbsup:
     
    Last edited: Jun 20, 2018
  7. Jul 2, 2018 at 11:12 PM
    #7
    360joules

    360joules [OP] FWC Stalker

    Joined:
    May 8, 2018
    Member:
    #252951
    Messages:
    584
    First Name:
    Troy
    Portland Oregon
    Vehicle:
    SOLD
    The following couple weeks, I picked up a fair number of items for the bed. Relentless Fabrications had a sale for Memorial Day and that was just the motivation I needed to pull the trigger on some items I had been looking at.

    I picked up their Dual Quick Fist Mounts and a Hi Lift Jack Mount. As an impulse buy, I added a couple of their Accessory Mount brackets as well. I never had a vehicle with bed-rails like the Tacoma before, but I was quick to find value in them.

    Here, I've installed the Quick Fist Mounts and added a small, but quite functional shovel and bow saw.

    IMG_5374.jpg
     
  8. Jul 2, 2018 at 11:38 PM
    #8
    360joules

    360joules [OP] FWC Stalker

    Joined:
    May 8, 2018
    Member:
    #252951
    Messages:
    584
    First Name:
    Troy
    Portland Oregon
    Vehicle:
    SOLD
    At this point, my wife and I have solidified our plans for a two week road trip. I need to start getting things going so that we are ready for it as we will be camping during our entire journey. :)

    The first thing I did, knowing that either a canopy or RTT would be mounted over the bed, was to buy a set of bed stiffeners. I went with the Total Chaos set through Wheelers. I really like the attachment points they provide and the way they blend in visually once installed.

    Here's a pic from mid-install, but it's the best one I have. I mounted the stiffeners to the existing bolt locations, then removed the tail light to drill the remaining holes. I sprayed the holes with a metal primer to prevent rust and then performed the final install.

    IMG_5375.jpg

    I mentioned that I don't have a garage, right? I did this work in a taco bell parking lot while eating taco bell. Of interest, I had found an empty corner in the parking lot to work in, but was then interrupted as two cars collided right behind me headed for the drive thru. Literally, right behind my tailgate.
     
    Last edited: Jul 3, 2018
    TOTAL CHAOS and vendrakk like this.
  9. Jul 3, 2018 at 12:02 AM
    #9
    360joules

    360joules [OP] FWC Stalker

    Joined:
    May 8, 2018
    Member:
    #252951
    Messages:
    584
    First Name:
    Troy
    Portland Oregon
    Vehicle:
    SOLD
    I have been scouring TacomaWorld for ideas for camping and there are plenty of options to drool over. Ideally, I might go with an in-bed camper like the Four-Wheel Swift, but because of finances and our rushed timeline that will have to come later, if at all. I also very much like the idea of a hardshell tent mounted above a canopy; I may eventually get a SnugTop Rebel and either a CVT hardshell or Roofnest or similar. There is so much good eye candy on this forum. So many wants.

    For now, however, the timeline demands that I take the quickest line to an acceptable solution as our trip is only a bit over a month out. I'm going with a RTT, so now my priority is a mounting system. I don't think I'll be able to swing a canopy on this timeline and I've grown quite fond of the tonneau that came on my truck, so whatever method I choose will need to work with this cover.

    I picked KB Voodoo's Hi Rise Crossbars for the task. They are a simple design, extremely versatile, and utilize the bed-rail for mounting.

    Here are the brackets mounted to the passenger side. The extra bolts you see in the channel are from the Hi-Lift mount that I'll be installing later. You can also see the bed stiffener in this pic with all mounting bolts installed.

    IMG_5376.jpg

    IMG_5377.jpg

    IMG_5378.jpg

    IMG_5379.jpg

    These bars are hella strong. I am impressed. I have absolutely no worries about overloading them.

    Shortly after taking that last pic, I hit 500 miles. :humble:

    IMG_5380.jpg
     
    Last edited: Jul 3, 2018
  10. Jul 3, 2018 at 12:48 AM
    #10
    360joules

    360joules [OP] FWC Stalker

    Joined:
    May 8, 2018
    Member:
    #252951
    Messages:
    584
    First Name:
    Troy
    Portland Oregon
    Vehicle:
    SOLD
    Road Trip!!

    Made the trip to Cascadia Tents in Bend to pick up the new tent. I went with the Mt Shasta Summit in CVTree Camo. I knew that I wanted one of the more ruggedized versions, whether I went with CVT or Tepui. I lamented a bit about missing the 20% coupon that REI had, but during that time our trip plans hadn't been finalized. I might have gone with the Tepui Kukenam Ruggedized mostly out of convenience, cost savings and REI's stellar return policy in the case the tent had any issues. I was only disappointed for a short time, until the moment I found the sale Cascadia Tents had on their CVTree Camo. It has the important Summit features, including the heavier diamond plate base, thicker water resistant mattress, condensation mat, and heavier fabric. It doesn't have the LED lights or USB plug ins, as are typical of their Summit series, but I can add them later if I decide I need them. For now, I don't.

    IMG_5253 2.jpg

    I'm generally not a camo kind of guy, but in this case, I'm seeing some benefit. Even in the above pic, you can see the truck, but the tent doesn't draw attention to itself. Also, the darkness of the material will keep the inside nice for sleeping in in the mornings.

    IMG_5383.jpg

    IMG_5384.jpg

    Travel mode:

    IMG_5256 2.jpg

    Out of necessity, I have to keep the tent low as the garage at my work has a low roof and a max vehicle height posted of 6' 5". I do miss having an open view of the vehicles behind me, but I still have an adequate view of my blind spot for lane changes.
     
    Last edited: Jul 3, 2018
  11. Jul 3, 2018 at 12:51 AM
    #11
    360joules

    360joules [OP] FWC Stalker

    Joined:
    May 8, 2018
    Member:
    #252951
    Messages:
    584
    First Name:
    Troy
    Portland Oregon
    Vehicle:
    SOLD
    1000 miles! :taco:

    IMG_5382.jpg
     
  12. Jul 3, 2018 at 2:01 AM
    #12
    360joules

    360joules [OP] FWC Stalker

    Joined:
    May 8, 2018
    Member:
    #252951
    Messages:
    584
    First Name:
    Troy
    Portland Oregon
    Vehicle:
    SOLD
    My wife thought I was off my rocker the first time that I mentioned installing a fridge in the truck. However, the closer we get to our road trip, the more she welcomes the idea. In fact, she even pushed for me to get it installed before a smaller camping trip we have planned for this upcoming weekend. She now wants it as much as I do.

    For this install, I decided to do the work in the Lowe's parking lot. I figured, the sun is out so I can see what I'm doing and I'll likely need supplies mid-project, so why not? A handful of hours, a sunburn and several trips inside for misc supplies later and I now have this:

    [​IMG]

    To keep things simple, I decided to utilize the seat mounts for the platform. I went inside and got some scrap particle board cut to size, 13" wide (I'd have to measure again for the length). I also picked up a piece of 2 inch (ish) railing to use for my leveling piece (it was inexpensive and wasn't likely to have splinters).

    IMG_5354.jpg

    I had to mount it a bit offset so that the fridge wouldn't hit the bracket from the upper seat mount. The gap on this side is also good because there is a vent on the fridge at this location.

    IMG_5355.jpg

    Here's where I think I really got lucky. (or maybe I'm just that skilled!)

    When it came time to mount the holes for the fridge, I decided to use part of the fridge packaging as a template. I drilled a single hole for the inner front mount; I actually drilled this hole twice to get the correct placement in front of the seat mount. I measured and drew a guide line to make sure the next hole would be square. I then placed one of the rubber feet with a bolt through that first hole and laid the piece of cardboard packaging over it.

    IMG_5356.jpg

    I set the next rubber foot in the cardboard template and squared it up with my mark and marked the site for my next hole.

    IMG_5357.jpg

    I repeated this for each of the mounting holes. There was a lot of potential for error with this plan, so when I drilled the last 3 holes, I went up on my drill size just a little bit to give me some wiggle room. I'll be damned if it didn't work.

    IMG_5385.jpg

    To finish the mounting, I have ARB mounting straps incoming that I plan to run from the front and back handles to the seat mounts. I really only need this in the back where the platform is unsecured, but I will likely do the same in the front. I also plan to order some carpeting to make the shelf look finished in the near future, but it for now it just feels good to have this thing mounted.

    Next, the wiring...
     
    Last edited: Jul 3, 2018
  13. Jul 3, 2018 at 3:10 AM
    #13
    360joules

    360joules [OP] FWC Stalker

    Joined:
    May 8, 2018
    Member:
    #252951
    Messages:
    584
    First Name:
    Troy
    Portland Oregon
    Vehicle:
    SOLD
    Using the ARB wiring kit, I ran the cable through the firewall. I initially measured my length from the battery, but then re-measured from the passenger side to make sure I will have enough wire once I mount a secondary battery there.

    Here's a look at where I passed the wire through from the engine compartment side. I poked a hole through the surrounding boot with a screwdriver from the engine compartment side, then from inside the truck, pushed some needle nose pliers through the hole, then back outside the truck, I placed a zip tie around the end of the cable and placed the zip tie into the jaws of the pliers so that I could pull the wire through from inside the cab.

    IMG_5388.jpg

    From inside the cab...

    IMG_5389.jpg

    The zip tie that made it all possible...

    IMG_5391.jpg

    I fed the wire behind the panel and underneath the trim all the way to the back.

    IMG_5390.jpg

    IMG_5392.jpg

    After removing the three bolts, I pulled the rear seat panel out and ran the wire behind that and drilled holes for my plug in. After another run into Lowe's, this time to buy a soldering iron, I finished the connections and installed the jack.

    I chose this location because I may eventually move the fridge to the passenger side. Some of my plan has yet to be developed. I oriented the plugin this way because it is easy enough to reach and the plug will be somewhat protected should I choose to use the cubby for storage.

    IMG_5394.jpg

    I reinstalled all of the body panels, mounted the fridge again and hooked up the battery. But then before plugging the fridge into the newly assembled jack, I had a panic moment. Did I put the red wire to the + side of the jack..?! Crap.

    The good thing about taking photos while you work, aside from being able to post about it online, is that you can double check these things without having to fully disassemble your work.

    IMG_5393.jpg

    Whew!
     
    Last edited: Jul 3, 2018
    xsf18cdf likes this.
  14. Jul 3, 2018 at 8:27 AM
    #14
    TOTAL CHAOS

    TOTAL CHAOS WWW.CHAOSFAB.COM Vendor

    Joined:
    Jun 6, 2018
    Member:
    #255639
    Messages:
    685
    Corona, CA
    Looks great!

    Glad you were able to get through the install in one piece. Sounds like those cars got too close for comfort. If you don't mind, we'd love to see more shots in our bed stiffener thread (here).

    TOTAL CHAOS
    WWW.CHAOSFAB.COM
     
  15. Jul 9, 2018 at 11:37 AM
    #15
    360joules

    360joules [OP] FWC Stalker

    Joined:
    May 8, 2018
    Member:
    #252951
    Messages:
    584
    First Name:
    Troy
    Portland Oregon
    Vehicle:
    SOLD
    My wife and I went here this past weekend with some friends:

    C744E6A4-F8F0-4C86-9203-2527EADCC04C.jpg

    And set up for our first couple nights in the tent:

    IMG_5468.jpg

    We spent a bit of time on the beach, staring at British Columbia in the distance:

    9A36D08F-D8A1-451A-A8D2-2812D2F7D0B9.jpg

    I was able to grab a cold beer all through the weekend out of the new fridge:

    7E9E526D-877E-4A64-88E6-EE624BB46309.jpg

    We didn’t have to use the new Throne Room on this trip as there were facilities, but I wanted to set it up for the first time.

    225B4E02-9E84-4524-955A-69C84CFCE1A3.jpg

    The sunset was amazing on Saturday night. I didn’t get a pic of that, but this picture was taken at nearly midnight. I was stunned to still be able to see the horizon, let alone photograph it with my phone.

    E39770F5-4EE1-419F-A3A6-931E4DCF21AA.jpg

    I still have numerous projects waiting for for install, but I really like what I’ve done so far.
     
    Last edited: Aug 5, 2018
  16. Aug 2, 2018 at 3:02 PM
    #16
    360joules

    360joules [OP] FWC Stalker

    Joined:
    May 8, 2018
    Member:
    #252951
    Messages:
    584
    First Name:
    Troy
    Portland Oregon
    Vehicle:
    SOLD
    I've added a couple of small items over the past couple of weeks.... Tacoweide Radio Knobs and I did the Subaru tweeter upgrade. I didn't take pictures, but will say that both of these small upgrades are worthwhile. I'm contemplating getting the kicker upgrades as well once I get a couple more things done.

    These knobs are a great touch for the Tacoma.

    AD0E1557-F0D0-48DF-BFF4-0DABAB4DF2B3.jpg

    Yesterday, however, was a big day for the Taco. I got the freshly released ECU update for the transmission related to TSB 00062-18. This is an upgrade that has made a big difference for me in liking my Toyota. Before the Taco felt like driving a passenger car with weak shift points and misc quirks. It now feels more like the engine has some power as a truck should. The engine feels stronger. Before IMO, the idea of OVTune was a must. It may still have great benefit, but honestly, this upgrade puts that lower on my list of needs.

    After leaving the dealership, I went to 4wheelparts to get my Firestone Riderite air bags installed, plus some new rubber that was on sale - KO2's in 265/75/r16. The purpose of the airbags for me isn't lift, but to adjust for the sag due to the weight that I added to the back. I still need to address the suspension issue, but this will work for my upcoming road trip.

    I'm a bit high in the back in this pic and I've since made adjustments, but I am thrilled to no longer be sagging and to now have some travel in the rear suspension for daily driving.

    IMG_5722.jpg

    I got home to find that my bug shield had been delivered. I'm not sure that this is a full time accessory, but will be very necessary for my road trip later this month. I admit, I do like the way it looks.

    IMG_5725.jpg


    I've mentioned elsewhere in these forums that I've done some rethinking on the goals of this build (the word "some" there is a huge understatement). I've concluded that the direction that I want to work toward will culminate in the installation of a Swift by Four Wheel Campers. With this in mind, my suspension will ultimately get a pretty significant upgrade at some point in the future.

    The logical side of my brain tells me not to add too much to this truck that will just be removed later; this is much of what led me to adding the air bags instead of an AAL. However, seeing the pic above, I have really taken a liking to the way that higher stance in the back looks. It looks right. I may end up with another change to my suspension here shortly - despite what my logical brain says.
     
    Last edited: Aug 13, 2018
  17. Aug 13, 2018 at 8:53 PM
    #17
    360joules

    360joules [OP] FWC Stalker

    Joined:
    May 8, 2018
    Member:
    #252951
    Messages:
    584
    First Name:
    Troy
    Portland Oregon
    Vehicle:
    SOLD
    A few more pieces coming together...

    This past week, I got my glass tinted with XCel nano ceramic film. I went with 20% in the front and 50% in the back and it matches almost perfectly. The nano ceramic cuts down a lot on the heat and, just as important, you cannot see any belongings in the back seats (like the fridge) from the outside even on a sunny day. The darker vision will take a little bit to get used to. I may have actually been a tiny bit happier with a smidge lighter, but I'm very pleased with this.

    D187B684-0551-412A-9E25-E807529FDD63.jpg

    A few more smaller items:

    I installed a Dashtop Multi Mount available from The Taco Garage for a rock solid RAM phone mount. I have a RAM mount for my wife's iPad Pro on its way so that my wife can watch movies while on the road if she wants.

    B61CB6E5-4B82-4194-AA66-03521EC9DC97.jpg

    AA028C65-CE7A-4BE7-8D6D-F2324F4BC9B1.jpg

    I finally picked up a Gentex rear view mirror with Homelink to control my apartment complex's gate opener. It works perfectly. This opens up my left hand cubby for my brake controller.

    I also solved my battery upgrade conundrum. Instead of a dual battery system, I installed a Pelfreybilt battery mount and Northstar group 31 battery for more power for my fridge. I can't say enough about the customer service at Pelfreybilt. They are great folks who stand behind their product. :thumbsup:

    Old battery:

    8E46D5CA-5911-4237-AFE5-DA135ED83456.jpg

    New Battery:

    AD629ED1-E2C2-4E8E-92A4-F28E0F6412E0.jpg

    **Interesting story about this battery install...I picked up my battery on a 95F degree day. In order to turn in my core, I made the swap right away. I pulled into a spot of shade to do the work in an empty parking lot of an office building complex. I get my old battery and the battery mount out in under 5 minutes and I hear someone banging on the window inside the office. I can't see through the glass so I keep working. A few minutes later, some old guy walks up and says hi, I say hi and introduce myself. He turns around and while walking away says "I'm going to tell Sam that you are parked in my parking spaces." I shrugged and finished my swap in another 10 minutes. I have to admit, I've never had someone threaten to tell their imaginary thug on me before. The parking lot was literally empty. Anyhoo...

    Instead of installing a second battery, I picked up a NOCO Genius Boost Plus Lithium Jump Starter for those rare times that I've let my battery consumption get out of hand. This lithium jump starter is good for up to 20 jump starts and is small enough to stow away behind the back seat. Being lithium, it should keep its charge for a very long time. I do like that peace of mind.

    37ABE554-E661-4BEA-9035-62EA86AA3F7E.jpg

    I also upgraded our shower system to a 3.8 gallon Waterport water tank. This tank can be pressurized either by garden hose during filling or with a bicycle pump. For travel, I really like that it can be securely mounted to the rear hitch.

    5BB10492-B6E9-4E9D-B96A-AB0CEF0FB86D.jpg

    Now, about that suspension...
     
    Last edited: Aug 26, 2018
  18. Aug 21, 2018 at 5:52 AM
    #18
    360joules

    360joules [OP] FWC Stalker

    Joined:
    May 8, 2018
    Member:
    #252951
    Messages:
    584
    First Name:
    Troy
    Portland Oregon
    Vehicle:
    SOLD
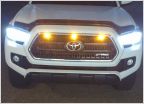
    A new smile... :D


  19. Aug 22, 2018 at 11:42 AM
    #19
    the_tacocamper

    the_tacocamper The Taco Camper

    Joined:
    Jul 28, 2018
    Member:
    #260857
    Messages:
    314
    Gender:
    Male
    First Name:
    Tyler
    Portland, Oregon
    Vehicle:
    2017 Tacoma DCSB 4x4
    -Prinsu designs cab rack -Southern Style slimline bumper -Smittybuilt XRC 9500 lbs winch -Cascadia 4x4 flipster -CBI off road ditch might brackets -KChilite flex dual ditch lights -Mountain Hatch tailgate reinforcement -Cali Raised LED faux TRD Pro grille -Cali Rasied LED bed stiffeners -Cali Raised LED 25 degree sliders -RCI metal works bed rack -RCI front skid plate -CVT Mt. Shasta Rooftop tent -K&N cold air intake -Tinted windows 15% -Chrome deleted (emblems/bumper) -Full size spare -OEM bed mat -Maxxtraxx SUSPENSION: -ARB BP-51s suspension w/reservoirs -OME heavy duty dakars -OME heavy springs -BFGoodrich KO2 285/70r17 -Method Roost race wheels INTERIOR: -Marathon seat covers -Hondo Garage phone mount -Ram ball mounts -Ram squeeze mount -LED interior lighting -Attic by Blue Ridge Overland -Weathertech Floor mats -Tacoma red dash inlay CAMP GEAR -Tembo Tusk skottle -Front Runner wolf packs (2) -Ruger 10/22 breakdown rifle -Waterport pressurized water system -Yeti Panga 28 backpack w/dry sidekick -Yeti Panga 50 duffel bag -Yeti Roadie 20 cooler -Rtic 65 cooler -Fiskars chopping axe and hatchet -Hyke and Byke down sleeping bag -10x10 Coleman easy up -Coleman two burner stove FUTURE MODS: -GFC Camper #184 (mid February-March) -CBI Rear bumper w/tire swingout -Bed drawer system -Bed lighting system -Wilco Offroad spare tire bedrail mount
    Awesome build man, liking what you have done so far :thumbsup:
     
  20. Aug 22, 2018 at 12:17 PM
    #20
    360joules

    360joules [OP] FWC Stalker

    Joined:
    May 8, 2018
    Member:
    #252951
    Messages:
    584
    First Name:
    Troy
    Portland Oregon
    Vehicle:
    SOLD
    Thank you. I'm enjoying this build a lot. My last truck was a Ford Ranger and there weren't a lot of aftermarket options/mods available for that, so this is a nice treat.

    Coming up soon, I'll deal with my suspension (finally settled on a strategy for what I want to do), install on board air, my camera kit and a few other odds and ends. Then I might consider round 1 complete. I'll have to work a fair amount of overtime this winter to save up for round two. :D
     

Products Discussed in

To Top