1. Welcome to Tacoma World!

    You are currently viewing as a guest! To get full-access, you need to register for a FREE account.

    As a registered member, you’ll be able to:
    • Participate in all Tacoma discussion topics
    • Communicate privately with other Tacoma owners from around the world
    • Post your own photos in our Members Gallery
    • Access all special features of the site

PrInSu Design Studio Roof Racks BS Thread

Discussion in 'PrInSu Design Studio' started by zscott, Feb 26, 2014.

  1. Aug 29, 2018 at 12:21 PM
    #9461
    Taquitoqvola

    Taquitoqvola Well-Known Member

    Joined:
    May 9, 2018
    Member:
    #253004
    Messages:
    153
    Vehicle:
    2018 TRDORDCSB MT QUIKASFKSAND
    For those that are running lightbars.. how did u run cable to rooftop?
     
  2. Aug 29, 2018 at 12:37 PM
    #9462
    Hextall

    Hextall Well-Known Member

    Joined:
    Apr 4, 2017
    Member:
    #215330
    Messages:
    1,096
    NH
    Vehicle:
    17 Inferno OR DCSB
    I'm not running a light bar, but am running scene lights off either side and a pair of S2 sports off the back. I ran the wires through split loom (like this: https://www.amazon.com/225FWY-Condu...571346&sr=8-1-spons&keywords=split+loom&psc=1) and down along the edge of the driver's side windshield. Its held in place by a double sided tape (gorilla tape).

    I think it's possible to run a couple of wires right along the outside of the windshield. There's a small channel there.
     
  3. Aug 29, 2018 at 12:42 PM
    #9463
    Gunshot-6A

    Gunshot-6A Prime Beef

    Joined:
    Dec 29, 2009
    Member:
    #28389
    Messages:
    23,249
    Gender:
    Male
    First Name:
    Conner
    Everett, WA
    Vehicle:
    2015 TRD Offroad
    I tucked mine under the rubber flap by the corner of the windshield, then up the A pillar in the channel between it and the glass.

    Edit: a friend of mine found a piece of that c channel stuff you use to run cables along a baseboard in your house. He painted it black and stuck it to the edge of the windshield. If he hadn't pointed it out, I wouldn't have even noticed it.

    this stuff:

    https://www.lowes.com/pd/Legrand-1-...hannel-Cord-Cover-White-Cord-Cover/1000282079
     
  4. Aug 29, 2018 at 5:48 PM
    #9464
    FuzzysTacos

    FuzzysTacos Well-Known Member

    Joined:
    Jun 23, 2017
    Member:
    #222249
    Messages:
    778
    Gender:
    Male
    First Name:
    Corey
    Wichita, KS
    Vehicle:
    Sold: 2017 TRD OR/2012 TRD Sport
    What an atomic pain in the ass that install was :bananadead:
     
  5. Aug 29, 2018 at 5:54 PM
    #9465
    Shwankin407

    Shwankin407 Well-Known Member

    Joined:
    Apr 27, 2017
    Member:
    #217482
    Messages:
    253
    Gender:
    Male
    First Name:
    Casey
    Orlando,FL
    Vehicle:
    17 TRD OR 4x4 6MT
    Please share pain points and any tips please! Mine should be here tomorrow!
     
  6. Aug 29, 2018 at 6:03 PM
    #9466
    20tacoma17

    20tacoma17 Well-Known Member

    Joined:
    Nov 8, 2016
    Member:
    #201910
    Messages:
    7,096
    Gender:
    Male
    Vehicle:
    2017 DCLB Sport AT
    Kings, 275/70/17, a few custom items, lots of Meso mods.
    2 people sure makes it easier but one can do it.
     
  7. Aug 29, 2018 at 6:09 PM
    #9467
    Shwankin407

    Shwankin407 Well-Known Member

    Joined:
    Apr 27, 2017
    Member:
    #217482
    Messages:
    253
    Gender:
    Male
    First Name:
    Casey
    Orlando,FL
    Vehicle:
    17 TRD OR 4x4 6MT
  8. Aug 29, 2018 at 6:18 PM
    #9468
    20tacoma17

    20tacoma17 Well-Known Member

    Joined:
    Nov 8, 2016
    Member:
    #201910
    Messages:
    7,096
    Gender:
    Male
    Vehicle:
    2017 DCLB Sport AT
    Kings, 275/70/17, a few custom items, lots of Meso mods.
    For the Prinsu? If so I used black to better match my dark vehicle but you don't need much really. This 3oz tube was more than enough.
    Permatex 81158 Black Silicone Adhesive Sealant, 3 oz. Tube https://www.amazon.com/dp/B000AL6WLA/ref=cm_sw_r_cp_apa_Ev0HBbWA1F7WG
     
  9. Aug 29, 2018 at 6:19 PM
    #9469
    FuzzysTacos

    FuzzysTacos Well-Known Member

    Joined:
    Jun 23, 2017
    Member:
    #222249
    Messages:
    778
    Gender:
    Male
    First Name:
    Corey
    Wichita, KS
    Vehicle:
    Sold: 2017 TRD OR/2012 TRD Sport
    Assembly was great. Do it on a level surface upside down per instructions and it should be square.

    The difficulty lies within your perfectionism. I opted to keep weatherstripping, which involved drilling holes. Again, instructions were fine minus the aluminum band running down the strip I had found out about. If your holes are the slightest skewed, the spacers block your straight entry into the hole which leaves much asspain to be had. I received the rack around 12, had it assembled well before 1, didn't start install til 2:30, and didn't finish until 7ish including a harbor freight run for prep material (bits, silicon, and a moving blanket).

    Again, you can't see the missing weatherstripping if you opt against it, but I would know, and that's enough of a reason for me. If you ditch it or make the holes excessively big (I drilled one size larger and they were still snug), the adjustability of the spacers isn't limited and I'm sure it's 100x easier.

    Edit: I used half a normal sized tube of silicon.
     
    Shwankin407[QUOTED] likes this.
  10. Aug 29, 2018 at 6:22 PM
    #9470
    20tacoma17

    20tacoma17 Well-Known Member

    Joined:
    Nov 8, 2016
    Member:
    #201910
    Messages:
    7,096
    Gender:
    Male
    Vehicle:
    2017 DCLB Sport AT
    Kings, 275/70/17, a few custom items, lots of Meso mods.
    I decided to just cut off the ends front and rear up to the first bracket for a cleaner look. Didn't want to mess with lining up the holes.
     
    Shwankin407 likes this.
  11. Aug 29, 2018 at 6:24 PM
    #9471
    Shwankin407

    Shwankin407 Well-Known Member

    Joined:
    Apr 27, 2017
    Member:
    #217482
    Messages:
    253
    Gender:
    Male
    First Name:
    Casey
    Orlando,FL
    Vehicle:
    17 TRD OR 4x4 6MT
    Appreciate the feedback man. Did you go punch or paddle bit?
     
  12. Aug 29, 2018 at 6:32 PM
    #9472
    FuzzysTacos

    FuzzysTacos Well-Known Member

    Joined:
    Jun 23, 2017
    Member:
    #222249
    Messages:
    778
    Gender:
    Male
    First Name:
    Corey
    Wichita, KS
    Vehicle:
    Sold: 2017 TRD OR/2012 TRD Sport
    Yeah, figured it'd be much easier that way, I was just hopeful it'd be forgiving.

    Paddle, went through fine as long as you hold tension on both sides. Basically, stretch the rubber while you drill it.
     
  13. Aug 29, 2018 at 8:25 PM
    #9473
    GZeus24

    GZeus24 bystander

    Joined:
    Apr 5, 2014
    Member:
    #127076
    Messages:
    593
    Gender:
    Male
    First Name:
    Gary
    Texas
    Vehicle:
    2014 DCLB Sport
    lightly modified
    My cab rack is arriving in a week or two (i hope). Other than 6 hours due to my OCD, 4 beers to pace myself and some silicone, what do I need to get for the install?
    I see some comments about the spacers being chrome - not good - but some saying that has changed. Is everyone pretty sure that are black now? Any of the other hardware still chrome?
     
  14. Aug 29, 2018 at 8:38 PM
    #9474
    20tacoma17

    20tacoma17 Well-Known Member

    Joined:
    Nov 8, 2016
    Member:
    #201910
    Messages:
    7,096
    Gender:
    Male
    Vehicle:
    2017 DCLB Sport AT
    Kings, 275/70/17, a few custom items, lots of Meso mods.
    On mine only thing not black was 10 roof mounting bolts. Painted head and washers black before install and touchup after install. Blanket or towels for roof just in case and to set your tools. Came in handy for me since I did it alone.
     
  15. Aug 29, 2018 at 8:49 PM
    #9475
    GZeus24

    GZeus24 bystander

    Joined:
    Apr 5, 2014
    Member:
    #127076
    Messages:
    593
    Gender:
    Male
    First Name:
    Gary
    Texas
    Vehicle:
    2014 DCLB Sport
    lightly modified
    Thanks! I'll dig around for the moving blanket for sure.
    Forgot to mention that I will be taking off the factory roof rack - any tips in the thread on that or how it affects the install?
     
  16. Aug 29, 2018 at 8:58 PM
    #9476
    20tacoma17

    20tacoma17 Well-Known Member

    Joined:
    Nov 8, 2016
    Member:
    #201910
    Messages:
    7,096
    Gender:
    Male
    Vehicle:
    2017 DCLB Sport AT
    Kings, 275/70/17, a few custom items, lots of Meso mods.
    Makes install easier. Use same holes as factory rack so you don't have to dig them out. Just have to clean up some sealant. Removal is easy, just reverse of this install.
    https://youtu.be/qLd7Elu2FjM
     
    GZeus24[QUOTED] likes this.
  17. Aug 29, 2018 at 9:28 PM
    #9477
    h5863emtmatt

    h5863emtmatt Well-Known Member

    Joined:
    Jan 21, 2018
    Member:
    #241911
    Messages:
    416
    Gender:
    Male
    First Name:
    Matt
    San Diego
    Vehicle:
    17' TRD OR 4x4 DCSB
    Method Vex311, Toyo Open Country AT, 2.0 Fox Performance Coilovers/Reservoir, Total Chaos UCA, Pelfreybilt, Prinsu Cabrac
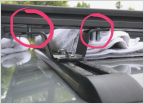
    I loosely assembled ensuring all hardware was there and determined using lower holes for wind screen. I also made sure mounting bolts threaded into the roof. Wouldn’t want to find out they don’t bite after you apply the silicon and race against it drying. I was installing by myself so I disassembled, siliconed each mounting hole, applied spacers and loosely installed each rail then cross rails. I tightened each mounting bolt and discovered the left side rail touched the roof. I removed the back two bolts, added a washer on top of the two spacers to raise the rail and re installed the bolts. The rail didn’t touch the roof anymore. Tightened each bolt, visually centered which was good to go and used a right angle to ensure square. Let silicon dry for 24 hours. Stood on top to celebrate.
     

    Attached Files:

    Last edited: Aug 29, 2018
    ffpdfirefighter2002 likes this.
  18. Aug 29, 2018 at 9:34 PM
    #9478
    20tacoma17

    20tacoma17 Well-Known Member

    Joined:
    Nov 8, 2016
    Member:
    #201910
    Messages:
    7,096
    Gender:
    Male
    Vehicle:
    2017 DCLB Sport AT
    Kings, 275/70/17, a few custom items, lots of Meso mods.
    I did this exact same thing except I didn't need any washers. But this reminded me that I lined the entire length of the gutters with painter's tape on both side in case it touched. Not inside the gutter but the roof itself.
     
  19. Aug 29, 2018 at 9:36 PM
    #9479
    GZeus24

    GZeus24 bystander

    Joined:
    Apr 5, 2014
    Member:
    #127076
    Messages:
    593
    Gender:
    Male
    First Name:
    Gary
    Texas
    Vehicle:
    2014 DCLB Sport
    lightly modified
    Is it general consensus that its easier to manage by yourself if you disassemble before install?

    Those tabs are overkill - especially unnecessary to be so close to the roof. Its the one part of the design that really made me hesitate.
     
  20. Aug 29, 2018 at 9:41 PM
    #9480
    h5863emtmatt

    h5863emtmatt Well-Known Member

    Joined:
    Jan 21, 2018
    Member:
    #241911
    Messages:
    416
    Gender:
    Male
    First Name:
    Matt
    San Diego
    Vehicle:
    17' TRD OR 4x4 DCSB
    Method Vex311, Toyo Open Country AT, 2.0 Fox Performance Coilovers/Reservoir, Total Chaos UCA, Pelfreybilt, Prinsu Cabrac
    I threw a sweat shirt on my roof and layed each cross rail on it and lined up the holes to the rail.
     
    20tacoma17[QUOTED] likes this.

Products Discussed in

To Top