1. Welcome to Tacoma World!

    You are currently viewing as a guest! To get full-access, you need to register for a FREE account.

    As a registered member, you’ll be able to:
    • Participate in all Tacoma discussion topics
    • Communicate privately with other Tacoma owners from around the world
    • Post your own photos in our Members Gallery
    • Access all special features of the site

Weekend Escape Build

Discussion in '1st Gen. Builds (1995-2004)' started by Bigal90, Sep 21, 2019.

  1. Sep 21, 2019 at 7:50 PM
    #1
    Bigal90

    Bigal90 [OP] Well-Known Member

    Joined:
    Feb 28, 2019
    Member:
    #284864
    Messages:
    148
    Gender:
    Male
    Houston, Texas
    Vehicle:
    98 XCab 3.4 Manual 4x4 SR5
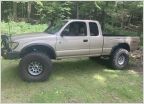
    I've been browsing this forum for almost a year now and figured it was time to post my build using a ton of info I've gathered from this site. I bought a 1998 evergreen pearl MT 4wd extended cab about 2 months ago after 6 months of looking. The truck had 244k miles on it and was in decent shape but had been in a side swipe wreck. The truck had everything I was looking for except an e-locker but I felt I got a good enough deal to account for buying a rear locker.

    Build Direction
    This is not my daily driver so I have a bit more freedom with the build
    - Must be reliable for long trips
    - Capable on and off road
    Otherwise, it's pretty open ended but I intend to use it mostly for camping

    Suspension
    Front
    - Total Chaos upper control arms
    - King extended travel front coilovers with 650lb coils
    Rear
    - Allpro Expo rear leaf springs
    - Bilstein 5100 shocks
    - Allpro 4" rear shackles

    Exterior
    ARB front bumper
    PIAA LED offroad lights
    Smittybilt 8,000 lb winch with synthetic rope
    Glasstite camper shell with Yakima roof rack
    Spray-in bedliner
    All-Pro extended SS brake lines
    Front diff drop
    Trail Gear BPV relocation bracket
    ARB Awning
    Ebay Snorkel
    ARB OBA

    Wheels & Tires
    16" Method 701s
    285/75-16 Falken Wildpeak AT3s

    Interior
    Paranoid Fabrications switch panel
    Interior winch control
    Sony head unit and Infinity speakers
    Weathertech floor mats
    Kenwood tm-v71a ham radio

    Performance
    JBA headers
    Deck plate mod
    K&N drop-in filter

    Maintenance
    OEM lower ball joints
    Whiteline lower control arm bushings
    Flush coolant
    Flush brake and clutch fluid
    Steering rack bushings
    Flush power steering fluid
    Sea foam

    Current Plans
    Install a second battery and upgrade wiring
    Build a go fast camper clone
    Upgrade speakers/amp/sub
    3 linked D44 will inevitably happen in the next 1-2 years


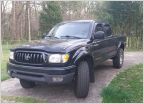
    When I bought it:
    IMG_1140.jpg

    As it sits now:IMG_1163.jpg
     
    Last edited: Feb 13, 2021
    This site contains affiliate links for which the site may be compensated.
    #1
  2. Sep 21, 2019 at 7:54 PM
    #2
    Bigal90

    Bigal90 [OP] Well-Known Member

    Joined:
    Feb 28, 2019
    Member:
    #284864
    Messages:
    148
    Gender:
    Male
    Houston, Texas
    Vehicle:
    98 XCab 3.4 Manual 4x4 SR5
    Front suspension right after I installed it. I went with 700lb springs because of the ARB bumper, winch and I plan on installing sliders very soon but do they seem quite stiff. I may try out some 650lb springs in the future or try removing the swaybar.

    MUWH8077.jpg
     
    Ritchie and EricL like this.
  3. Sep 21, 2019 at 7:59 PM
    #3
    EricL

    EricL Tomahawk Chopper

    Joined:
    Aug 21, 2014
    Member:
    #136643
    Messages:
    16,012
    Gender:
    Male
    Greenwood, SC
    Vehicle:
    2015 Slowmobile
    SOS Offroad Concepts Armor
    Looks like a solid start! 660 lb coils with sway bar removed on my 2nd gen with bumper and winch feels soft. I'd probably try removing it first to see how you feel about it before swapping coil springs.
     
  4. Feb 18, 2020 at 7:26 AM
    #4
    Bigal90

    Bigal90 [OP] Well-Known Member

    Joined:
    Feb 28, 2019
    Member:
    #284864
    Messages:
    148
    Gender:
    Male
    Houston, Texas
    Vehicle:
    98 XCab 3.4 Manual 4x4 SR5
    I have done a ton of work since the last post so I’ll start to slowly update.

    I got the camper shell installed along with Yakima round bars and built a sleeping platform for the back with storage in the cubbies along the side.

    The center panel can either lay on the floor for more headroom or sit level with the boxes on the side to allow storage underneath.

    I’m planning to install an inverter in one of the cubbies along with switches for interior and camp lighting.

    91EB38B1-62A2-4A5B-ABB1-097E38D58F2D.jpg
     
  5. Feb 18, 2020 at 7:28 AM
    #5
    Bigal90

    Bigal90 [OP] Well-Known Member

    Joined:
    Feb 28, 2019
    Member:
    #284864
    Messages:
    148
    Gender:
    Male
    Houston, Texas
    Vehicle:
    98 XCab 3.4 Manual 4x4 SR5
    I did end up removing the sway bar but I’m still feeling the 700lb coils are a bit too stiff. The only additional weight I need to add will come from skid plates so I’ll make the decision after that.
     
    EricL[QUOTED] likes this.
  6. Feb 18, 2020 at 12:08 PM
    #6
    Bigal90

    Bigal90 [OP] Well-Known Member

    Joined:
    Feb 28, 2019
    Member:
    #284864
    Messages:
    148
    Gender:
    Male
    Houston, Texas
    Vehicle:
    98 XCab 3.4 Manual 4x4 SR5
    Boxed my frame using Trail Gear plates in preparation for my swing out bumper. Don’t mind my mediocre welds.

    I ended leaving the stock shock mounts.
    I cut a hole in the driver side plate to slide over the mount and notched the mount on the passenger side and slid the plate behind it. I also drilled clearance holes to mount the proportional valve in the original position.

    I will probably go back in later down the road and put in new shock mounts so I can gain some extra travel, just didn’t feel like the hassle for now since my shocks are still fine.

    9D9A63BE-C951-4C1C-ABA7-8B89178B384D.jpg
    C538C437-49DF-459C-9C77-12CEF1D7CBF4.jpg
    86C1A3A0-E47C-4758-9F43-FFF1BB77301C.jpg
    3AAD39B4-EE84-44B8-A37C-36610F10504E.jpg
     
  7. Feb 18, 2020 at 7:28 PM
    #7
    Bigal90

    Bigal90 [OP] Well-Known Member

    Joined:
    Feb 28, 2019
    Member:
    #284864
    Messages:
    148
    Gender:
    Male
    Houston, Texas
    Vehicle:
    98 XCab 3.4 Manual 4x4 SR5
    I bought a CBI trail rider 1.0 weld together bumper kit and after missing a few pieces in the kit and changing my mind I ended up ordering a CBI outback 1.0 and making dual swing outs for it.

    I started with two A to Z mega spindles, a plate with holes for wheels studs from Barnes 4wd and 2000lb de sta co latches.

    I used 2x3x.125 tube for the bottom horizontal supports and 2x2x.125 tube for the rest. I started with a solidworks model I created and began cutting metal to match.

    My plan was originally to use pop pin locks to hold the arms open but there wasn’t enough room to easily mount them on the bumper so I changed gears and utilized gas shocks.

    I ordered a victory 4x4 Jerry can holder and mounted it on the passenger side swing out. I also cut out holes for two rigid flush mount lights.

    I will eventually weld up the trail rider bumper and try to sell it to recoup some of my money.

    DB759D16-B1AF-4A12-BE74-71843B4B7085.jpg
    F19E8C97-77F6-4A61-8104-F1405AAF925F.jpg
    1723171A-D137-45AB-A9DA-04D8744BED68.jpg
    8EC87965-B57F-4C98-A677-D5D4C01A65F4.jpg
    74EE6F4D-BB0C-4BE2-AC3F-07D4491D6093.jpg
    69F6FC56-F009-4CDE-A024-D12AC8719201.jpg
    EFA6E277-048B-4589-A769-64A99ABEE6F3.jpg
     
    monkeyevil likes this.
  8. Feb 19, 2020 at 7:03 PM
    #8
    Bigal90

    Bigal90 [OP] Well-Known Member

    Joined:
    Feb 28, 2019
    Member:
    #284864
    Messages:
    148
    Gender:
    Male
    Houston, Texas
    Vehicle:
    98 XCab 3.4 Manual 4x4 SR5
    Bought some All pro sliders with kick outs and fill plates from a member locally and installed them. It seemed like a no brainer to weld them over bolt them as I would’ve had to drill 32 holes in the frame. Install was pretty straight forward.

    F9E6D0D8-CD98-43AB-A0DA-FBC0212C9D38.jpg
    236DB157-9843-4FFC-B467-34F17D8063B8.jpg
     
  9. Feb 19, 2020 at 7:14 PM
    #9
    Bigal90

    Bigal90 [OP] Well-Known Member

    Joined:
    Feb 28, 2019
    Member:
    #284864
    Messages:
    148
    Gender:
    Male
    Houston, Texas
    Vehicle:
    98 XCab 3.4 Manual 4x4 SR5
    I ended up pulling the trigger on an ebay snorkel. The fit and quality are great and I think it looks decent but I’m still regretting it a bit as it’s definitely unnecessary. My passenger side fender is a crappy replacement so it’s not a huge loss that I cut a giant hole in it.

    F1734BDE-DEE3-4CFB-B103-E97613131F42.jpg
     
    This site contains affiliate links for which the site may be compensated.
    #9
    Fuergrissa likes this.
  10. Feb 21, 2020 at 11:44 AM
    #10
    Bigal90

    Bigal90 [OP] Well-Known Member

    Joined:
    Feb 28, 2019
    Member:
    #284864
    Messages:
    148
    Gender:
    Male
    Houston, Texas
    Vehicle:
    98 XCab 3.4 Manual 4x4 SR5
    Installed an ultragauge using a spiker mount. Was a little concerned the mount wasn’t super sturdy on the grab handle but it has worked just fine and is in a perfect location. Just need to figure out where to put a phone holder for gps.

    0E8E1704-78D5-4F22-A1B1-3D114A21910E.jpg
     
    SpikerEng likes this.
  11. Feb 27, 2020 at 4:18 PM
    #11
    JoshS

    JoshS Well-Known Member

    Joined:
    Aug 31, 2019
    Member:
    #303869
    Messages:
    267
    Gender:
    Male
    First Name:
    Josh
    Vehicle:
    2014 Tacoma TRD Sport DCSB 4x4
    Did you have any issues with your mounting bolt not tightening all the way?
     
  12. Feb 27, 2020 at 5:00 PM
    #12
    Bigal90

    Bigal90 [OP] Well-Known Member

    Joined:
    Feb 28, 2019
    Member:
    #284864
    Messages:
    148
    Gender:
    Male
    Houston, Texas
    Vehicle:
    98 XCab 3.4 Manual 4x4 SR5
    No, it tightened up just fine. The only reason it’s not super sturdy is that the mount goes around the rubber portion of the handle, which allows it to move but it’s really not an issue.
     
  13. Mar 24, 2020 at 9:38 AM
    #13
    Bigal90

    Bigal90 [OP] Well-Known Member

    Joined:
    Feb 28, 2019
    Member:
    #284864
    Messages:
    148
    Gender:
    Male
    Houston, Texas
    Vehicle:
    98 XCab 3.4 Manual 4x4 SR5
    Finally got the bumper powder coated and also installed an ARB awning. Next up is finding a place to mount a second battery, I’m probably going to make a mount under the bed where the spare tire used to be.

    94E1C01E-EBA7-41AB-81AC-496A122EC822.jpg
    40D24DF6-04F3-42F5-BAE9-F22FFE238223.jpg
     
    Flare side Taco Lover likes this.
  14. Apr 3, 2020 at 8:46 AM
    #14
    Bigal90

    Bigal90 [OP] Well-Known Member

    Joined:
    Feb 28, 2019
    Member:
    #284864
    Messages:
    148
    Gender:
    Male
    Houston, Texas
    Vehicle:
    98 XCab 3.4 Manual 4x4 SR5
    Got it out for a trip this past weekend. Thinking I’m going to need to upgrade from the Dakar rear leafs due to the extra weight from the swing out. Also going to be on the lookout for a supercharger to compensate for the weight gain.

    91DCC1C6-6333-4116-B5BA-4563EC1C5E8E.jpg
    95075411-516D-4F4B-9A07-39FBBBC3FE1F.jpg
     
  15. Jul 15, 2020 at 12:04 PM
    #15
    Akkording

    Akkording Well-Known Member

    Joined:
    Mar 19, 2018
    Member:
    #247722
    Messages:
    666
    Gender:
    Male
    First Name:
    Pete
    Houston
    Vehicle:
    03 +300k Still Truckin, 2012 4Runner
    That's a very nice setup, I just got a camper cap and plan on adding an awning as well
     
  16. Feb 13, 2021 at 6:24 PM
    #16
    Bigal90

    Bigal90 [OP] Well-Known Member

    Joined:
    Feb 28, 2019
    Member:
    #284864
    Messages:
    148
    Gender:
    Male
    Houston, Texas
    Vehicle:
    98 XCab 3.4 Manual 4x4 SR5
    Been a while since I updated this and I need to get some more pics. I designed an overhead console and antenna mount for the tailgate and got them laser cut and bent them up in my garage with a press brake that I made.

    Overhead Molle.jpg
    This the model I created and used to create flat patterns that I then laser cut out for the overhead molle panel/console.

    IMG_1664.jpg
    Not the best quality photos but this is the finished product. My intent was to mount my ham radio but instead just mounted the mic up there.

    Cable Clip.jpg
    I ended up creating these 3 mounts that snap into the molle panel that I used to mount the mic cables and mic itself and 3d printed them. Again kinda hard to see in the crappy pics but I can get better ones if anyone's interested.

    Antenna Mount.jpg
    This is the flat pattern of the antenna mount I created that mounts to the tailgate latch.

    IMG_1637.jpg
    IMG_1659.jpg
    Here is the finished product installed, I used a 3/4" hole for a NMO mount antenna.
    IMG_1675.jpg
    Here is where I ended up mounting my ham radio. I bent the remote mounting plate and used double sided tape and a couple screws to hold it to the useless cubby right below the ashtray. The main transceiver is underneath the passenger seat, I still need to create a mount for it to keep it from sliding around. Also added a cheap phone mount that suction cups to the dash, it has been a lifesaver on long trips.
     
    Akkording likes this.
  17. Feb 13, 2021 at 6:47 PM
    #17
    Bigal90

    Bigal90 [OP] Well-Known Member

    Joined:
    Feb 28, 2019
    Member:
    #284864
    Messages:
    148
    Gender:
    Male
    Houston, Texas
    Vehicle:
    98 XCab 3.4 Manual 4x4 SR5
    This was from a 10 day, 2500 mile trip I took with a couple buddies back in June along parts of the NMBDR and a few other random trails in NM. Only casualties were a broken marker light, a cut sidewall and the magnets came unglued on the motor for my locker which left me stuck with the rear axle locked. Luckily we had the tools to take it apart and re-epoxy the magnets back on.
    IMG_1595.jpg IMG_1614.jpg IMG_1633.jpg IMG_1674.jpg IMG_0420.jpg 20200622_170500.jpg IMG_0386.jpg
    20200626_110903.jpg 20200626_183733.jpg
     
    Akkording likes this.
  18. Feb 13, 2021 at 6:59 PM
    #18
    Bigal90

    Bigal90 [OP] Well-Known Member

    Joined:
    Feb 28, 2019
    Member:
    #284864
    Messages:
    148
    Gender:
    Male
    Houston, Texas
    Vehicle:
    98 XCab 3.4 Manual 4x4 SR5
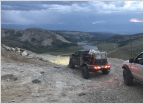
    This was a week long trip in August around Buena Vista CO.

    IMG_20200901_161332.jpg IMG_20200902_070707.jpg IMG_0578.jpg IMG_20200902_144734.jpg IMG_20200902_154645.jpg IMG_20200904_112731.jpg IMG_20200904_113225.jpg IMG_20200904_140106.jpg IMG_20200901_162421.jpg IMG_20200901_144456.jpg IMG_20200901_063910.jpg
     
    Akkording likes this.
  19. Feb 13, 2021 at 7:08 PM
    #19
    Bigal90

    Bigal90 [OP] Well-Known Member

    Joined:
    Feb 28, 2019
    Member:
    #284864
    Messages:
    148
    Gender:
    Male
    Houston, Texas
    Vehicle:
    98 XCab 3.4 Manual 4x4 SR5
    Back to truck updates. I've since swapped around suspension a bit by swapping to 650lb springs for the front coil overs and Allpro Expo rear springs, not much to see there so I dont have any pics. Also added RCI IFS and transmission skids. Upgraded to Osram 100/90 headlight bulbs as I couldn't see a thing on the highway at night without turning on the PIAAs. I didnt do the wiring harness upgrade like everyone else does as it didn't seem entirely necessary to me as the bulbs draw around 8 amps and are on a 10 amp fused circuit and I've had no issues so far. I'm sure the higher gauge harnesses have less voltage drop and therefore brighter lights but just the bulbs themselves seem like a good enough upgrade to me.

    I've also ordered a supercharger... about 2 months ago and am still waiting for it to come in with no ETA. In preparation for the supercharger, I checked the valve clearances (all were in spec), changed the fuel filter, upgrade the fuel pump to a Deatschwerks DW100, replaced the timing belt, water pump, thermostat, etc. I took the injectors to Injector RX in Houston and had them serviced (cleaned).
    IMG_1680.jpg
     
    Last edited: Feb 13, 2021
    ToyRyd04 and Akkording like this.
  20. Sep 24, 2022 at 9:58 PM
    #20
    Tom Foolery

    Tom Foolery Well-Known Member

    Joined:
    May 28, 2018
    Member:
    #254753
    Messages:
    62
    Gender:
    Male
    Vehicle:
    2002 Tacoma Xcab 4x4, V6 TRD
    Now that's my kind of truck. Nice work.
     

Products Discussed in

To Top