

-
Welcome to Tacoma World!
You are currently viewing as a guest! To get full-access, you need to register for a FREE account.
As a registered member, you’ll be able to:- Participate in all Tacoma discussion topics
- Communicate privately with other Tacoma owners from around the world
- Post your own photos in our Members Gallery
- Access all special features of the site
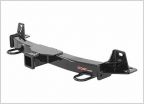 Could I have get a new front bumper and still keep my front receiver?
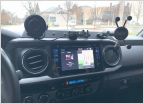 DMM and Quad Lock w/ wireless charging head
 Tray for eating in driver seat?
 What’s the “best” Onboard Air Compressor
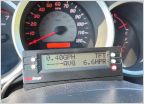 Scangauge II Mount 3D Printed ASA!
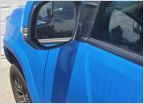 Blind Spot Mirror Help Please
Archive Hanger Install Assistance/Motivation
Discussion in '3rd Gen. Tacomas (2016-2023)' started by CAG Gonzo, Apr 5, 2020.
Page 3 of 5
Page 3 of 5


