1. Welcome to Tacoma World!

    You are currently viewing as a guest! To get full-access, you need to register for a FREE account.

    As a registered member, you’ll be able to:
    • Participate in all Tacoma discussion topics
    • Communicate privately with other Tacoma owners from around the world
    • Post your own photos in our Members Gallery
    • Access all special features of the site

09TRDSport4x4's "OCD is a B*tch" Build

Discussion in '2nd Gen. Builds (2005-2015)' started by 09TRDSport4x4, Apr 9, 2020.

  1. Apr 9, 2020 at 6:32 PM
    #1
    09TRDSport4x4

    09TRDSport4x4 [OP] OCD Approved!

    Joined:
    Oct 13, 2014
    Member:
    #140292
    Messages:
    1,093
    Gender:
    Male
    First Name:
    Nick
    Southwest Ohio
    Hi, my name is Nick and I have OCD.

    Background:

    I figure after five and a half years of ownership, it's about time for me to start a build thread. If, for no other reason, than to help my OCD keep track of everything I've done and plan future mods for the truck. But hey, maybe some of my mishaps, frustration and learning along the way will help others. Either way, here goes nothing...

    Well, let's see, where to start? I'm 35 years old, divorced, have two kids (ages 7 and 4), live in the suburbs of Cincinnati and bought my truck on October 8, 2014. The Tacoma is the first (and only) truck I've owned, and to date, the longest I have kept a vehicle. From the time I got my driver's license until just before I had my second kid, I had a really bad habit of changing cars about once per year. I know, I know... I blame the OCD and ignorance. I'll be the first to admit, it was a huge waste of money but in that time, I learned a lot about cars and how to work on them. In college, I got sucked pretty hard into the VW/Audi scene and well, it will show with some of the mods I've done to the truck.

    How did I end up going from VW/Audi to a Tacoma you might ask? Well, that's a fantastic question. Shortly before I bought the truck, I found out my (ex) wife was pregnant with our second child. At the time I was driving a lowered 2012 VW Jetta GLI and well, let's just say loading one kid into a car seat in the back of that thing was hard enough on my back... I couldn't imagine having to do it twice every time. And call it a sign of getting old, but I was getting tired of dodging potholes, going out of my way to avoid speed bumps and taking sharp angles over steep driveway curbs. At that point, I decided I needed something that sat much higher off the ground and could easily handle two car seats. So I figured, why not look into a double cab, mid sized truck for the added versatility?

    I started researching and immediately fell in love with the Tacoma. Living in Ohio, I knew I wanted a 4x4 and I was drawn to the TRD Sport model (yep, the hood scoop got me). My price range at the time had me looking for a 2005-2011. When I found out that the factory backup camera didn't come standard until 2009 (I was spoiled by German engineering), I narrowed down my search to a 2009-2011. I also wanted to retain factory Bluetooth for phone calls while driving and to get that in those model years, I learned I needed a truck equipped with the JBL radio. I really liked the look of the 2011 grill compared to the original version, so that's what I set out to find. But of course, as we all know, used Tacoma's retain their value quite well and I couldn't find a 2011 with JBL audio in my price range locally. I ended up settling on a 2009 because it was a low mileage, one owner trade in at a local Honda dealership and I was able to haggle the price down to a fair number.

    The Truck:

    2009 Toyota Tacoma TRD Sport 4x4 DCSB with JBL Audio

    Current Mileage: 122,575

    The truck only had 48,600 miles on it when I bought it. Here is how she looked at the dealership that night and the best "before" picture I have:

    [​IMG]

    In addition to the factory JBL audio system, the truck came with Toyota all weather floor mats, gray 5" oval tube steps and tinted front windows (to match the factory rear glass). Overall, I was thrilled to finally be driving a truck. And it wasn't long after I bought it, that the TW mod bug hit and I started spending money...

    At first, I intended to keep the truck as close to OEM as possible, with only some lighting upgrades (I'd grown accustomed to HID headlights and had to upgrade the Tacoma). But I didn't want to hurt the, already lower than I was used to gas mileage, and had no real intentions of taking the truck off road. I started small with LED lighting and a few other "cosmetic" mods. The headlights ended up being a complete OCD nightmare, which took well over a year before I got them how I wanted them, but I'll get into that when I detail my experience with HID retrofits in a later post. The "keep the truck stock" phase lasted about a year and a half. Once I sorted out the lighting upgrades, the mod bug bit me hard.

    Summer of 2016, I found myself lifting the truck and installing larger tires. I started out modest, with a 2.5" lift and 265/70/17 BFG KO2 C rated LT tires and drove on that setup for about two years. Immediately after the lift went on, I fought front driveshaft vibrations (ECGS bushing fixed that) and I dealt with a complete OCD disaster, varying rear drive shaft vibrations (read the full adventure here), until my OEM carrier bearing bit the dust in the summer of 2018. At that point, I decided to completely ditch the two piece rear shaft in favor of a custom built one piece. I should have done that a long time ago because I've been vibration free since and it's been amazing.

    Fast forward to the Spring of 2019 and a sticking passenger side caliper led to the T4R front brake upgrade (lots of good info here for anyone interested). That was an interesting experience, to say the least. Bleeding the brakes was infuriating, but after I installed speed bleeders, it was a piece of cake. The upgrade didn't cost much more than replacing the bad caliper and installing new OEM rotors and pads, so overall, I'm extremely satisfied with the outcome. But of course, after the brakes were sorted out, it was time to go bigger with my tires!

    Summer of 2019 brought on another OCD headache with the tire upgrade. After installing a brand new (defective) set of 285/70/17 C Rated BFG KO2s (they just wouldn't balance...), I eventually landed on a set of 285/70/17 standard load Nitto Ridge Grapplers. I've got about 12k miles on them right now and I couldn't be happier. In addition to the larger tires, I decided to add a little more lift in the front (to help eliminate some of the rake) and in the process, upgraded the UCAs for more flexibility with my alignment settings and to help fit the 33" tires. I installed a 1/2" top plate spacer on the driver's side and moved the 1/4' spacer to the passenger side. This netted me almost an extra 1/2" or so, putting me right around 3" of lift over stock in the front (to go with the ~2" in the back). I'd still like to fine tune the alignment, but so far, so good. No rubbing on the street and the steering feels as good as can be expected.

    Not much has changed on the truck since last summer, but over the winter I've been collecting parts and now have some big plans for this spring/summer (more on that in the next post). Anyway, before I get into my future plans, I wanted to list everything I've done to the truck so far. I'm sure I'll leave a few things out and I'll try to keep this up to date as new stuff gets installed. I won't get into all the replacement parts or maintenance (that comes with any used vehicle) and I'll try to call out any of the unique or "custom" things I've done.

    Mod List:

    Exterior:
    • OEM "Upgraded" Glass Lens TRD Sport Headlights
    • OEM Lexus RX350 Bi-Xenon Retrofit
    • OEM Tacoma 2011 Honeycomb Grill
    • TRD Aluminum Skid Plate
    • OEM Predator Side Steps
    • Access Lorado Tonneau Cover
    • OEM Tacoma Bed Mat
    • OEM Front "D Rings"
    • Custom LED Third Brake Light
    • Morimoto Amber LED Turn Signal Bulbs
    • Amber LED Fog Light Bulbs
    • Amber LED Side Marker Bulbs
    • Cool White LED License Plate Bulbs
    • Cool White LED Reverse Light Bulbs
    • Cut ~12" off the OEM Antenna
    Interior:
    • Cool White LED Interior Bulbs
    • Custom "VW Style" Switchblade Key/Fob
    • A Pillar RAM Ball Mount with Hardwired Garmin
    • Climate Control RAM Ball Mount with X Grip Phone Holder
    • Fog Lights "On Anytime" Wiring Mod
    • OEM "Upgraded" HVAC Blower Motor and Resistor
    • K&N Drop In Cabin Air Filter
    Engine/Driveshaft:
    • Custom 3.6" One Piece Rear Driveshaft
    • Duracell Ultra Gold 27F Battery
    • Crawford Performance Eco-Block
    • K&N Drop In Air Filter
    Suspension/Brakes/Wheels:
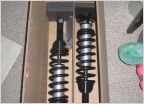
    • Bilstein 5100 Front/Rear Shocks
    • OME 885 Front Coils (installed on the lowest notch)
    • Wheelers Off-Road 1/2" Poly Top Plate Spacer (Driver)
    • Wheelers Off-Road 1/4" Poly Top Plate Spacer (Passenger)
    • SPC Adjustable UCAs
    • ECGS Replacement Clamshell Bushing
    • OEM Toyota TSB 3+1 Leaf Pack
    • Icon 3 Leaf Progressive AAL (with Overload Leaf)
    • OEM 5th Gen T4R Front Calipers/Rotors/Backing Plates
    • Headstrong Stainless Steel Front Brake Lines
    • Speed Bleeders on all Four Corners
    • BORA 1.25" Hubcentric Wheel Spacers
    • 285/70/17 Nitto Ridge Grappler Standard Load Tires
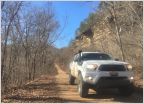
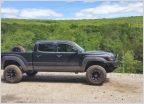
    I know, not the most exciting mod list you guys have seen. But, this truck has been and will remain my daily driver/kid hauler. The truck spends about 95% of it's time on the road and the only real off road action it sees are trips to and from fishing locations. I don't have any plans to transform the truck into a rock crawler or an overland vehicle, but as the kids get older, I plan to take them camping and use the truck off road more often. I'd say that's more than enough words for now, so onto the pictures. I apologize for my horrible photography skills and I promise once the new mods go on, I'll be better at documenting with photos.

    Pictures:

    VW Style Switchblade Key/Fob:

    [​IMG]

    5100/OME 885, Icon 3 Leaf AAL, 265/70/17s (Summer 2016):

    [​IMG]

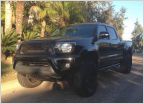
    OEM Style Retrofit Headlights and 2011 Honeycomb Grill (Fall/Winter 2016):

    [​IMG]

    T4R Brake Upgrade (Spring 2019):

    [​IMG]

    Most Recent Pictures (Summer/Fall 2019):

    [​IMG]

    [​IMG]

    [​IMG]

    [​IMG]
     
    Last edited: Apr 10, 2020
    brockefellar and HarrisonHopper like this.
  2. Apr 9, 2020 at 6:33 PM
    #2
    09TRDSport4x4

    09TRDSport4x4 [OP] OCD Approved!

    Joined:
    Oct 13, 2014
    Member:
    #140292
    Messages:
    1,093
    Gender:
    Male
    First Name:
    Nick
    Southwest Ohio
    Coming Spring/Summer 2020...

    [​IMG]

    [​IMG]

    Future Mod List:
    • Elka 2.5 IFP Extended Travel Shocks with 650lb Springs
    • Elka 2.0 IFP Rear Shocks
    • Matte Gunmetal SCS F5 17x8.5 -10 Wheels
    • Matt Gecko LED Bed and Under Hood Lights
    • Cali Raised Stealth Mount LED Light Bar
    • Dasaita 9” Android Headunit with Natika front camera
    • Headstrong Extended Rear Stainless Brake Lines with New OEM Hard Lines and Mounting Hardware
    • OEM Toyota Fuel Door Replacement (needs paint)
    • Energy Suspension Steering Rack Bushings (not pictured)
    • Rust Removal, Converter and Paint for the frame, rear drums, hubs and front dust caps
     
    Last edited: Apr 10, 2020
    HarrisonHopper likes this.
  3. Apr 9, 2020 at 7:32 PM
    #3
    09TRDSport4x4

    09TRDSport4x4 [OP] OCD Approved!

    Joined:
    Oct 13, 2014
    Member:
    #140292
    Messages:
    1,093
    Gender:
    Male
    First Name:
    Nick
    Southwest Ohio
    My OCD Retrofit Experience

    When I first set out to upgrade the Tacoma halogens to HIDs, I made the mistake of trying to do it on a budget... In the end, that didn’t work out at all because I have far more into my current headlights than I care to admit.

    First up was a set of aftermarket TYC headlights with a satin black painted bezel and reflectors. The retrofit was done by InSight Retrofits using Morimoto Mini 3" Round D2S Projectors from TRS and Chrome Orbit Shrouds. The corner lenses were smoked clear and I was using a Morimoto XB35 5500K D2S HID kit.

    [​IMG]

    [​IMG]

    [​IMG]

    Overall, I was fairly satisfied with the beam pattern and the light output but I did not like the “blacked out” look at all. I ended up running these headlights for a few months before selling them.

    My second attempt at an HID upgrade was a little more OEM, both in looks and parts. They were done by RECHELON AESTHETICS using the upgraded replacement glass lens TRD Sport headlights I got from the dealership (the plastic turn signal lenses were known to melt from the DTRL). They were retrofitted with a set of Morimoto FX-R 3" Bi-Xenon Projectors using the Apollo 3.0 Shroud. I left the OEM color scheme and had the amber side markers smoked. I used the same Morimoto XB35 5500K D2S kit with Osram Xenarc 66240 Cool Blue Intense 5500K D2S Bulbs in these lights.

    [​IMG]

    [​IMG]

    These headlights looked exactly the same as the ones I have on my truck right now. The only difference are the projectors and the lenses. After a few weeks of driving at night with these headlights, I quickly realized my OCD was not a fan of the clear projector lenses. No matter how well I aimed the lights, the cutoff pattern was far too crisp and visible on the road and I just couldn’t handle it. So once again, these headlights were sold...

    They say the third time is a charm, and thankfully for me (and my wallet), that turned out to be true. The current set of retrofit headlights I have on the truck have been installed since the fall of 2016. These were also done by RECHELON AESTHETICS and used the OEM upgraded glass lens TRD sport housing, with all internals left to OEM specs with the exception of the side markers, which have been smoked. This time I opted for OEM Lexus RX350 bi-xenon projectors (keeping the OEM Fresnel lenses) and again, I used the Apollo 3.0 shroud from TRS. I stuck with the Morimoto XB35 5500K D2S kit on these as well and overall, I’m thrilled by the end result. The beam pattern is fantastic and the cut off is perfect. I’m also happy to report that almost 3.5 years later, I’ve had no major issues with the lights. The Morimoto H4 wiring control module failed a few months ago, but after swapping it out, everything was as good as new.

    I just searched my phone and I can’t find any good cut off pictures of my current setup, so I’ll have to come back later and add them. I’ll also have to clean the headlights up and snap a close up shot of the retrofit.
     
    Last edited: Apr 9, 2020
    HarrisonHopper likes this.
  4. Apr 9, 2020 at 8:00 PM
    #4
    Bman562

    Bman562 Well-Known Member

    Joined:
    Nov 18, 2019
    Member:
    #311119
    Messages:
    252
    Gender:
    Male
    SoCal, CA
    Vehicle:
    2005 Radiant Red Tacoma Sport DCSB
    '12+ Facelift, TRD Baja Bilsteins, SCS Ray10's, K02's...
    Man! I can't wait to see the truck with the wheels and suspension set up. It's going to look awesome.

    You have to give us more details on the switchblade key fob. What brand is that fob? I want to switch to an all-in-one type of set up, and that looks ideal.
     
    HarrisonHopper likes this.
  5. Apr 10, 2020 at 5:24 PM
    #5
    09TRDSport4x4

    09TRDSport4x4 [OP] OCD Approved!

    Joined:
    Oct 13, 2014
    Member:
    #140292
    Messages:
    1,093
    Gender:
    Male
    First Name:
    Nick
    Southwest Ohio
    Thanks man, I’m excited to finally change the look of the truck after all these years on the stock wheels. And I’m hoping for a little bit of a less harsh ride on the Elka suspension. I also don’t mind ditching the top plate and wheel spacers at all.

    As for the key, I bought my first one from a vendor on TW but I don’t think he’s around anymore. When that key stopped unlocking the doors I bought my second one on eBay.

    You’ll need to flip your current fob over and check the model number of the remote transmitter on the back. Mine was GQ43VT20T (and I think most second gen Tacoma’s used this model) so I bought something like this key. If your truck has an immobilizer, you’ll also need to pay attention to the marking on your key (it’ll either be blank, a dot or a G). Or, if you have a valet key, you can save yourself the trouble of having the dealership or a locksmith program the new immobilizer chip and just steal the one from the valet key (or any programmed key).

    I went that route since I was lucky enough to get two keys and fobs and the valet key when I bought my truck. I knew I’d never use the valet key so I didn’t mind slicing it open to steal the already programmed immobilizer chip. I just dropped that into the VW style fob, had the key portion cut at Home Depot and then programmed the remote myself using instructions you can easily find on the forums or with google. Programming the remote is not hard at all but it requires patience and will make your neighbors think you’re crazy if you do it in the driveway (you have to open and close the door a bunch during the process).
     
    Last edited: Apr 10, 2020
    This site contains affiliate links for which the site may be compensated.
    #5
  6. Apr 11, 2020 at 12:30 PM
    #6
    Bman562

    Bman562 Well-Known Member

    Joined:
    Nov 18, 2019
    Member:
    #311119
    Messages:
    252
    Gender:
    Male
    SoCal, CA
    Vehicle:
    2005 Radiant Red Tacoma Sport DCSB
    '12+ Facelift, TRD Baja Bilsteins, SCS Ray10's, K02's...
    Haha I'm sure they think of that because I tend to spend a lot of time in the garage. Thanks for the link. I'll have to really look into this on my day off since I don't have a valet key. Have to factor in the cost vs want..
     
    This site contains affiliate links for which the site may be compensated.
    #6
    HarrisonHopper likes this.
  7. Apr 18, 2020 at 4:48 PM
    #7
    09TRDSport4x4

    09TRDSport4x4 [OP] OCD Approved!

    Joined:
    Oct 13, 2014
    Member:
    #140292
    Messages:
    1,093
    Gender:
    Male
    First Name:
    Nick
    Southwest Ohio
    Well, got some bad news today...

    While I was crawling around under the truck, getting a good look at all the areas in need of rust removal and paint, I was checking out my power steering rack. I recently ordered poly bushings from energy suspension and planned on installing those sometime this spring/summer. And while I was checking out the rack, I noticed both sides leaking power steering fluid... I can’t say I’m surprised given how sloppy my steering wheel has been lately, but I definitely wasn’t planning on needing to replace my steering rack. I had the inner and outer ties rods replaced about 6 months ago and now I understand why that didn’t seem to make much difference in the steering wheel vibrations.

    Anyway, looks like I’m going to have to find a new rack to install these poly bushing in. And at least once this is done, I shouldn’t ever have to touch the steering rack again. Hoping I can still make some progress on rust removal and paint this weekend, will post pictures as I go through the process.
     
    HarrisonHopper likes this.
  8. May 2, 2020 at 10:45 PM
    #8
    09TRDSport4x4

    09TRDSport4x4 [OP] OCD Approved!

    Joined:
    Oct 13, 2014
    Member:
    #140292
    Messages:
    1,093
    Gender:
    Male
    First Name:
    Nick
    Southwest Ohio
    It’s not super exciting, but I finally started working on the truck to do list today. First, I dropped the spare tire (it’s stock, has been under there for 10+ years and was basically flat), and that turned out to be much harder than I expected...

    Apparently my truck had a lock on the spare which required a special key added to the end of the hook in order to turn the cable. Thankfully the key was in the bag with the rest of the tools, I just spent way more time than I should have cussing at the thing before I dumped the bag and found the key. Once I got that out, I removed the cable assembly and got to work.

    Before:

    [​IMG]

    After:

    [​IMG]

    Overall, I’m pleased with how it turned out. We’ll see how well it holds up, but for now it looks much better than it did. I’ve been really impressed with the Rustoleum Rust Reformer paint so far. I used it on the rear diff about a year and a half ago and as you can see in the before picture, it was in much better shape than the trailer hitch. I removed and painted the hitch at the same time but used a different Rustoleum product on it. Clearly, it did not survive two Ohio winters...

    I managed to finish the entire back part of the truck today, from the rear bumper to the back of the cab. I even did the frame rails inside both rear wheel wells. And one of these days, I’ll buy a 33” spare tire and get it mounted back up under there. Next up will be the drums and rear hubs (gotta prep for the SCS F5s), the frame under the cab and the one piece rear driveshaft. After I get those done I’m going to replace my leaky steering rack, install the new Elka suspension and paint the front part of the frame. I’m still waiting on parts for the new steering rack but I’m slowly making progress...
     
    HarrisonHopper likes this.
  9. May 20, 2020 at 6:35 AM
    #9
    09TRDSport4x4

    09TRDSport4x4 [OP] OCD Approved!

    Joined:
    Oct 13, 2014
    Member:
    #140292
    Messages:
    1,093
    Gender:
    Male
    First Name:
    Nick
    Southwest Ohio
    Well, the truck is in the garage, where it will likely stay for the next month or longer. I got it pulled in there and put the rear up on jack stands this past weekend and started on the rear drums/hubs. This is what I was looking at after the wheels were removed:

    [​IMG]

    I broke out the drill, a few different wire wheels, a rust and paint remover wheel and some sandpaper. It took a little longer than I would have liked, but I got the majority of the surface rust off and the hubs cleaned up nicely. After that I sprayed them both with a phosphoric acid based rust remover and metal prep solution, let that sit for a few hours and then cleaned them up. At this point, I was pretty beat so I decided to call it a night. I left the truck in the garage looking like this:

    [​IMG]

    I started the painting process Monday after work. Since I’m unsure exactly how hot the rear drums will get during extended driving, I opted to lay a base coat of flat black high heat Rustoleum paint on them, just to be safe. I taped off the hubs and wheel studs, laid down two thick coats of that and let it sit overnight.

    I finished them up yesterday by removing the tape from the hubs and laying down three light coats of Rustoleum Rust Reformer. This was probably overkill on the drums, but I like the color/texture of that paint more than the high heat stuff and I figured the more protection from rust back there, the better. Anyway, here’s the finished product:

    [​IMG]

    Next up is some rear suspension work and then more painting. I’m going to work my way forward and clean up the frame rails and my custom one piece rear driveshaft then hit them with some Rust Reformer. Once I make it to the front, it’ll be time to swap out the front suspension and start fighting with the power steering rack replacement.

    I spent some time this past weekend removing the rubber bushings from the new rack so it’s now ready for the Energy Suspension poly bushings. I just need to clean up the metal around the bushing mounts a bit since the screwdriver and pickle fork I used to remove them left a few decent marks.

    [​IMG]
     
    HarrisonHopper likes this.
  10. May 31, 2020 at 9:39 PM
    #10
    09TRDSport4x4

    09TRDSport4x4 [OP] OCD Approved!

    Joined:
    Oct 13, 2014
    Member:
    #140292
    Messages:
    1,093
    Gender:
    Male
    First Name:
    Nick
    Southwest Ohio
    Made some progress this weekend but it wasn’t without a few speed bumps. Started by removing the 5100s from the rear. They’d been on the truck about four years and apparently, they did not want to come off. The lower shock bolts came out without issue but both of the uppers wouldn’t budge. The hex rounded off on both and the shaft just spun as I tried to loosen the nut. I tried vice grips on the shaft but ultimately had to cut them both out...

    [​IMG]

    With those out of the way, it was time to remove the overload leaf from my TSB pack and 3 leaf progressive AAL setup. When I installed the suspension, I left the overload for the extra 1/2” of lift. After driving like this for four years, I decided to replace the overload leaf with a 1/2” flat shim. The main reason being that I had noticed an indentation on both overloads from the metal rivet head on the AAL clamp (I don’t tow often or haul much weight). The ride was far more harsh than I expected and anytime I hit a big bump, the AAL would make contact with the overload. By removing the overload and replacing it with a 1/2” flat shim I shouldn’t lose any lift and I’m hoping for a smoother ride.

    Of course, just like the upper strut nuts, I couldn’t budge any of the 8 U Bolt nuts... I hit them with PB blaster and let them sit, tried an air impact gun and a breaker bar and they still wouldn’t give up. So I grabbed the angle grinder and a cut off disc and went to work.

    [​IMG]

    The angle grinder made quick work of the U bolts but I had to be careful around the ABS line and the hard brake lines. Once those were removed I used a C clamp to hold the leaf pack and AAL together while I lowered the axle. I tried to loosen the center pin nuts but both sides ended up breaking off. Not a big deal, I just used another jack to lift the spring pack high enough to get the pin out. From there I removed the overload, installed the flat shim and a new center pin. The first side I did took me a while but the second side went much quicker.

    Before:

    [​IMG]

    During:

    [​IMG]

    After:

    [​IMG]

    From there I trimmed the center pin, painted a few parts with Rust Reformer, reinstalled the bump stop and new U bolts. After I got the leaf packs sorted out I installed my new Elka 2.0 IFP rear shocks. The install was super easy and the color printed instructions they provided were very helpful. All I have left to do in the rear is torque everything down once the truck is back on the ground. Here’s where I finished the weekend.

    Passenger Side:

    [​IMG]

    Driver’s Side:

    [​IMG]
     
    Last edited: May 31, 2020
  11. Aug 16, 2022 at 11:45 AM
    #11
    09TRDSport4x4

    09TRDSport4x4 [OP] OCD Approved!

    Joined:
    Oct 13, 2014
    Member:
    #140292
    Messages:
    1,093
    Gender:
    Male
    First Name:
    Nick
    Southwest Ohio
    I know I didn’t keep this thread very up to date, but for anyone who was curious, I figured I’d post one last update. It’s been a fun ride, but I sold the truck last week. Never really got around to taking many pictures but here she was a few weeks before I sold it. I’ll miss her, but for now, onto new adventures.

    [​IMG]
     

Products Discussed in

To Top