

-
Welcome to Tacoma World!
You are currently viewing as a guest! To get full-access, you need to register for a FREE account.
As a registered member, you’ll be able to:- Participate in all Tacoma discussion topics
- Communicate privately with other Tacoma owners from around the world
- Post your own photos in our Members Gallery
- Access all special features of the site
 Does anybody miss the manual clock in the center dash?
 Need help deciding on a rear lift setup
 How to keep your Toyota Tacoma tailgate from being stolen
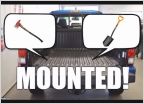 Tacoma Mod: Quick Fist bed rail mounts for tools (axe/shovels)
 OEM Roof Rack question
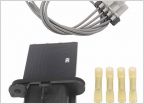 2nd Gen A/C fix
Big Three Wiring Upgrade - 2nd Gen Tacoma - Writeup with pictures!
Discussion in '2nd Gen. Tacomas (2005-2015)' started by ramonortiz55, May 3, 2020.
Page 1 of 7
Page 1 of 7
