1. Welcome to Tacoma World!

    You are currently viewing as a guest! To get full-access, you need to register for a FREE account.

    As a registered member, you’ll be able to:
    • Participate in all Tacoma discussion topics
    • Communicate privately with other Tacoma owners from around the world
    • Post your own photos in our Members Gallery
    • Access all special features of the site

Home Improvement Today?

Discussion in 'Garage / Workshop' started by Hotdog, Jul 28, 2008.

  1. May 21, 2020 at 8:26 PM
    theredofshaw

    theredofshaw Well-Known Member

    Joined:
    Aug 10, 2010
    Member:
    #41484
    Messages:
    7,031
    Gender:
    Male
    First Name:
    John
    Somewhere on the East coast
    Vehicle:
    not a taco (guess that means I can be a MOD now)
    (totaled) 2011 Tacoma DC
    was entertaining when these fresh outta boot camp kids had to be shown how to use it.
     
    Drainbung likes this.
  2. May 21, 2020 at 8:30 PM
    5nahalf

    5nahalf I build dumb things

    Joined:
    Sep 22, 2018
    Member:
    #267058
    Messages:
    10,481
    Gender:
    Male
    First Name:
    Erik
    Minnesota
    Vehicle:
    2018 Inferno Longbed

    Most kids now dont know how to use these things. Its not a bad thing, but if you need to drill a hole and dont have a good battery, you need a backup.
     
  3. May 21, 2020 at 8:58 PM
    Drainbung

    Drainbung Somedays you are the show....

    Joined:
    Sep 2, 2010
    Member:
    #42629
    Messages:
    9,123
    Gender:
    Male
    First Name:
    Bob
    Fallabama, NV
    Vehicle:
    10 DCLB
    TRD Fleshlight
    At least you have safe jack stands.
     
    wilcam47 likes this.
  4. May 21, 2020 at 9:02 PM
    5nahalf

    5nahalf I build dumb things

    Joined:
    Sep 22, 2018
    Member:
    #267058
    Messages:
    10,481
    Gender:
    Male
    First Name:
    Erik
    Minnesota
    Vehicle:
    2018 Inferno Longbed

    Lol, yeah, we just got a harbor freight near us like 2 years ago. I was using them just a little bit ago to take the rear wheel off my mini bike to fix the rear brakes dragging.
     
    wilcam47 and Drainbung[QUOTED] like this.
  5. May 21, 2020 at 10:15 PM
    OZ-T

    OZ-T You are going backwards

    Joined:
    Dec 15, 2009
    Member:
    #27584
    Messages:
    50,463
    Gender:
    Male
    First Name:
    Peter North
    British Columbia
    Vehicle:
    Mag Grey 09 Trd Sport DCLB 4x4
    OME 885x , OME shocks and Dakars , Wheelers SuperBumps front and rear , 275/70/17 Hankook ATm , OEM bed mat , Weathertech digifit floor liners , Weathertech in-channel vents , headache rack , Leer 100RCC commercial canopy , TRD bedside decals removed , Devil Horns by Andres , HomerTaco Satoshi
    I started hand nailing all my framing together , I mean who wants a framing nailer anymore , too damn noisy
     
  6. May 21, 2020 at 10:30 PM
    wilcam47

    wilcam47 Keep on keeping on!

    Joined:
    Jan 27, 2016
    Member:
    #176243
    Messages:
    50,572
    Gender:
    Male
    First Name:
    Will
    Bourbon state
    This you cutting your own 2x4's
     
    shane100700 and Drainbung like this.
  7. May 22, 2020 at 12:20 AM
    TK-422

    TK-422 Toyota! Oh what a feeling.

    Joined:
    Apr 2, 2016
    Member:
    #183071
    Messages:
    2,347
    Gender:
    Male
    First Name:
    Chris
    So Cal - SCV
    Vehicle:
    2015 4Runner TEP
    Toytech 2.5 lift BFG KO2 275-70-17
    What? Mr Makitta isn't using one of these?
    [​IMG]
     
    Drainbung likes this.
  8. May 22, 2020 at 7:33 AM
    OZ-T

    OZ-T You are going backwards

    Joined:
    Dec 15, 2009
    Member:
    #27584
    Messages:
    50,463
    Gender:
    Male
    First Name:
    Peter North
    British Columbia
    Vehicle:
    Mag Grey 09 Trd Sport DCLB 4x4
    OME 885x , OME shocks and Dakars , Wheelers SuperBumps front and rear , 275/70/17 Hankook ATm , OEM bed mat , Weathertech digifit floor liners , Weathertech in-channel vents , headache rack , Leer 100RCC commercial canopy , TRD bedside decals removed , Devil Horns by Andres , HomerTaco Satoshi
    I have a Hitachi cordless framing nailer
     
    wilcam47 likes this.
  9. May 22, 2020 at 8:48 AM
    4BYTOY

    4BYTOY Well-Known Member

    Joined:
    Feb 11, 2019
    Member:
    #282629
    Messages:
    381
    Colorado Front Range
    Vehicle:
    2018 TRD Off Road
    I used to use one of these all the time when I was doing electrical work.

    Yankee Screwdriver.jpg
     
  10. May 22, 2020 at 8:53 AM
    98tacoma27

    98tacoma27 is going full "SANDWICH" Moderator

    Joined:
    Dec 18, 2008
    Member:
    #11714
    Messages:
    67,732
    Gender:
    Male
    First Name:
    Ben
    Not Beech Creek
    Vehicle:
    05 Tundra SR5 (+295k AND COUNTING), 2006 F350 King Ranch 6.0L
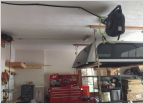
    Some stuff. Not a lot, just some.
    20191119_164111.jpg
    20191119_164431.jpg
    20191119_170832.jpg
     
    scocar, Bagman, ImpulseRed008 and 6 others like this.
  11. May 23, 2020 at 5:12 PM
    FlyingWolfe

    FlyingWolfe Wolfie

    Joined:
    Jan 24, 2018
    Member:
    #242249
    Messages:
    4,475
    Gender:
    Female
    First Name:
    Crystal
    Maine
    Vehicle:
    2018 Tundra TRD OR inferno
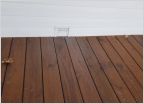
    Building a new portico. Wasnt able to finish the deck/railings because the 4x4 I reluctantly had delivered with the deckboards rather than pick myself due to my bed being full of work equipment was shaped like a damned banana..
    EDFA8369-ADD7-458C-88E2-CD2093854C04.jpg
     
  12. May 23, 2020 at 5:24 PM
    Drainbung

    Drainbung Somedays you are the show....

    Joined:
    Sep 2, 2010
    Member:
    #42629
    Messages:
    9,123
    Gender:
    Male
    First Name:
    Bob
    Fallabama, NV
    Vehicle:
    10 DCLB
    TRD Fleshlight
    And they were more then happy to shamelessly deliver it...UGH.

    EDIT: Forgot to say, looks good!
     
  13. May 23, 2020 at 5:27 PM
    FlyingWolfe

    FlyingWolfe Wolfie

    Joined:
    Jan 24, 2018
    Member:
    #242249
    Messages:
    4,475
    Gender:
    Female
    First Name:
    Crystal
    Maine
    Vehicle:
    2018 Tundra TRD OR inferno
    Ive been going that lumber yard for years and when I wrenched at the bike shop I worked on half of the employees’ bikes/wheelers.. 90% of the time they hook me up. Theyre getting their 4x back, and will then in turn most likely deliver it to someone else, unfortunately.. couldnt use it if I wanted to, the PVC sleeve wouldnt fit over that even if I buttered that bad boy up first :rofl:
     
  14. May 23, 2020 at 5:45 PM
    buyobuyo

    buyobuyo Read The Fucking Manual

    Joined:
    Jan 24, 2008
    Member:
    #4417
    Messages:
    6,291
    Gender:
    Male
    First Name:
    Jeremy
    Camden, AR
    Vehicle:
    08 PreRunner SR5, I4, Manual, Silver
    A thing or two...
    I bought a couple of lights last weekend to replace a motion light on the house and swapped a standard porch light on the shop with a motion light. I tried to install them today and ran into a couple of issues. I'm hoping you all can offer some insight, so I can get them installed properly.

    The problem with the shop light install was that there's no junction box. Behind the existing light is just a bracket screwed to the siding and a drilled hole for the wire. What would be the proper way to mount a round junction box that the new light wants to mount to.

    20200523_164801.jpg
    20200523_164806.jpg

    The existing light on the house is mounted to a single gang outlet box, but the box isn't mounted right and is loose. The new light also wants a round junction box to mount to.
     
    Drainbung likes this.
  15. May 23, 2020 at 6:07 PM
    Scott B.

    Scott B. Well-Known Member

    Joined:
    Nov 11, 2014
    Member:
    #142118
    Messages:
    4,242
    Gender:
    Male
    First Name:
    Scott
    Georgia
    Vehicle:
    2015 ACLB SR5 4x4 Expo
    ^ What you have there is not code legal - unfortunately, most outdoor lights are attached to the house in that manner.

    Can you post a picture of the light - the mounting part in particular?

    To answer your question, a fairly easy thing to do is cut a round hole in the siding, and mount a pancake box (1/2 height round junction box) to solid substrate under the siding, or run long screws into the studs.

    There might be some easier tricks, which is why I want to see the light itself.
     
    truchador and shane100700 like this.
  16. May 23, 2020 at 6:27 PM
    theredofshaw

    theredofshaw Well-Known Member

    Joined:
    Aug 10, 2010
    Member:
    #41484
    Messages:
    7,031
    Gender:
    Male
    First Name:
    John
    Somewhere on the East coast
    Vehicle:
    not a taco (guess that means I can be a MOD now)
    (totaled) 2011 Tacoma DC

    the first thing I see is a reason to bust out something to kill that damn spider :rofl:
     
    Lawfarin and cafereef like this.
  17. May 23, 2020 at 10:01 PM
    buyobuyo

    buyobuyo Read The Fucking Manual

    Joined:
    Jan 24, 2008
    Member:
    #4417
    Messages:
    6,291
    Gender:
    Male
    First Name:
    Jeremy
    Camden, AR
    Vehicle:
    08 PreRunner SR5, I4, Manual, Silver
    A thing or two...
    The mounting plate for the light going on the shop looks like the picture below with a couple of long screws to attach the light.

    20200523_234626.jpg

    The mount for the house light looks like the screenshot below. It's just clear plastic with a couple of screws to attach it to the junction box.

    20200523_235323.jpg

    No worries. That spider is long dead now. I'd already doused the hell out of it with spray. It was just dying a slow death that the time.
     
  18. May 24, 2020 at 4:22 AM
    ralfnjan

    ralfnjan Well-Known Member

    Joined:
    Aug 17, 2015
    Member:
    #161984
    Messages:
    416
    Gender:
    Male
    Finished a Radon mitigation project. The local health unit was doing a Radon survey in January and I participated. 3 months with a sensor, then return it for reading. Turns out I've got Radon at the level they say to do something within 2 years. Been here for almost 40 years, so damage might be done...but I went ahead and vented the sump pump pit.

    The basement is an integral part of the house, not something forgotten until there's a problem with the water heater, furnace or whatever. The woodstove that heats the whole house is there, so the basement air is the upstairs air.

    I sealed up the pit but haven't re installed the pump. I need to cut a manhole in the plywood and rig a clear Lexan or acrylic porthole for inspection and work, then re-install the pump. I had 12 volts running right past (going to my tracking solar panel array) so I nabbed power from it. Works out that the 12 volt fan is a bit more efficient than the 4inch 120volt muffin fans.

    Rented a Milwaulkee hammer drill and 4 inch core bit. It took longer to run the extension cord than to cut the hole. What a pig! Must have weighed 60 pounds. $70 for half day rental. Total cost of the project about $150. No way I was going to pay a professional to install a fan. sorry all you professionals, I'd hire Peter (Oz) in a heartbeat for the right work.

    pit.jpg
     
    Fargo Taco likes this.
  19. May 24, 2020 at 4:52 AM
    Venom

    Venom Well-Known Member

    Joined:
    Oct 23, 2019
    Member:
    #308773
    Messages:
    6,021
    Gender:
    Male
    First Name:
    Kevin
    Massachusetts

    I had a similar issue. I used this mounting block https://www.amazon.com/Arlington-Ve...N913R86D6GP&psc=1&refRID=VJ8WJXVX1N913R86D6GP

    I'm not sure if it will work in your situation.
     
  20. May 24, 2020 at 5:01 AM
    shane100700

    shane100700 Bed, Bath & Beyond Crawler

    Joined:
    Jun 1, 2011
    Member:
    #57578
    Messages:
    7,013
    Gender:
    Male
    Montana
    Vehicle:
    2019 DCSB, OR
    Rocket Boosters
    This... go to a hardware store and ask for a new work light box. To do it right, a 4” hole saw cut into the siding and the new work box placed in that hole. Even if the box is surface mounted, there are ways to hide that.

    This was a surface mounted new work box. Easily hidden behind a diy trim piece. 2C62A070-E1A6-462E-8CDE-B1631D6F5AAD.jpg
     

Products Discussed in

To Top