1. Welcome to Tacoma World!

    You are currently viewing as a guest! To get full-access, you need to register for a FREE account.

    As a registered member, you’ll be able to:
    • Participate in all Tacoma discussion topics
    • Communicate privately with other Tacoma owners from around the world
    • Post your own photos in our Members Gallery
    • Access all special features of the site

Derpiful's Build & Adventures

Discussion in '2nd Gen. Builds (2005-2015)' started by Derpiful, Apr 19, 2020.

  1. May 26, 2020 at 9:32 PM
    #21
    Derpiful

    Derpiful [OP] Well-Known Member

    Joined:
    Mar 23, 2014
    Member:
    #125973
    Messages:
    69
    Gender:
    Male
    First Name:
    Hayden
    Fort Collins, Colorado
    Vehicle:
    '15 Taco TRD OR
    Unfortunately I don't have much time to work on them. My printer also broke 2 months ago and I haven't been able to fix it yet..

    Thank you! I'm sure you will, I'm always out and about near Old Town.
     
  2. Jun 16, 2020 at 7:57 PM
    #22
    Derpiful

    Derpiful [OP] Well-Known Member

    Joined:
    Mar 23, 2014
    Member:
    #125973
    Messages:
    69
    Gender:
    Male
    First Name:
    Hayden
    Fort Collins, Colorado
    Vehicle:
    '15 Taco TRD OR
    Finally knocked out the biggest project so far: rear shock relocation kit. Archive Garage shock relocation kit, King 14"x2.5s, BAMF HD hangers + shackles. I waited quite a while for both the Kings and Archive kit to get built, but it was well worth it.

    I went ahead and pulled the bed for the install, which was super easy and I would definitely recommend to anyone else taking on this project. It made access to come of the cuts much easier.

    [​IMG]

    Cutting everything off took quite a while, and I went through lots of cutting and grinding wheels.

    [​IMG]

    Got the towers tacked in (after putting the bed on and lining it up) and the shackle hangers on

    [​IMG]

    All installed!

    [​IMG]

    [​IMG]
    [​IMG]
    [​IMG]
    [​IMG]

    With the help of @literallynothing I was able to get about 13.5" of shock travel used with these springs, which is perfect. The lower shock mount ended up about where the stock one was, which is fine with me. I did have to trim one of the leafs slightly.

    Looking back I wish I had went with the Archive hammer hangers. The fitment on the BAMF ones isn't perfect, and the shackle even rubs a bit on the hanger.

    I completely forgot about resi mounts so I'll have to work on something more permanent. Otherwise, super happy with how this turned out! Now time to actually flex it out and go fast. (also need to get bumps set up)
     
    RockiesTaco and literallynothing like this.
  3. Jun 16, 2020 at 9:12 PM
    #23
    literallynothing

    literallynothing I tow my new truck around with my old truck

    Joined:
    Aug 27, 2017
    Member:
    #228243
    Messages:
    2,074
    Gender:
    Male
    First Name:
    Noah
    Vehicle:
    2017 DCSB
    Steel and 37s
    Let’s race
     
    Derpiful[QUOTED][OP] likes this.
  4. Jun 17, 2020 at 8:04 AM
    #24
    Ripcord

    Ripcord KM6PIM

    Joined:
    Mar 31, 2011
    Member:
    #54120
    Messages:
    1,465
    First Name:
    Jim
    Northglenn, Colorado
    Vehicle:
    Spruce Mica 2013 TRD-OR
    Those shocks are YUGE
     
  5. Aug 1, 2020 at 8:32 PM
    #25
    Derpiful

    Derpiful [OP] Well-Known Member

    Joined:
    Mar 23, 2014
    Member:
    #125973
    Messages:
    69
    Gender:
    Male
    First Name:
    Hayden
    Fort Collins, Colorado
    Vehicle:
    '15 Taco TRD OR
    Added some more parts recently that I'm excited for: Baja Designs 30" S8, Squadron Pros, and S2 Sports wired to a SwitchPro SP-9100.

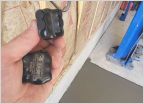
    I'm trying to do the wiring right the first time around and I'm very happy with how the SwitchPro installs. In the past I've always done fuse blocks, relays, and rockers, but this definitely makes for a cleaner install. I'm also adding BlueSea terminal blocks and a ground bus to make future installs fast and easy.

    I designed a quick mount for the SwitchPro and BlueSea stuff using existing mounting holes from some 1/4" aluminum. Everything barely clears the hood struts, but nothing hits!
    [​IMG]


    On the inside, I used @XPOTRPR's flush mount. It fits perfectly and I'm glad to be utilizing the wasted space.
    [​IMG]

    Rushing the light install I didn't take any photos, but the C4 bumper makes it super easy. Here's a quick teaser:
    [​IMG]

    Filled in the holes on the rear bumper too with some S2s. Another teaser photo:
    [​IMG]


    The lights are BRIGHT. Expensive, but you can tell the quality difference holding it vs. a cheap Amazon bar. All amber driving/combo.
     
    Last edited: Aug 1, 2020
  6. Aug 2, 2020 at 8:41 AM
    #26
    XPOTRPR

    XPOTRPR CNC Programmer/Machinist

    Joined:
    May 29, 2011
    Member:
    #57449
    Messages:
    30,616
    Gender:
    Male
    First Name:
    Josh
    Chandler, AZ
    Vehicle:
    [2009 Supercharged Adventuretruck] & [1986 22r Minitruck]
    > BUILD LINKS >
    Looking good! Nice tray for the switchpro. I need to re-do mine and make a custom tray as well and clean up some wiring.
     
  7. Nov 10, 2020 at 7:15 PM
    #27
    Derpiful

    Derpiful [OP] Well-Known Member

    Joined:
    Mar 23, 2014
    Member:
    #125973
    Messages:
    69
    Gender:
    Male
    First Name:
    Hayden
    Fort Collins, Colorado
    Vehicle:
    '15 Taco TRD OR
    Alright, I've really really been slacking on keeping this updated. Life has been busy, but be on the lookout for some more photos in the next few days.

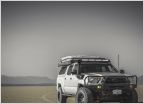
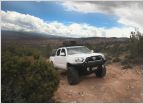
    Anyways, here's a few photos from our big trip around Colorado earlier this year. Had a blast with a solid group, wouldn't hesitate to do it again. Enjoy!

    [​IMG]
    [​IMG]
    [​IMG]
    [​IMG]
    [​IMG]
    [​IMG]
    (lights were only on for the photo please don't get mad)
     

Products Discussed in

To Top