1. Welcome to Tacoma World!

    You are currently viewing as a guest! To get full-access, you need to register for a FREE account.

    As a registered member, you’ll be able to:
    • Participate in all Tacoma discussion topics
    • Communicate privately with other Tacoma owners from around the world
    • Post your own photos in our Members Gallery
    • Access all special features of the site

Gandalf Da Grey - Slow build

Discussion in '3rd Gen. Builds (2016-2023)' started by C41n, Aug 8, 2020.

  1. Aug 8, 2020 at 1:40 AM
    #1
    C41n

    C41n [OP] KDMax Pro Authorized Tuner | Portland, OR

    Joined:
    Jul 24, 2019
    Member:
    #300113
    Messages:
    1,239
    First Name:
    Anthony
    Portland, OR
    Vehicle:
    2020 DCSB OR MT
    20200805_184538.jpg


    Gandalf Da Grey
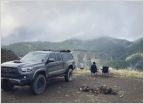
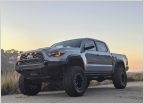
    is so named because he takes us on adventures. This is my daily driver, dogs chariot, place to sleep on the road, and off road king. I cannot decide how I want to format the OP, so it may change. TacomaWorld has been invaluable to me in everything related to this truck, and I try and give back as much as possible.

    Gandalf is a 2020 TRD Off-Road, DCSB, 6 speed

    This thread is intended to help me keep track of everything I have done and plan on doing. I intend to keep this truck forever. Mod budget is low, and it will be many years before I get Gandalf near where I envision him.


    Timeline:

    • 1/27/20 | Brought home - 45 miles, don't know why so many, had to make the dealer get it from another dealer to get the color / options I wanted. These 45 miles will always be a mystery. Gandalf keeps his secrets close.
    • 1/29/20 | Kurgo hammock, dog seatbelts, seatbelt covers
    • 2/20 | 784 miles | first dealer maintenance - general check over + first oil change
    • 6/20 | 5080 miles | 5000 mile service - Tires rotated
    • 7/20 | Tailgate letter inserts
    • 7/20 | Dashtop multi mount DMM
    • 7/20 | MESO vent ring covers + plasti dipping chrome around cup holders
    • 8/20 | Dog platform - rough version
    • 3/21 | OV Tune - Valley Runner
    • 3/21 | Anytime backup camera + front camera
    • 5/21 | Bed mat
    • 7/21 | CB Radio
    • 7/21 | Ditch lights
    • 9/21 | Prinsu cab rack
    • 9/21 | Meso stage 1 tail light bulbs
    • 4/22 | Chrome free tail lights
    • */22 | SPC UCAs
    • */22 | Speedo correction
     
    Last edited: Apr 2, 2022
    su.b.rat and Superhulk LB like this.
  2. Aug 8, 2020 at 1:40 AM
    #2
    C41n

    C41n [OP] KDMax Pro Authorized Tuner | Portland, OR

    Joined:
    Jul 24, 2019
    Member:
    #300113
    Messages:
    1,239
    First Name:
    Anthony
    Portland, OR
    Vehicle:
    2020 DCSB OR MT
    Future plans:

    No particular order, I get distracted eas.. ADHLAS.jpg


    Attached Files:

    Last edited: Jun 30, 2021
    Superhulk LB likes this.
  3. Aug 8, 2020 at 1:40 AM
    #3
    C41n

    C41n [OP] KDMax Pro Authorized Tuner | Portland, OR

    Joined:
    Jul 24, 2019
    Member:
    #300113
    Messages:
    1,239
    First Name:
    Anthony
    Portland, OR
    Vehicle:
    2020 DCSB OR MT
  4. Aug 8, 2020 at 1:41 AM
    #4
    C41n

    C41n [OP] KDMax Pro Authorized Tuner | Portland, OR

    Joined:
    Jul 24, 2019
    Member:
    #300113
    Messages:
    1,239
    First Name:
    Anthony
    Portland, OR
    Vehicle:
    2020 DCSB OR MT
    Reserved
     
    Last edited: Aug 8, 2020
  5. Aug 8, 2020 at 1:48 AM
    #5
    C41n

    C41n [OP] KDMax Pro Authorized Tuner | Portland, OR

    Joined:
    Jul 24, 2019
    Member:
    #300113
    Messages:
    1,239
    First Name:
    Anthony
    Portland, OR
    Vehicle:
    2020 DCSB OR MT
    One more
     
  6. Aug 8, 2020 at 5:11 AM
    #6
    doublethebass

    doublethebass aspiring well-known member

    Joined:
    Jan 1, 2017
    Member:
    #206252
    Messages:
    3,342
    Gender:
    Male
    First Name:
    Antoin
    Minneapolis MN
    Vehicle:
    ’17 6MT Pro
    Sweet truck. I’m a Dumbledore man myself but I’ll sub anyway.
     
    C41n[OP] likes this.
  7. Aug 8, 2020 at 9:09 AM
    #7
    tacobliss

    tacobliss Well-Known Member

    Joined:
    Aug 30, 2019
    Member:
    #303785
    Messages:
    57
    Gender:
    Male
    Washington State
    Vehicle:
    2019 White Tacoma TRD Off-Road
    Great stuff, Gandalf all the way!
     
    C41n[OP] likes this.
  8. Aug 8, 2020 at 12:06 PM
    #8
    C41n

    C41n [OP] KDMax Pro Authorized Tuner | Portland, OR

    Joined:
    Jul 24, 2019
    Member:
    #300113
    Messages:
    1,239
    First Name:
    Anthony
    Portland, OR
    Vehicle:
    2020 DCSB OR MT
  9. Aug 8, 2020 at 6:33 PM
    #9
    C41n

    C41n [OP] KDMax Pro Authorized Tuner | Portland, OR

    Joined:
    Jul 24, 2019
    Member:
    #300113
    Messages:
    1,239
    First Name:
    Anthony
    Portland, OR
    Vehicle:
    2020 DCSB OR MT
    Rear diff vent relocation.

    https://www.tacomaworld.com/threads/rear-diff-vent-relocation.471649/

    Parts:

    90404-51319
    90930-03136
    6' 5/16" heater hose

    Since the new vent is a two way I was concerned with the amount of dust and dirt behind the taillights. So I decided to add in a filter. I found this cheap filter material and wrapped it around the vent as seen in the pictures.

    The thread indicates the stock vent is a one way. It appears that it was a two way already. In any case it's much higher now.


    20200808_154155.jpg 20200808_155120.jpg
    The end behind the taillight.

    20200808_160727.jpg
    The old one before removal. Cleaned up around it so no dirt would fall in.

    20200808_161924.jpg
    The old one removed. Looks just like the two way I bought, except for the threads.

    20200808_161623.jpg 20200808_155207.jpg 20200808_161629.jpg 20200808_161729.jpg 20200808_161633.jpg

    Easy enough, cost $20 to get the breather and junction. Another $7 for six feet of hose.
     

    Attached Files:

    Last edited: Aug 9, 2020
    Superhulk LB likes this.
  10. Aug 8, 2020 at 6:45 PM
    #10
    C41n

    C41n [OP] KDMax Pro Authorized Tuner | Portland, OR

    Joined:
    Jul 24, 2019
    Member:
    #300113
    Messages:
    1,239
    First Name:
    Anthony
    Portland, OR
    Vehicle:
    2020 DCSB OR MT
    Phase one of the war on dust intrusion in the canopy.

    I have a rubber strip on the way to cover the gap between the tailgate and the bed.

    20200808_162927.jpg
    I had cleaned out the entire bed before I went off road last. This is some of the dirt and dust that got in after just one day out. That's not gonna work for me.

    20200808_175130.jpg
    20200808_175135.jpg

    Sealed up the bed light holes and these cracks with caulk. Doesn't look that great, but oh well.

    20200808_172440.jpg 20200808_172443.jpg 20200808_172948.jpg 20200808_172942.jpg

    Really wasn't sure how to seal the bed cubby and inverter. There are three slots that need to have things go in them for the door to work. I took some left over hose from the ac vent drain relocation and cut it in half. caulked it over the holes, providing a channel for the door slots to be in. I am not sure if this is gonna work or not, but it was the best I could think of right now. See how it works. If these stay on I am happy with this.

    I did not think it though though, and putting this on both the top and bottom meant the cubby pushed on them when reinstalled. Luckily it caulk wasn't dry and I just moved them back into place after carefully putting it back in.

    I still have a big opening at the sides of the canopy door. Not sure what to do about them just yet.

    20200808_180034.jpg
     

    Attached Files:

  11. Aug 20, 2020 at 10:18 PM
    #11
    C41n

    C41n [OP] KDMax Pro Authorized Tuner | Portland, OR

    Joined:
    Jul 24, 2019
    Member:
    #300113
    Messages:
    1,239
    First Name:
    Anthony
    Portland, OR
    Vehicle:
    2020 DCSB OR MT
    After adding the canopy and putting my sleeping platform in full time the rear of the truck felt like shit when driving. Combined they weigh in at over 400#s back there full time. Not ready to do a full lift so I decided upon a cheap AAL. I went with the WULF from amazon. Planning on replacing the whole leaf pack with the lift so spending a lot here didn't make since.

    Today I installed it. With the canopy, other weight in the back, and an almost full tank of gas, the rear was sitting at:

    Driver: 35 3/16"
    Passenger: 35 1/2"

    Ground to the center of the fender. After a short test drive:

    Driver: 37 1/4"
    Passenger: 36 7/8"

    It was a bit higher before the test drive. I expect it to settle down a bit and will remeasure soon. I don't have measurements from before the canopy, but a buddy with a twin truck and similar miles told me his was at 36.5" with 3/4 of a tank.

    So that puts me right back near stock height. That is exactly what I was going for. This AAL is supposed to be a 2" lift, but I assume that is with no weight in the back. Most importantly is how it rides now. Only drove a couple of miles so far after the AAL but it feels very much like it did stock.

    Very pleased with this result. Even more so with the price. $60 out the door.

    I did the install myself. I can get most things done if I get motivated enough. It pretty much always takes me far longer than it should to do anything. Took me about 3.5 hours to get this done, and for once I didn't even hurt myself. :D

    I had almost all the tools I needed already. Needed a new torque wrench as the last time I used my harbor freight one it snapped a bolt at 40#s, and I threw it out in frustration. I picked up this Tekton 3/8" drive. The quality of this tool for the price is very high. Feels better than the harbor freight version I threw out by far, and was half the price. Will be picking up a 1/2" drive Tekton at some point. Always very pleased with Tekton tools.

    I do not have a ball joint press and they were all loaned out at the auto parts stores I called. I used some cheap C clamps to hold the leafs together during removal. That worked out fine, but felt pretty sketchy and I didn't like it much. Talking $3-$4 harbor freight quality ones. I doubled up on each end to be "safer". :rolleyes:

    Really missed that ball joint press when trying to compress the leafs back together. One video I watched before the install said explicitly not to compress the leafs with the center bolt. I end up doing this some, using a jack some and the u bolts. Fucked around with this for a good while.

    Finished the passenger side first, put it all back together and torqued everything down. Moved on to the driver side and it was going much faster. Then I realized I couldn't get the bottom of the center bolt to line up with the hole on the bottom. Fought with this for a good while before it finally dawned on me that I needed to loosen the passenger side back up to get it to line up. Once I did this everything went back where it should no problem.

    Long story short, if I can manage to get this done, you can probably do it also.

    If you want a cheap solution to having 400#s ish at all times in / on your bed this works great. There are certainly better AALs I am sure. For me this worked out great. I would have done something different had I not planned on replacing the whole leaf pack anyway.


    20200820_182259.jpg
     
    Last edited: Aug 20, 2020
    doublethebass and Superhulk LB like this.
  12. Feb 22, 2021 at 8:12 PM
    #12
    Superhulk LB

    Superhulk LB Well-Known Member

    Joined:
    Mar 22, 2019
    Member:
    #287595
    Messages:
    2,237
    Gender:
    Male
    First Name:
    Josh
    Oregon
    Vehicle:
    2019 superwhite DCLB off road
    Tonneau cover, Black exhaust tip, blacked out badges and tailgate lettering. Black rhino(glamis)18x9 wheels with +12 offset. LT265/70/18 Toyo Opencountry ATIII. Metaltech 4x4 rock sliders Cali Raised lower grill light bar/mounts TRD Pro Skid, DD Fogs(pro), Ironman 4x4 FC pro lift.
    Nice write up!
     
    C41n[OP] likes this.
  13. May 20, 2021 at 6:04 PM
    #13
    C41n

    C41n [OP] KDMax Pro Authorized Tuner | Portland, OR

    Joined:
    Jul 24, 2019
    Member:
    #300113
    Messages:
    1,239
    First Name:
    Anthony
    Portland, OR
    Vehicle:
    2020 DCSB OR MT
    Finally got some rock sliders! :D

    Found a great deal on some used mobtown bolt on rock sliders up in Seattle. Took a day and went up there to buy them.

    While I was there I captured the flag in the name of Portland, and brought it back down here.

    20210510_183212.jpg

    They were in pretty rough shape paint wise so I decided to strip them bare.

    20210513_153258.jpg

    Knowing what I now know, I would not do this again. I wanted to bring them down to bare metal and get a really good finish on them. This proved to be much harder than I anticipated.

    I tried a bunch of methods. Wire wheels on a grinder and drill, DA sander with 80 grit, hand sanding, and a few different abrasive wheel options. The most effective was the polycarbide abrasive wheels.


    20210512_191508.jpg

    These did a great job removing paint and rust anywhere they could reach. They make a huge mess, between the paint flakes and the dust from the wheels. All the cracks, corners, and odd angles made for a lot of space they couldn't reach at all. I ended up spending a lot more than I expected on consumables to try and get these stripped bare.

    I even tried to use a paint stripper, but again the corners and odd angles made if very difficult to work with. I don't think the paint stripper helped that much but it did add to the already large mess. For the corners and really hard to reach places I mostly used wire wheels on an angle grinder. So many tiny metal bits everywhere.

    In the end, I spent 4 days working on stripping the paint and never got them fully stripped.

    20210516_190504.jpg
    4 days was enough for me. I was so over it by then. It would have to do.

    On to paint. I ended up using Rustoleum self eching primer, and matte pro enamel mostly. I did a couple coats of undercoating on the top side to add some grip for use as a step. The undercoating was a complete waste. Almost no texture. It did make poor stripping look a bit better.

    20210518_101902.jpg

    20210517_154631.jpg


    It seems I didn't take a finished shot of them painted.

    While I was under the truck for the install I decided to touch up all the places I had scratched up on the trails that were rusting. Hit them with a quick spray.

    20210519_112933.jpg
    20210519_113650.jpg

    In the end they came out great. The paint is just ok though. I feel like I could have gotten about as good of finish on the paint job by just scuffing up what was there, spraying it and calling it a day. Oh well. Live and learn.

    20210519_163258.jpg
    20210519_163243.jpg

    They stick out pretty far. Zero degrees with a top plate. They are built like a tank. Overbuilt even. Website says they weigh in at 152#s. At one point they completely wrap around the frame with hardware. Zero drilling, but very well secured.

    Exactly what I wanted from sliders. If you want something that is tucked in close, these mobtown sliders are not for you.
     

    Attached Files:

    Last edited: May 21, 2021
    doublethebass and Superhulk LB like this.
  14. Jun 5, 2021 at 5:05 PM
    #14
    C41n

    C41n [OP] KDMax Pro Authorized Tuner | Portland, OR

    Joined:
    Jul 24, 2019
    Member:
    #300113
    Messages:
    1,239
    First Name:
    Anthony
    Portland, OR
    Vehicle:
    2020 DCSB OR MT
    Blue Sea fuse box install

    Used 6 gauge AWG wire to connect to the battery.

    20210605_110225.jpg 20210605_114718.jpg

    Drilled into the fuse box cover and bolted it on top of that. Left enough room in the battery cables to remove it as needed. Used M4 socket screws and nuts to attach it. I bought 25mm long ones, but those were too long. Need to swap those out for shorter ones.

    Ditch lights, cb install coming soon.
     
  15. Jun 23, 2021 at 7:19 AM
    #15
    C41n

    C41n [OP] KDMax Pro Authorized Tuner | Portland, OR

    Joined:
    Jul 24, 2019
    Member:
    #300113
    Messages:
    1,239
    First Name:
    Anthony
    Portland, OR
    Vehicle:
    2020 DCSB OR MT
    Gandalf Da Grey slow build progresses! :D

    Scored some used front 5100s, and a heavy OME dakar leaf pack from the local craigslist thread a few weeks back. Shout out to @ericmtnbkr for the great deal.

    My buddy @TacoTim85 offered to help install the front shocks and show me how to adjust them without using coil spring compressors. Thank you @TacoTim85! :D

    These 5100s only had 4 settings. Not sure why they don't have five. They came set at the 3rd setting.

    To set your height on the 5100s you adjust a clip on the shock. Since the ones I bought came with springs preinstalled this meant I had to remove the tension on those before being able to do that. I have coil spring compressors, but they don't fit in the springs so they were useless here. Not a problem, it's not too hard to do it on the truck.

    Put the truck on jack stands.

    Mark your lower control arms with a paint marker. This is to get your alignment back as close as possible when you are done. You also want to mark the top of your perch to ensure you get it back in the correct orientation.

    Put a jack under the control arm and put some tension on it. Be sure your jack stands are stable.

    Loosen the lower control arm bolts. Just enough it can swing down, but not too loose or you will have a hard time getting it back where you started.

    Remove the lower bolt on the shock.

    Loosen the top nut. This is the hardest part so far. You have to hold the center pin from moving while loosening the bolt. This can be a huge pain in the ass if there is rust.

    Lower the jack slowly. This is the most dangerous part. Be careful and keep your body parts safe while doing this.

    Shock should come out and allow you to remove to coil.


    Since my used shocked had coils on them, we had to put them in and repeat the steps to remove the coils. Used my stock coils with the first shock, and set it to the top perch. Going great so far. Get to the other side and then had a problem. The nut was so rusted it would not come off. We fought valiantly but in the end broke off the nub that you need to hold still to remove the top nut. This meant without coil spring compressors this guy was staying on the 3rd perch.

    Ok, so be it. Buy used parts and you get what you get. Back to the other side to put that one back to the 3rd perch where it started.

    20210608_124935.jpg 20210608_124925.jpg
    20210608_144145.jpg
    That was pretty much that for the front shocks. As you can see in the image above the diameter of the 5100s is significantly larger than the stock 4600s. For being the most budget option, and used to boot, I am really impressed with how these ride. As with so many things, it really should have come from the factory this way.

    Next post, leaf springs..

    20210608_124939.jpg
    20210608_124925.jpg
    20210608_144145.jpg
     
  16. Jun 23, 2021 at 7:44 AM
    #16
    C41n

    C41n [OP] KDMax Pro Authorized Tuner | Portland, OR

    Joined:
    Jul 24, 2019
    Member:
    #300113
    Messages:
    1,239
    First Name:
    Anthony
    Portland, OR
    Vehicle:
    2020 DCSB OR MT
    Now the used OME dakar heavy duty leaf pack. These are notoriously squeaky. It came with a set of new bushings and extended ubolts. They were pretty rusty and the wear pads were all shot. I wanted to see if I could keep these from being annoying as fuck, so I ordered some new wear pads. I considered leaf spring liners, but the price was more than I wanted to pay.

    Decided to order a tub of Energy Suspension Polyurethane Bushing Grease.

    Plan was to lube the entire length of each leaf with grease and see how well that worked to keep them from squeaking. This might be a good time to remind the reader I have absolutely no clue what the fuck I am doing when working on cars and you may not want to do as I do.

    Found a use for my coil spring compressors here.

    20210609_132729.jpg

    I was just gonna lube these up, throw them back together and call it good. I tried to apply of grease to the first spring and the dirt and grease made it fall right back off. So I ended up taking each leaf pack fully apart and taking a wire wheel on a grinder to each and every leaf. Just enough to knock the dirt and rust off.20210609_133311.jpg
    20210609_133427.jpg
    Drilling out the old bushings
    20210609_141825.jpg
    20210609_142149.jpg
    20210609_160454.jpg


    After clean up with the wire wheel
    20210609_150112.jpg


    I should have bought the rubber liners that go along the sides, but I didn't think of that until I was already into them. My next problem was I bought the wrong size wear pads and they didn't fit in the holes. Wasn't going to let that stop me, so I got out the dremel and made them fit. Thought I had a picture of that, but I do not. Basically just cut off some of the side that clips in until I could make them fit the hole.

    Lubed up the bushings
    20210609_142407.jpg

    Then lubed up the leafs. I have no idea if this was a good idea, but I did it.

    20210609_154845.jpg 20210609_154841.jpg 20210609_154836.jpg

    This is where things got really messy. This grease is supposed to stand up to a pressure washer and does not come off easily. Kinda the whole point. Must have burned though 50 pairs of gloves on this project trying to keep it off my tools, driveway, and me. It super sucked to install these all greasy like this. Not sure I would do this again.

    20210610_125750.jpg

    Installed. So far so good.

    This heavy leaf pack is designed to support 600+ pounds. I wanted to see how it rode while I waited on my rear 5100s to show up. It did not ride well at all. The back end felt like shit, they were just way too stiff. (As expected)

    20210609_131343.jpg
    20210609_133309.jpg
     
  17. Jun 23, 2021 at 7:52 AM
    #17
    C41n

    C41n [OP] KDMax Pro Authorized Tuner | Portland, OR

    Joined:
    Jul 24, 2019
    Member:
    #300113
    Messages:
    1,239
    First Name:
    Anthony
    Portland, OR
    Vehicle:
    2020 DCSB OR MT
    The nice thing about the dakar heavy pack, is you can just remove a leaf to make it a medium pack. So that is what I ended up doing when my extended length 5100s showed up. Installed the rear 5100s, and removed the 3rd leaf down on the dakars.

    20210621_163619.jpg 20210622_142136.jpg 20210622_142124.jpg

    The ride quality with the pack reduced to medium, and the full set of 5100s all around exceeds my expectations from a budget lift. It is night and day better than stock. Stock even going over minor speed bumps felt like shit. Your truck shouldn't feel like you're gonna break something if you hit a speed bump at 10-15 mph.

    Nose dive is almost completely gone. Cornering is much more planted. Speed bumps feel like they should in a truck. Everything about how this truck drives is greatly improved by the new suspension.

    As of now, the dakar leaf pack is not squeaking. Time will tell how that holds up.

    All in all I am really happy with how this turned out. Especially for a budget lift with some used parts. (rear shocks were new)

    20210622_142149.jpg
     
    Superhulk LB likes this.
  18. Jun 25, 2021 at 12:27 PM
    #18
    Roof Walker

    Roof Walker Well-Known Member

    Joined:
    Jan 11, 2021
    Member:
    #352454
    Messages:
    477
    Gender:
    Male
    SE Michigan
    Vehicle:
    2021 Tacoma TRD Pro MT
    Maxxis Militia
    Nice build! Keep it up :thumbsup:
     
    C41n[OP] likes this.
  19. Jun 25, 2021 at 12:31 PM
    #19
    C41n

    C41n [OP] KDMax Pro Authorized Tuner | Portland, OR

    Joined:
    Jul 24, 2019
    Member:
    #300113
    Messages:
    1,239
    First Name:
    Anthony
    Portland, OR
    Vehicle:
    2020 DCSB OR MT
    Thanks brother! I am figuring it all out as I go, and sharing in the hope my thread helps someone.
     
  20. Jun 25, 2021 at 12:35 PM
    #20
    C41n

    C41n [OP] KDMax Pro Authorized Tuner | Portland, OR

    Joined:
    Jul 24, 2019
    Member:
    #300113
    Messages:
    1,239
    First Name:
    Anthony
    Portland, OR
    Vehicle:
    2020 DCSB OR MT
    Alignment numbers. A buddy shared his with me today. He has SPC upper control arms and I have stock. You can see his numbers are way better.

    With the stock arms it drives OK. Not great, not bad just OK. I'm sensitive to alignments and I can tell it could be way better.

    SPCs are high on my list.


    20210622_202243.jpg received_841029173182091.jpg
     
To Top