1. Welcome to Tacoma World!

    You are currently viewing as a guest! To get full-access, you need to register for a FREE account.

    As a registered member, you’ll be able to:
    • Participate in all Tacoma discussion topics
    • Communicate privately with other Tacoma owners from around the world
    • Post your own photos in our Members Gallery
    • Access all special features of the site

Old Brahma Shell Restoration... (slow going & pic heavy)

Discussion in 'Tonneau Covers, Caps and Shells' started by Navelfunk, Aug 30, 2016.

  1. Sep 27, 2020 at 7:46 PM
    #21
    bfrazier

    bfrazier Member

    Joined:
    Sep 27, 2020
    Member:
    #342117
    Messages:
    16
    Gender:
    Male
    First Name:
    Bob
    Vehicle:
    1989 Toyota SR5 4X4 Pickup
    Those screws drive in between two grooves of the outside aluminum frame. That groove can become widened by wear and tear. Get some vice-grips set up right and correct that gap, then they will screw in like new. I used new screws too, but painted mine black as I have black anodized trim on my side windows.
     
    Last edited: Oct 10, 2020
  2. Oct 3, 2020 at 7:49 AM
    #22
    bfrazier

    bfrazier Member

    Joined:
    Sep 27, 2020
    Member:
    #342117
    Messages:
    16
    Gender:
    Male
    First Name:
    Bob
    Vehicle:
    1989 Toyota SR5 4X4 Pickup
    Progress! Three coats of "Smoke Grey" oil based gloss Rustoleum seemed like enough.
    [​IMG]
    I used the peel and stick tar like sealer they use on house windows. I would not use this again, but it was inexpensive and I believe it will be effective. It was messy, but cleans up with paint thinner. Next time I would just use clear silicone caulk.
    [​IMG]
    Two base coats of gloss black on the emblem, then I'll roll a coat of grey over the high spots.
    [​IMG]
     
    Last edited: Oct 10, 2020
  3. Oct 10, 2020 at 3:23 PM
    #23
    bfrazier

    bfrazier Member

    Joined:
    Sep 27, 2020
    Member:
    #342117
    Messages:
    16
    Gender:
    Male
    First Name:
    Bob
    Vehicle:
    1989 Toyota SR5 4X4 Pickup
    Last edited: Oct 13, 2020
  4. Oct 10, 2020 at 3:43 PM
    #24
    bfrazier

    bfrazier Member

    Joined:
    Sep 27, 2020
    Member:
    #342117
    Messages:
    16
    Gender:
    Male
    First Name:
    Bob
    Vehicle:
    1989 Toyota SR5 4X4 Pickup
    The Brahma Logo: Tape around him on the canopy, paint him (black in my case), then roll a contrasting paint on with a 4" foam roller. Touch up with an artist's brush afterwards, if you want to. I know - it's way not perfect, but way good enough for me.

    [​IMG]
     
    Last edited: Oct 10, 2020
  5. Oct 10, 2020 at 5:37 PM
    #25
    bfrazier

    bfrazier Member

    Joined:
    Sep 27, 2020
    Member:
    #342117
    Messages:
    16
    Gender:
    Male
    First Name:
    Bob
    Vehicle:
    1989 Toyota SR5 4X4 Pickup
    Some finish details that might be helpful to someone:
    This is the extruded aluminum trim piece at the bottom, I just painted over it because I really wanted to cover the joint between it and the body, and then I sanded it with my random orbital sander to expose fresh aluminum trim.
    [​IMG]
    Here is that trim:
    [​IMG]

    This was a crappy product, much thinner than the original and did not end up looking very good.
     
    Last edited: Oct 10, 2020
  6. Oct 10, 2020 at 5:43 PM
    #26
    bfrazier

    bfrazier Member

    Joined:
    Sep 27, 2020
    Member:
    #342117
    Messages:
    16
    Gender:
    Male
    First Name:
    Bob
    Vehicle:
    1989 Toyota SR5 4X4 Pickup
    Here is the trim being stuffed into the channel.

    Note that there is the wire for the rear interior light hidden under this passenger side channel.

    [​IMG]

    The trim gets a stainless steel screw coated with silicone caulk at the start and end of each side. This replaces a large rivet, and structurally holds the entire corner together.
    [​IMG]
    That radius corner trim got re-worked and it fits better than shown here, but even still, not great because it's a cheap lightweight product.
     
    Last edited: Oct 10, 2020
  7. Oct 10, 2020 at 6:01 PM
    #27
    bfrazier

    bfrazier Member

    Joined:
    Sep 27, 2020
    Member:
    #342117
    Messages:
    16
    Gender:
    Male
    First Name:
    Bob
    Vehicle:
    1989 Toyota SR5 4X4 Pickup
    Some final touches easily overlooked: Why is the front cap painted flat black?
    Because you don't want it reflecting in your rear-view mirror.
    But, on mine at least, they used the cheap unfinished aluminum trim on the cap window which will reflect distracting light - so here it is ready to also be painted flat black. (Rustoleum Spray Enamel)
    [​IMG]
     
    Last edited: Oct 10, 2020
    Navelfunk[OP] and chrslefty like this.
  8. Oct 12, 2020 at 6:03 PM
    #28
    TRlPPlN

    TRlPPlN Pavement Cruiser

    Joined:
    Jan 14, 2009
    Member:
    #12595
    Messages:
    1,308
    Gender:
    Male
    Bay Area, CA South SF to be precise
    Vehicle:
    MGM DCSB 09 DC TRD Sport 4x4 - Family Hauler
    Getting close to the finish line!!! Labor of love hahahahah
     
    bfrazier likes this.
  9. Oct 19, 2020 at 6:09 PM
    #29
    bfrazier

    bfrazier Member

    Joined:
    Sep 27, 2020
    Member:
    #342117
    Messages:
    16
    Gender:
    Male
    First Name:
    Bob
    Vehicle:
    1989 Toyota SR5 4X4 Pickup
    Ok, here it is finished. Is it perfect - no, not even close!
    No one should start a thread and then deny you the courtesy of allowing you to know how their pet project turned out, so here's how mine turned out. It's "OK".

    [​IMG]
    If I had only added some black to the "Smoke Grey" color I could have easily come closer to color matching, but I overlooked that.

    [​IMG]
    New screens were easy to do. I added in the carpet kit in for a more finished look.

    [​IMG]
    I absolutely would have, should have, spent the extra money for a carpeted headliner - I found out the fabric is very inexpensive and you can use spray on or roll on adhesive. It is easiest to work it in with all the windows out. I still may, because it only takes an hour or so to take all the windows out. We'll see.

    [​IMG]
    I have two lights mounted and wired but not connected yet. One aft and one forward.

    I did not add the center support back in. I'd rather have the headroom and I just never could see it actually helping supporting the roof anyway.
    This canopy has the double slider as does this SR5 model pickup, so that was a happy "win".
    [​IMG]
    If you don't know much about these "carpet kits" they install in about 5 minutes, and without any hardware or tools. There's a back wall, the two sidewalls with three access latches each, and the two middle pieces that create a sleeping platform. Oh, and the tailgate piece. In the above photo you can also see a sliding door on the left (it just lifts up) for longer stuff, and cup holders on the right.

    [​IMG]
    Just a shot of in the middle latch, which of course is largely taken up by the wheel well.

    In hindsight, I'd say I made some pretty junior mistakes, but it will still suit my needs along with my 31 year old ranch truck.
    Thanks for riding along.
     
  10. Oct 19, 2020 at 6:35 PM
    #30
    TroutBum

    TroutBum Well-Known Member

    Joined:
    Aug 29, 2008
    Member:
    #8871
    Messages:
    559
    Gender:
    Male
    First Name:
    Mike
    Michigan
    Vehicle:
    06 SR5 AC 4x4 Sold, 17 Sport 6MT DCSB, 2020 OR DCSB
    Leer 100R
    I think it looks great!

    Mike
     
    TRlPPlN and bfrazier like this.
  11. Dec 28, 2020 at 1:13 PM
    #31
    Navelfunk

    Navelfunk [OP] Well-Known Member

    Joined:
    Aug 19, 2011
    Member:
    #61974
    Messages:
    1,580
    Gender:
    Male
    First Name:
    Phyllis
    WA
    Vehicle:
    '03 DC SR5 V6 4x4
    Cap, incorrect rims & tires, stereo...
    :anonymous:

    Great job!:thumbsup: Mine's still upside down on the garage floor...:bananadead: Kinda lost interest after I sold my RC & got a DC, but it does bug me everyday to see it unfinished. After seeing your (my) thread here, & given the amount of free time I have, inspiration renewed! We'll see how far I get, though... I think I've finished 2 projects in the 10 years I've been on TW.:muscleflexing:
     
  12. Dec 28, 2020 at 2:48 PM
    #32
    bfrazier

    bfrazier Member

    Joined:
    Sep 27, 2020
    Member:
    #342117
    Messages:
    16
    Gender:
    Male
    First Name:
    Bob
    Vehicle:
    1989 Toyota SR5 4X4 Pickup
    Here's all the motivation you m
    Thanks! Here is some added motivation on today's Craigslist: Someone trying to sell an old Brahma shell for 500, yes, FIVE HUNDRED dollars!!!!
    https://eugene.craigslist.org/for/d/eugene-small-truck-camper-shell/7253135516.html
     
    Navelfunk[QUOTED][OP] likes this.
  13. Apr 28, 2021 at 5:43 PM
    #33
    oldtimertoyota

    oldtimertoyota Well-Known Member

    Joined:
    Aug 5, 2009
    Member:
    #20697
    Messages:
    1,202
    Gender:
    Male
    New Mexico
    Vehicle:
    2009 4X4 Double Cab-1986 2wd Pickup Orig own
    I still have my Brahma camper shell I bought new in 1987, in fact I still have my 86 toyota pickup I put it on. I appreciate you guys making and updating this thread, I need to do some of the repairs you guys have done!
     
    Navelfunk[OP] likes this.
  14. Jun 8, 2021 at 3:25 PM
    #34
    Navelfunk

    Navelfunk [OP] Well-Known Member

    Joined:
    Aug 19, 2011
    Member:
    #61974
    Messages:
    1,580
    Gender:
    Male
    First Name:
    Phyllis
    WA
    Vehicle:
    '03 DC SR5 V6 4x4
    Cap, incorrect rims & tires, stereo...
    $500?! They're not that retro-popular...
    Status update: I'm trying to figure out what adhesive to use on the cross member, otherwise...:anonymous::bananadead:
     
  15. Jun 9, 2021 at 10:42 AM
    #35
    oldtimertoyota

    oldtimertoyota Well-Known Member

    Joined:
    Aug 5, 2009
    Member:
    #20697
    Messages:
    1,202
    Gender:
    Male
    New Mexico
    Vehicle:
    2009 4X4 Double Cab-1986 2wd Pickup Orig own
    I paid about $800 in 1987 for my Brahma, I’d say it’s worth about $150. To $200 at least that’s what I’ve been offered
     
  16. Jan 15, 2022 at 2:34 PM
    #36
    apotter

    apotter Well-Known Member

    Joined:
    Jun 19, 2009
    Member:
    #18655
    Messages:
    313
    Gender:
    Male
    Southern Maine
    Vehicle:
    2013 Tacoma
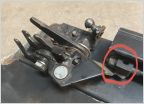
    Long shot- though do you know if all the Brahma rear window's used this T-handle with the mounting screw offset of 1 1/2"?
     

Products Discussed in

To Top